|
Building
DML's T19 105mm Howitzer Motor Carriage |
 |
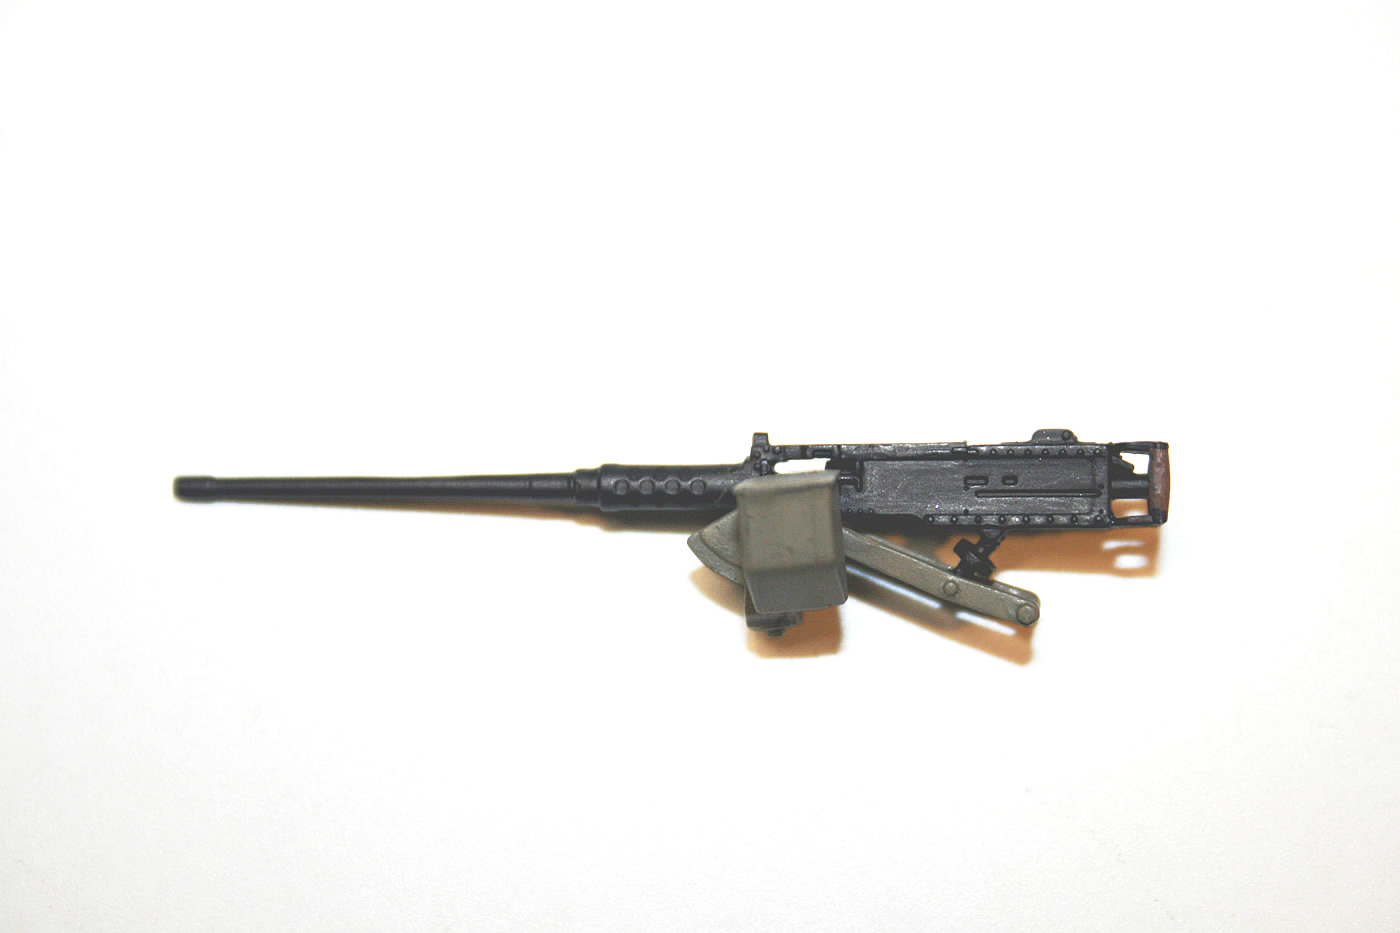
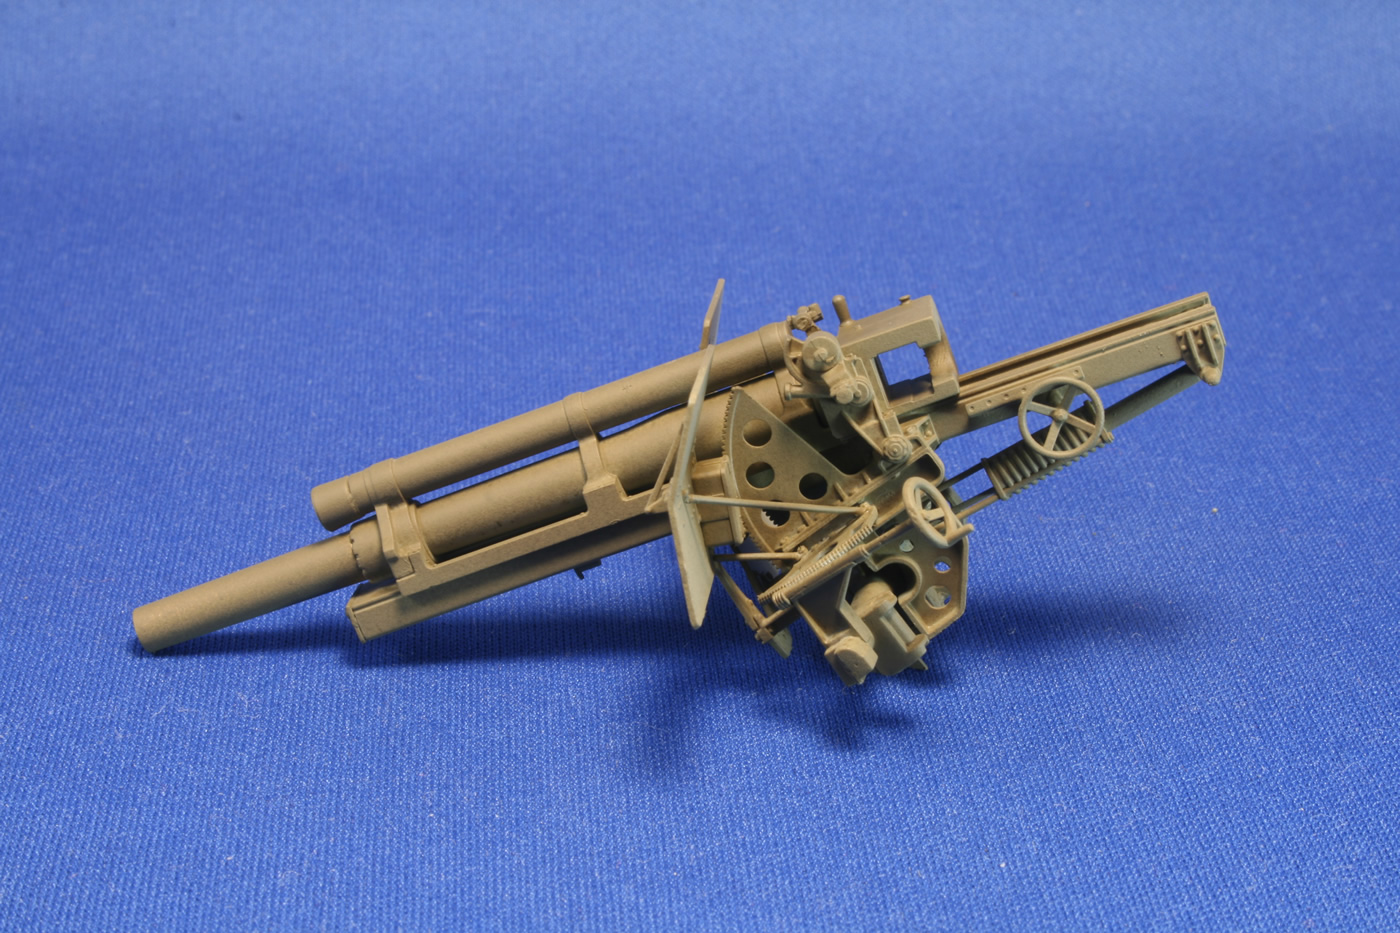
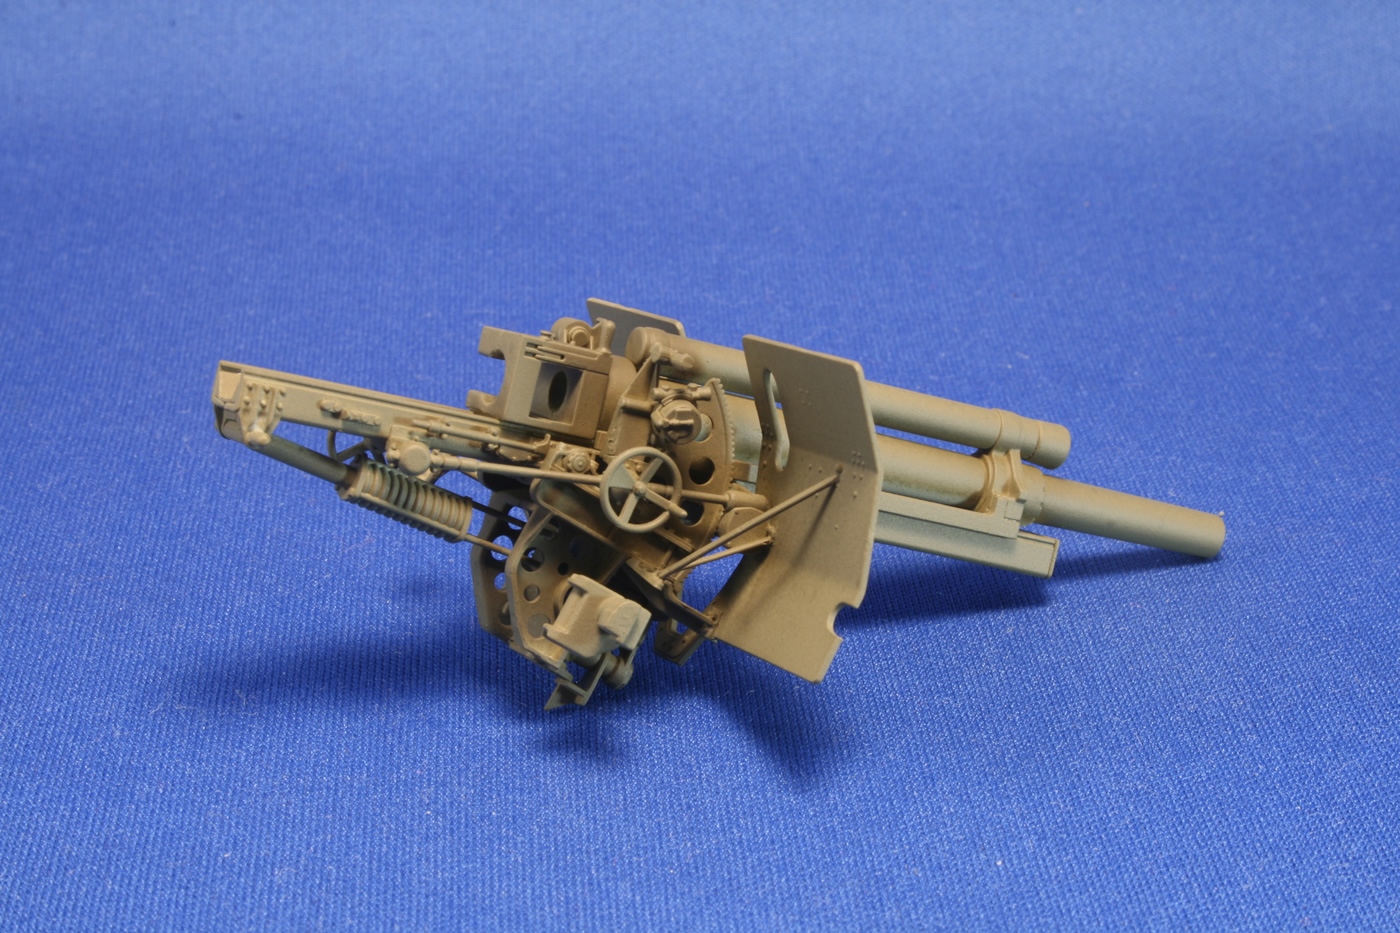
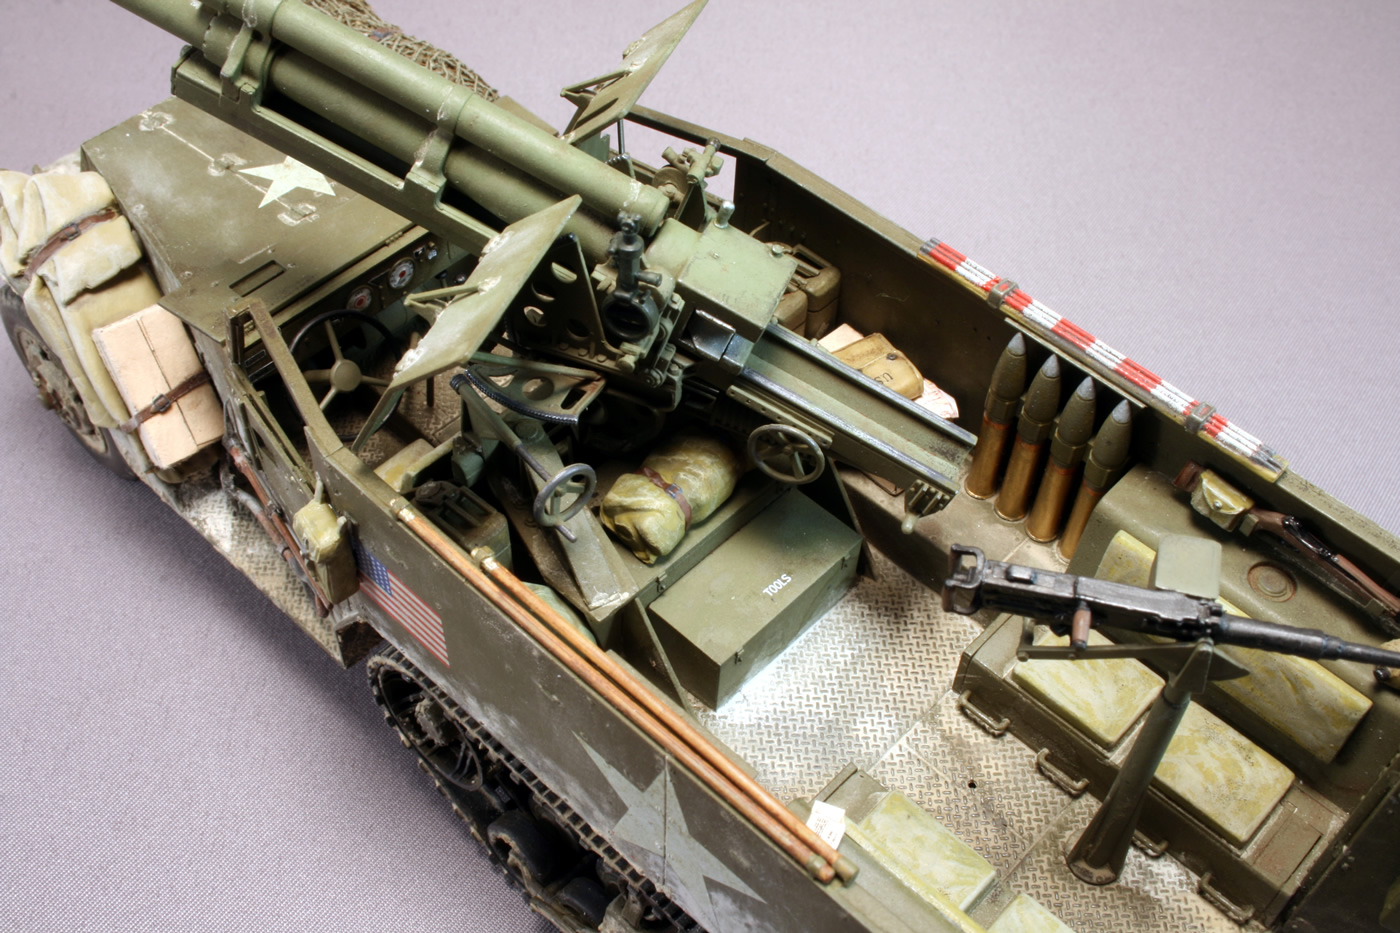
Painting and WeatheringBefore painting, the .50 cal machine gun needed some attention. DML, in one more attempt to confuse the issue, shows the .30 Browning in both the D36960 cradle and the cradle assembly for the Tripod Mount M1917A1—though unnecessarily adding on the M49 ring mount.
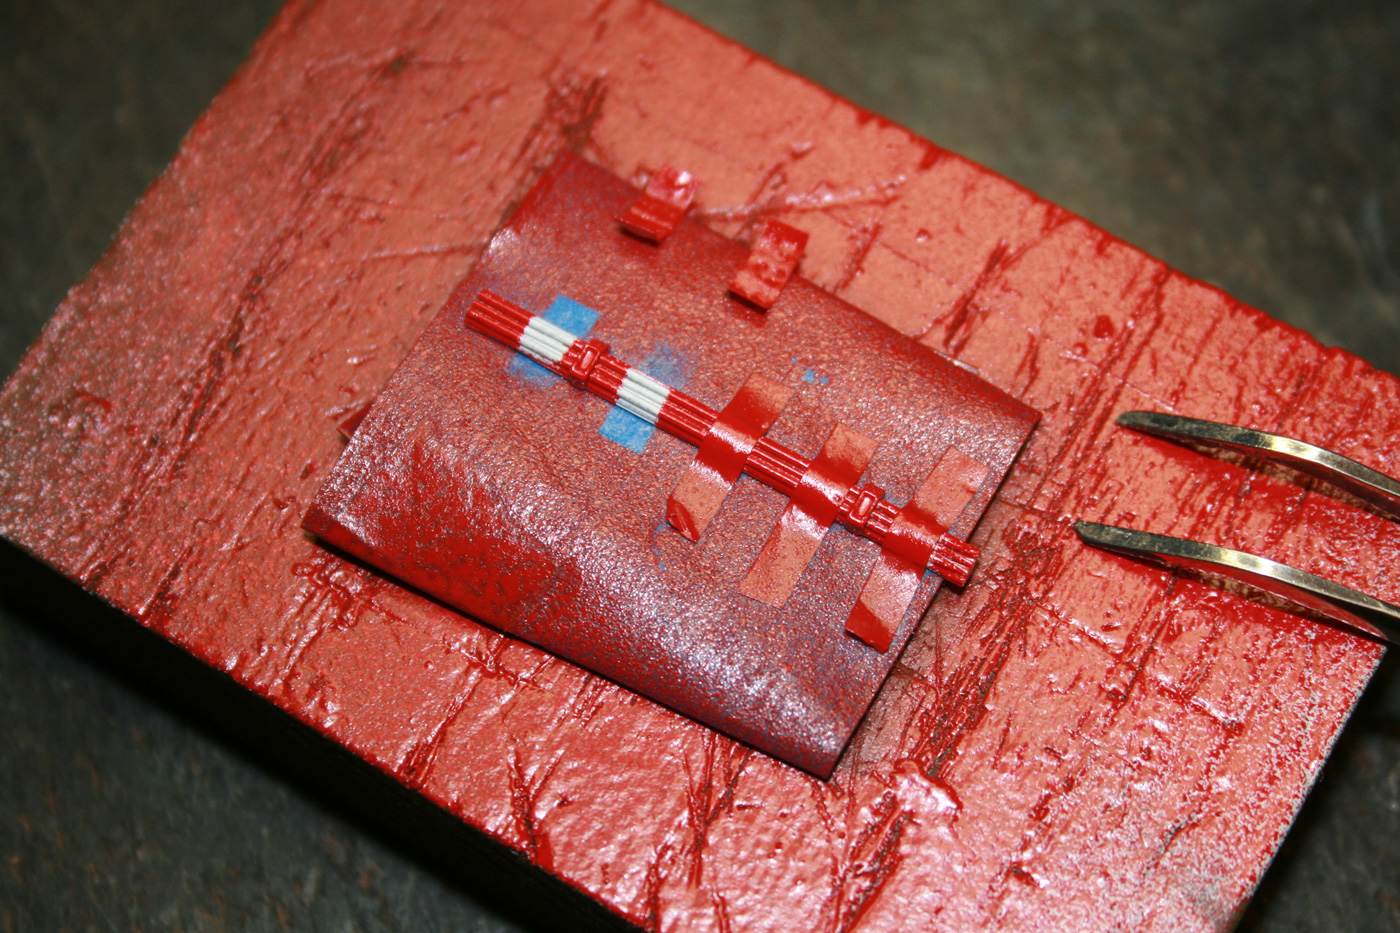
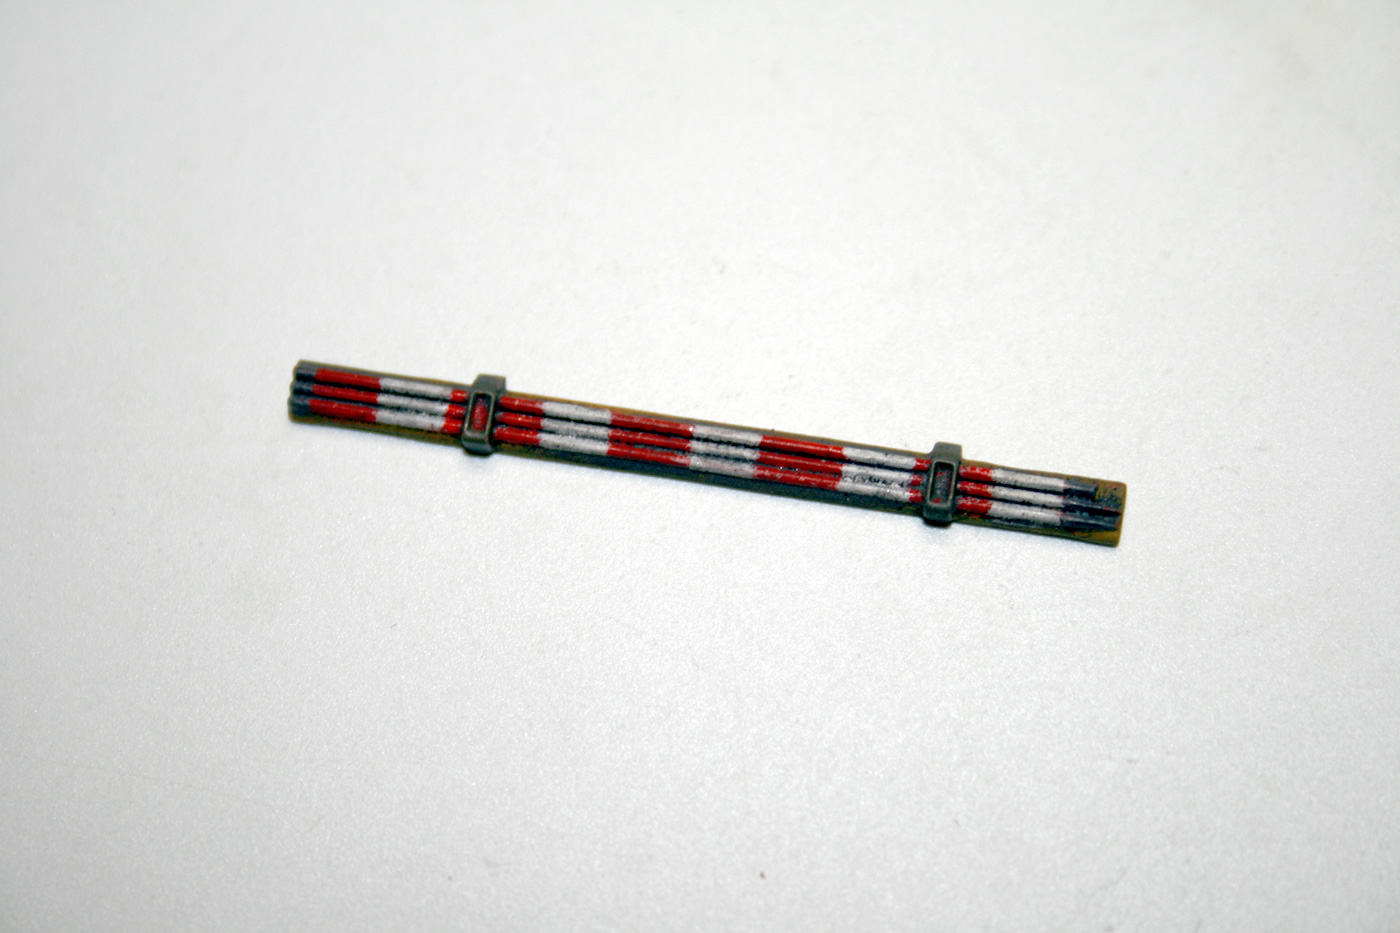
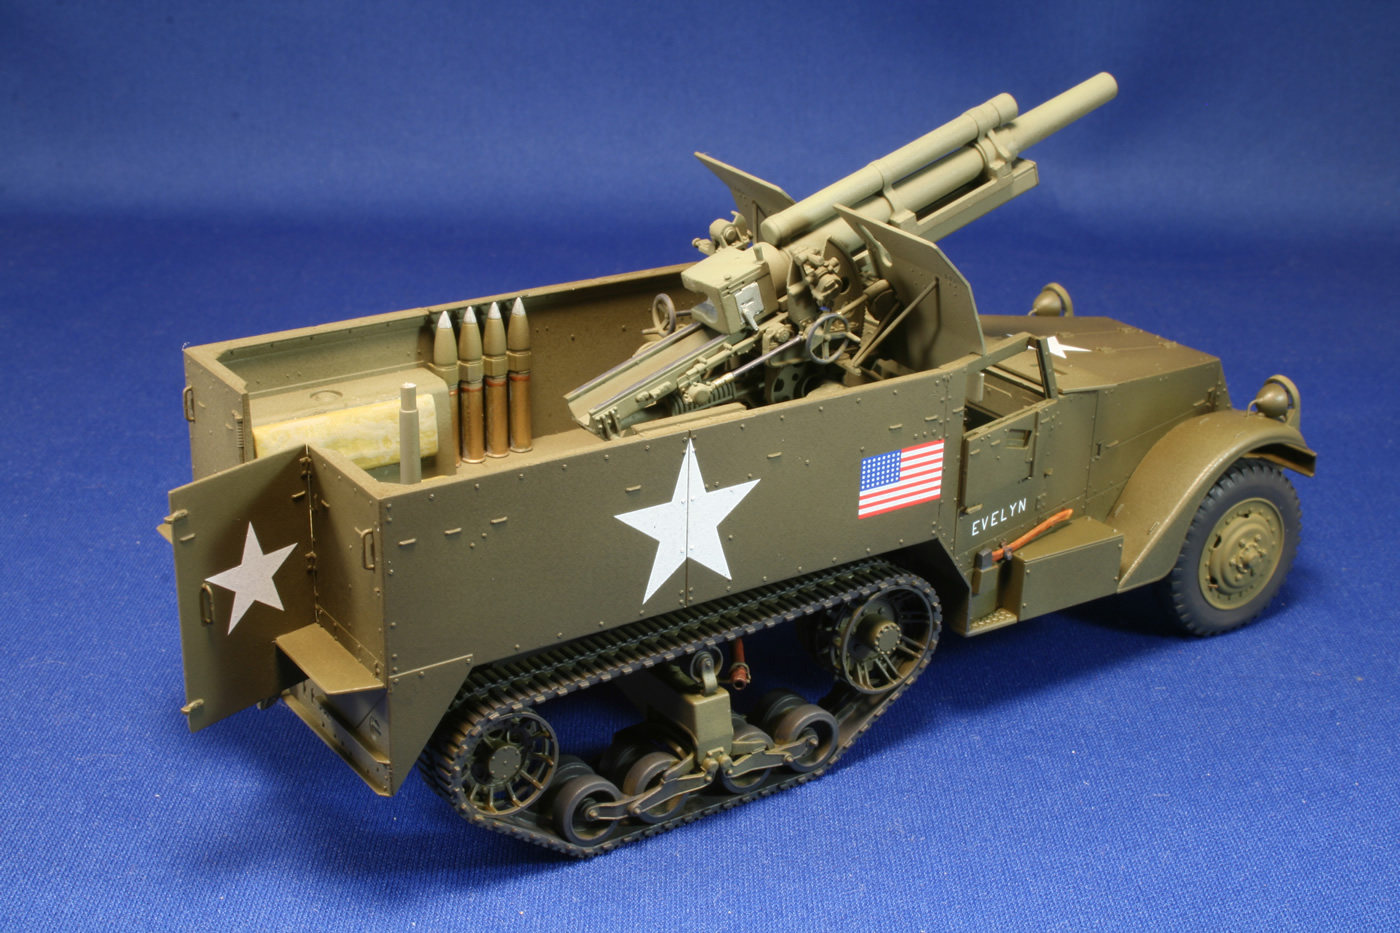
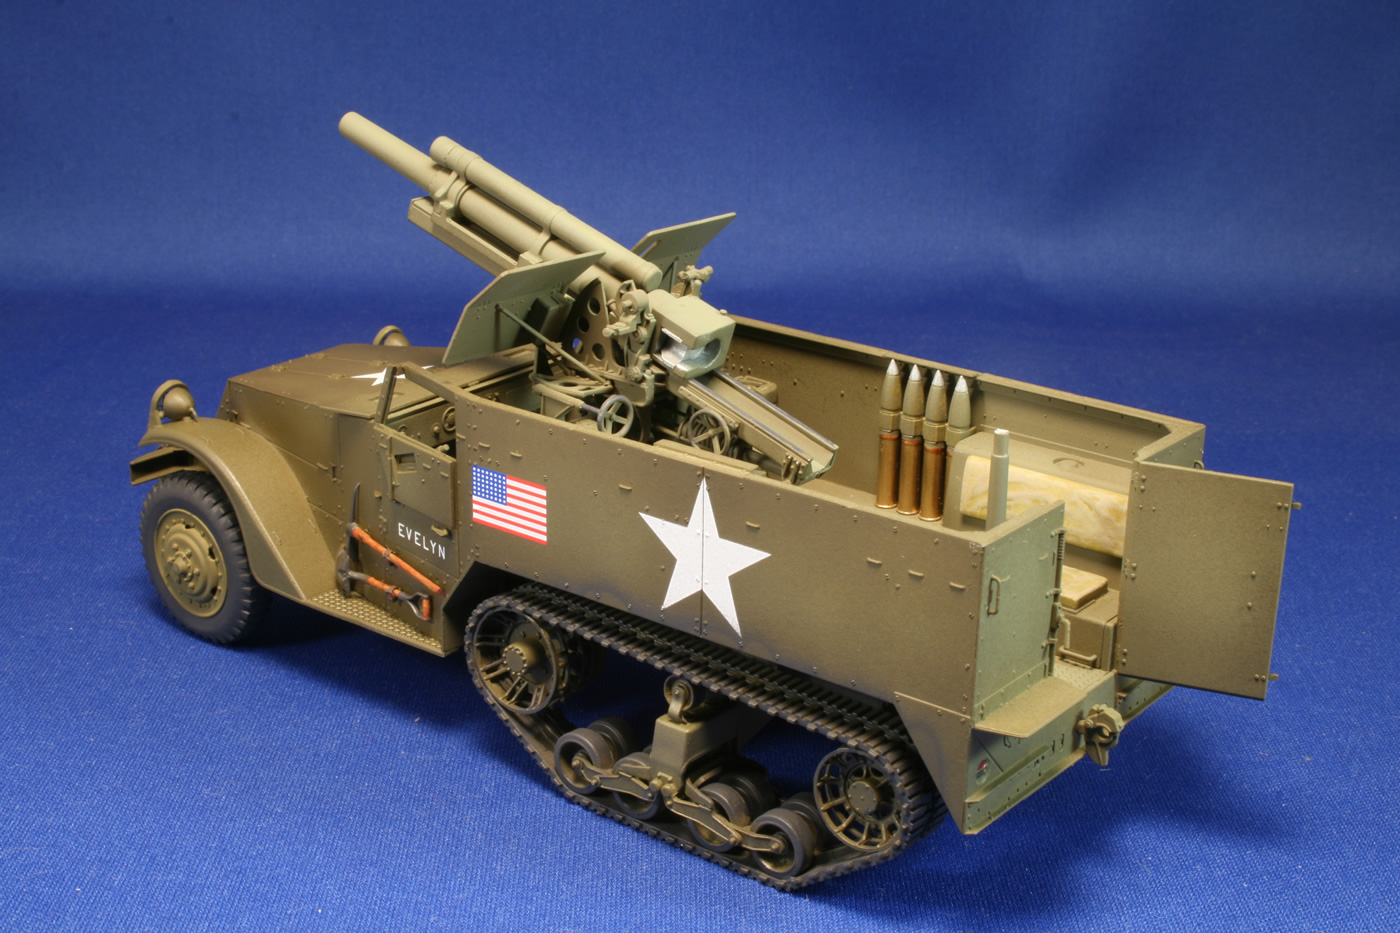
The red and white aiming posts were easier to paint that I anticipated. I sprayed part G10 white, and after that dried I masked the piece with 1/8" Pactra masking tape. I left some space to paint metallic grey on the sharpened ends and the caps on the opposite ends that joined the halves of the posts together. Since there were two pair, I nipped off the point on the third visible stake half, since only two were inserted into the ground when laying the gun. After spraying the masked piece red, I added the metallic grey and some OD to the clips that secured the posts to the vehicle. It appears they usually were carried in a canvas bag, so I ran some Lifecolor Olive Drab Light Mustard around the base the posts rest on. A bit of weathering and that was it!
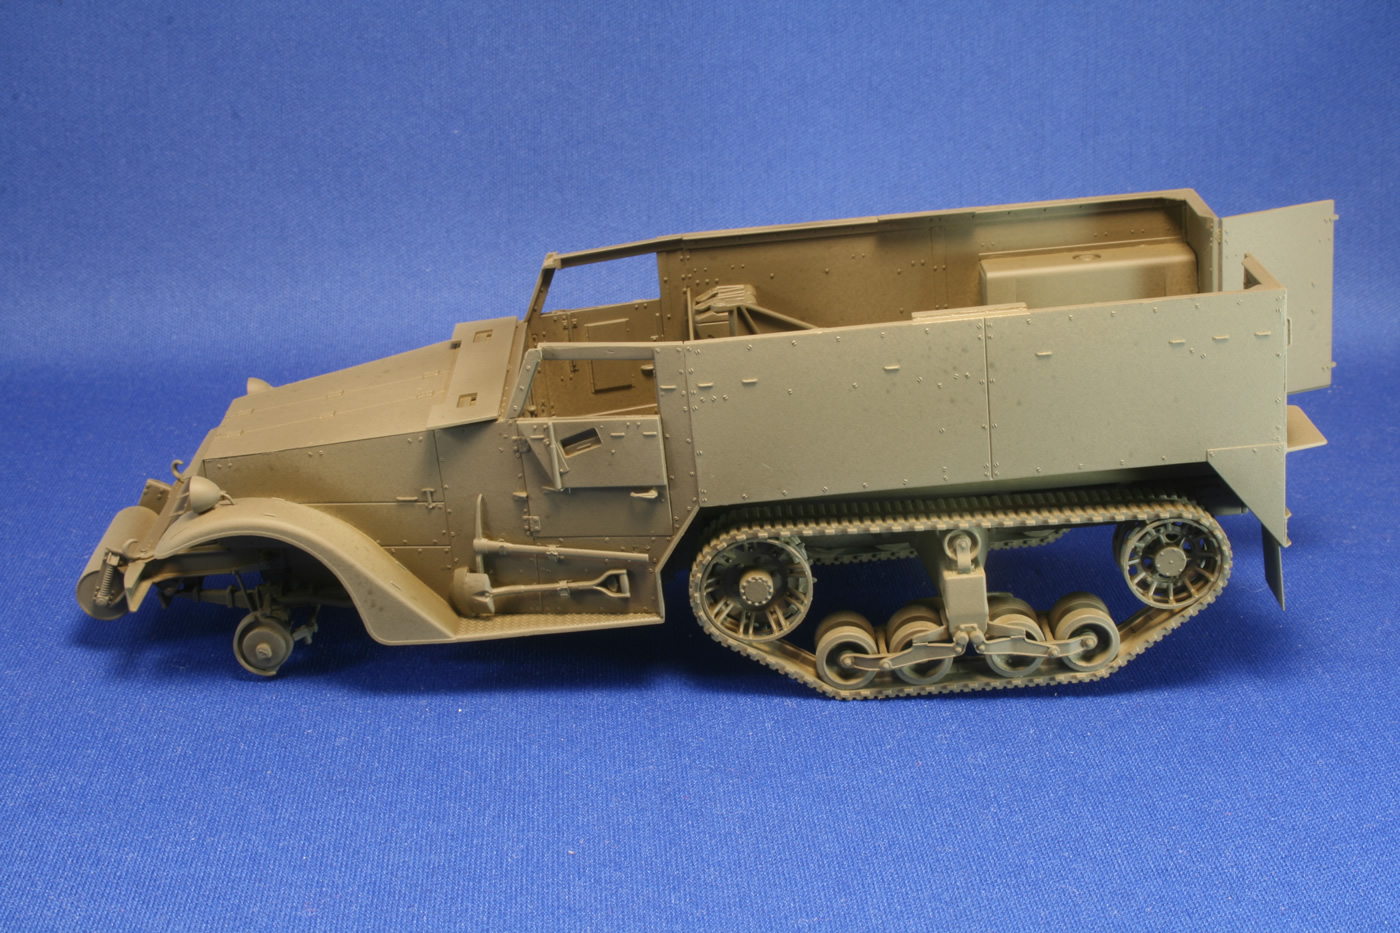
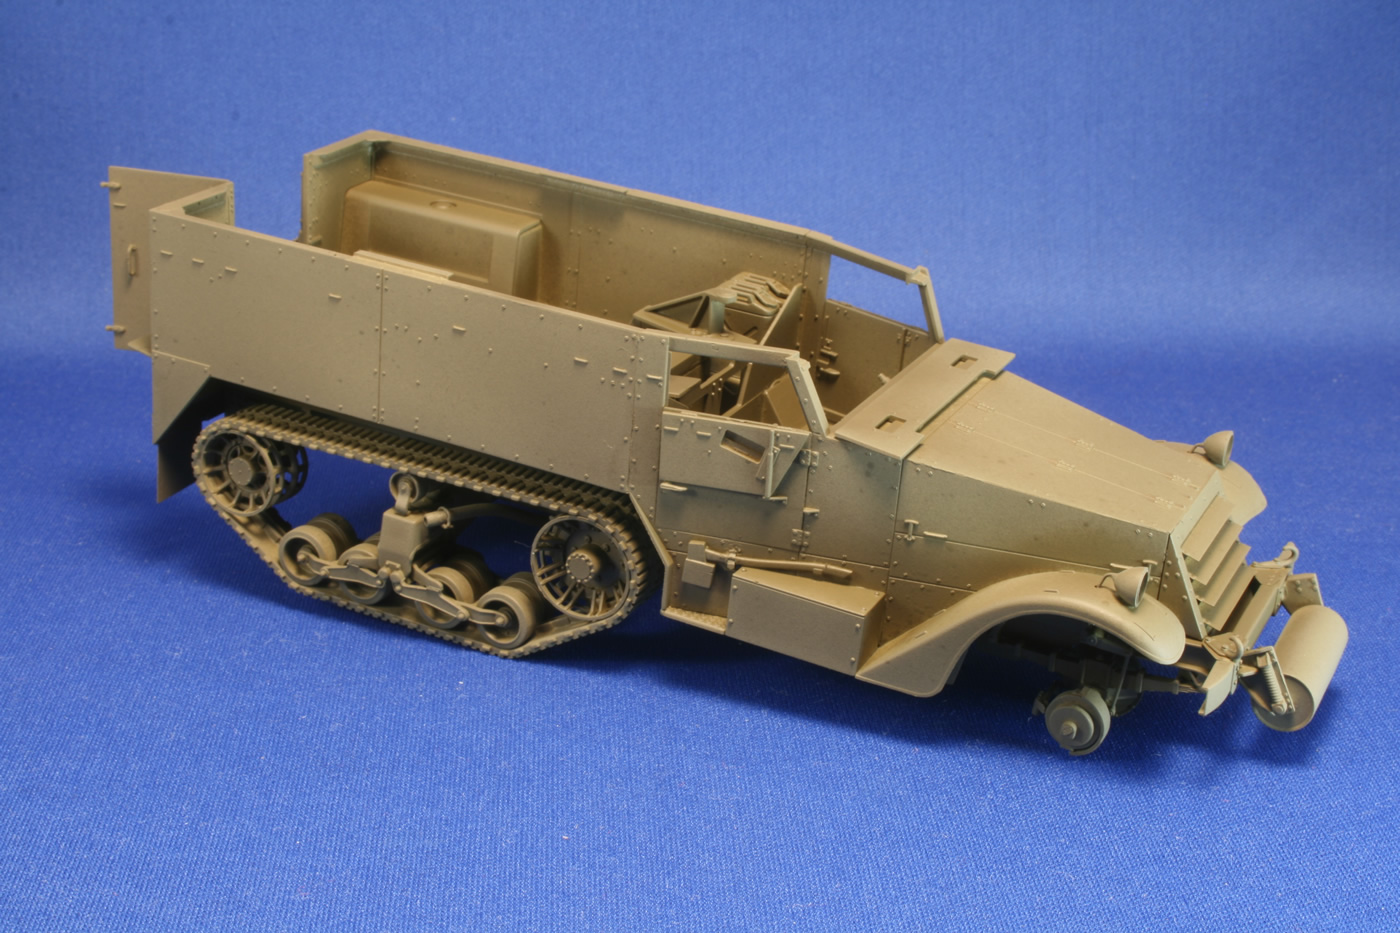
I kept the gun separate vehicle during the painting and weathering process. The front seats in the cab also were left out because installing them would make it impossible to insert the gun nto the modified trail. I received complimentary sets of Lifecolor's U.S. Olive Drab and Camoflauge paints as I was building this kit, so I took this opportunity to try them out. I was very pleased how well they worked with my Iwata HP-C Plus airbrush. Lifecolor recommends thinning them with their brand of thinnor or water. I didn't have any thinner on hand, so I used distilled water, just a drop per half cup of paint (i.e., the cup on the airbrush, not a drinking cup!). The paint flows well through the brush and I didn't have the clogging at the tipt that sometimes occurs with Model Master or PollyScale paints, though that might mean I got lucky and hit the right combination of paint and air pressure. The Lifecolor OD set provides six different shades of olive drab, including four federal standards and two faded hues. I started with the darkest lusterless drab FS 33070 and proceded with successive thin coats in lighter colors. The shadowing and variations don't show up quite as well under the bright photography lights.
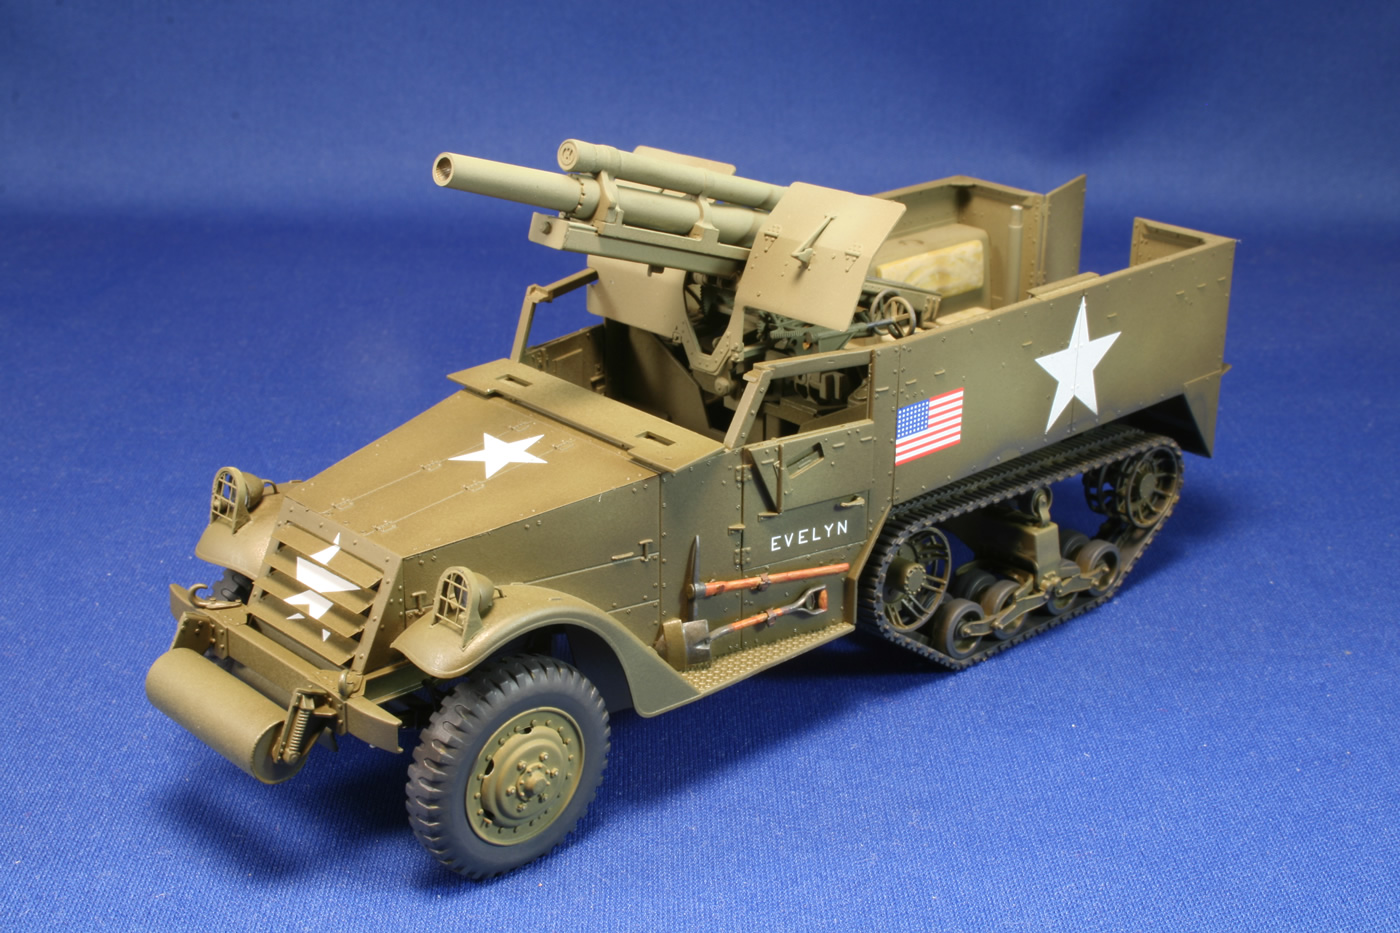
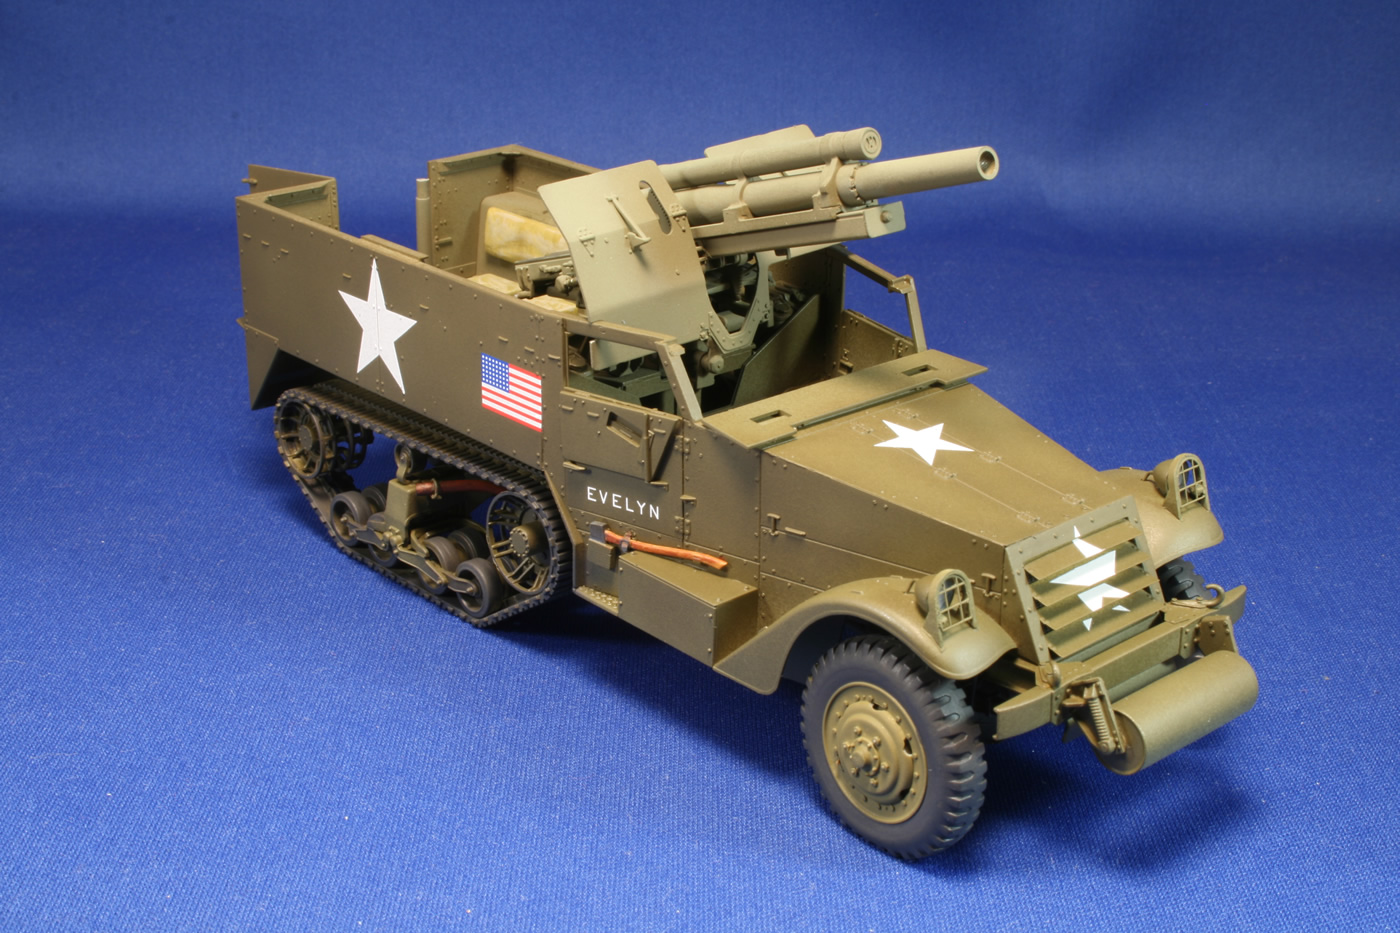
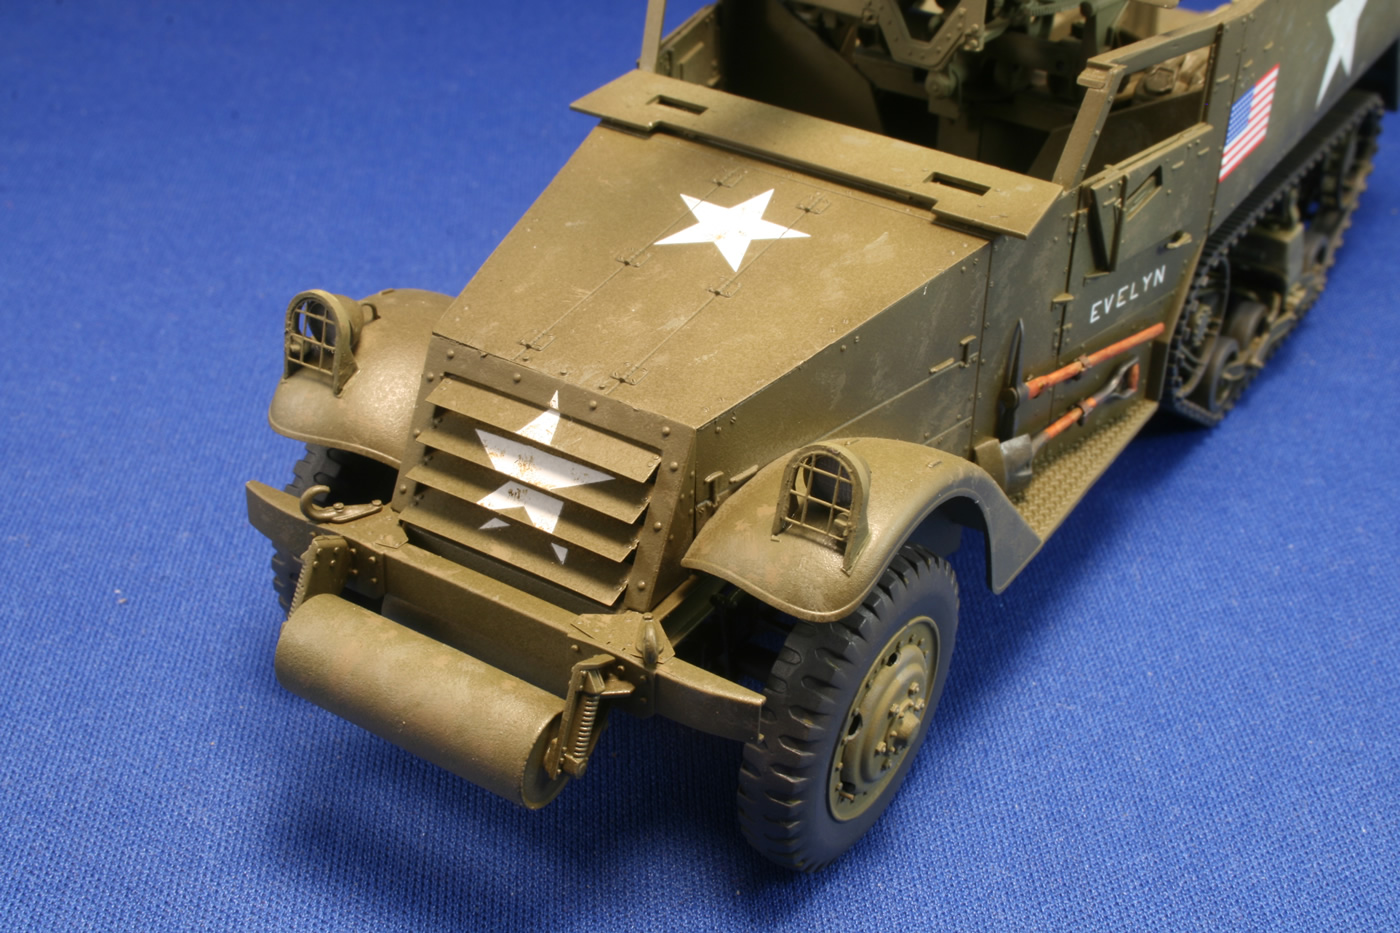
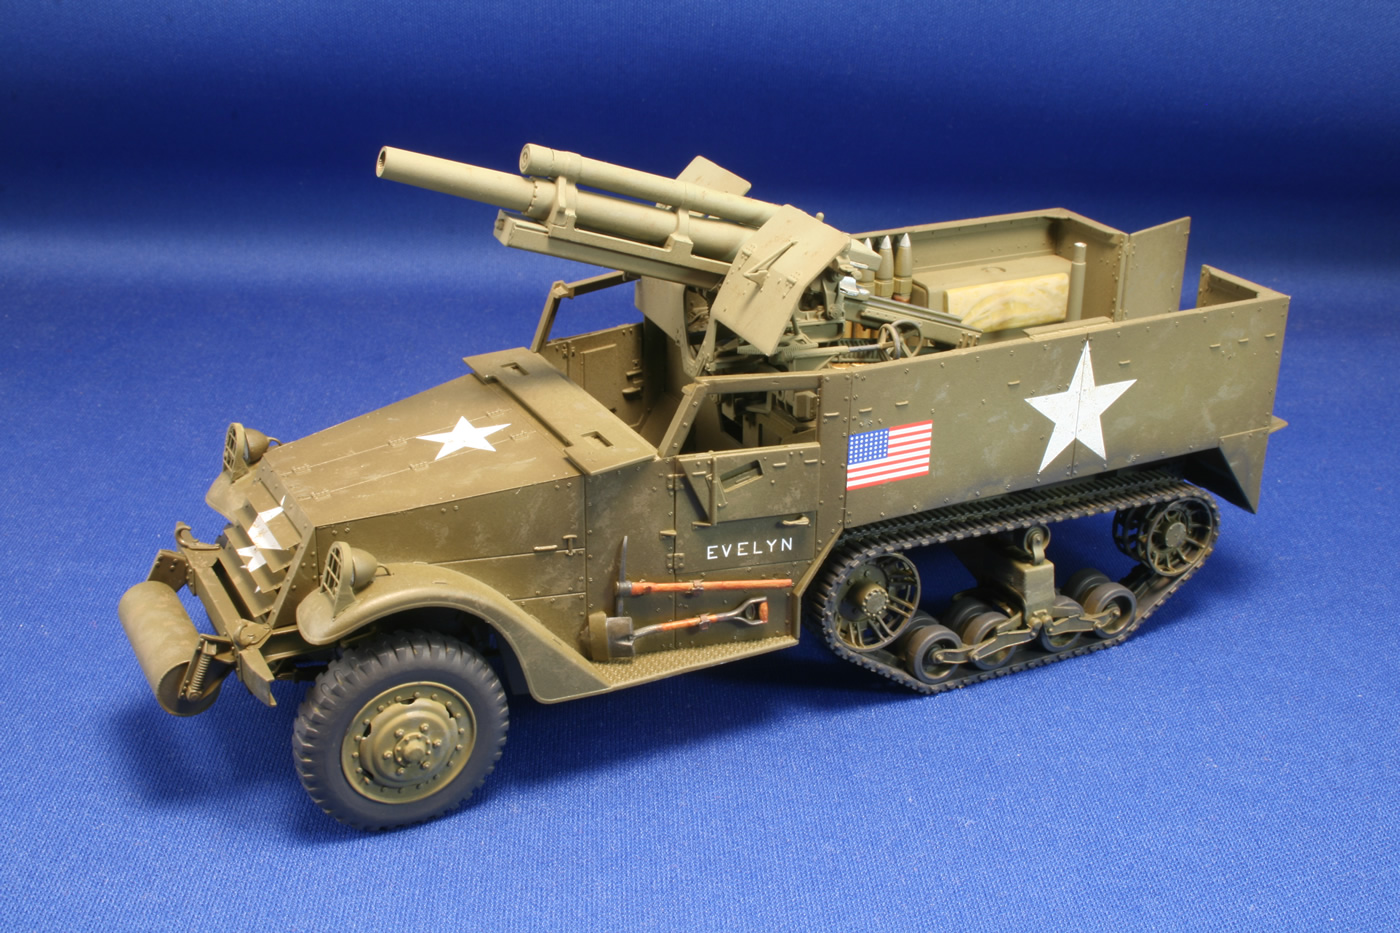
After the base coat, more details were painted. Since the tracks need to be painted in place, I used my airbrush to get most of the work done and a brush to catch anything I missed. There was some overspray on the HT walls, but that would be covered with dust down the road, so to speak. The tires had been painted separately and were added to the axles. I usually paint tools separately, but this time I opted to glue them on during construction and paint them in place. The handles got a base coat with Lifecolor's Olive Drab Red Tone from the camo set, which really is a good color for natural wood. After the paint was dry, I gave the parts a heavy wash of Turpenoid and burnt sienna. The metal parts got a dark grey base coat highlighted with pencil graphite and a touch of aluminum color paint, topped with a wash to pull it together. Prior to the applying the decals, the half-track exterior got a shot of gloss varnish. The DML decals are very thin and snuggle down nicely, but I was disappointed in two respects: there are no decals for the dashboard instrument dials and information plaques, and the registration numbers are individual instead of a string, requiring time and effort applying and aligning each number (think of them as the equivalent of indy link tracks). As I'd done gone through that process recently on some other models, I opted for the choice of least effort: "Evelyn," of the 7th Regimental Combat Team of the 3rd Infantry Division stationed in Rabat Morrocco in late 1942. This vehicle appears as a color plate in Zaloga's half-track book from Concord. For several months prior to December 1942, Army regulations called for vehicles, including those used in the North African invasion, to be painted with blue drab letters and yellow stars. Unfortunately, all of the decal numbers and stars are white, but alternatives are available from Archer Fine Transfers and Fingerprint Designs if you want that initial look of Operation Torch. Oddly, the kit does not include nstrument guages and data plates for the dashboard, a serious omission in my book. Fortunately, Archer Fine Transfers again comes to the rescue with a set of nearly a dozen little transfers that can be applied wet (and one marking that needs to be rubbed onto the glove box door—I recommend doing that before applying the other water slide markings). The Archer set is a good investment as it can mark four half-tracks.
Once the half-track and gun were dry, faded OD was stipled onto surfaces to provide some color variations and suggest wear.
With the basic painting and weathering completed, I turned to accessorizing the T19 with a variety of Tamiya and Verlinden items. The rations boxes are the early war type from Pre-size. I made the camo netting bundle and two-part epoxy tarps on the fender and sleeping bags tied to the back wall. The vehicle then was weathered with dry powders from MMP to give the dusty look of North Africa.
For
more photos, visit the Gallery. Introduction Building the Chassis Building the Tracks Building the Cab Building the 105mm Howitzer Building the Fighting Compartment Ready for Paint Painting and Weathering References
|


 |
 |
 |
 |
 |
 |
 |
 |
 |
 |
 |
 |
|