|
Building
DML's T19 105mm Howitzer Motor Carriage |
 |
Building
the Cab
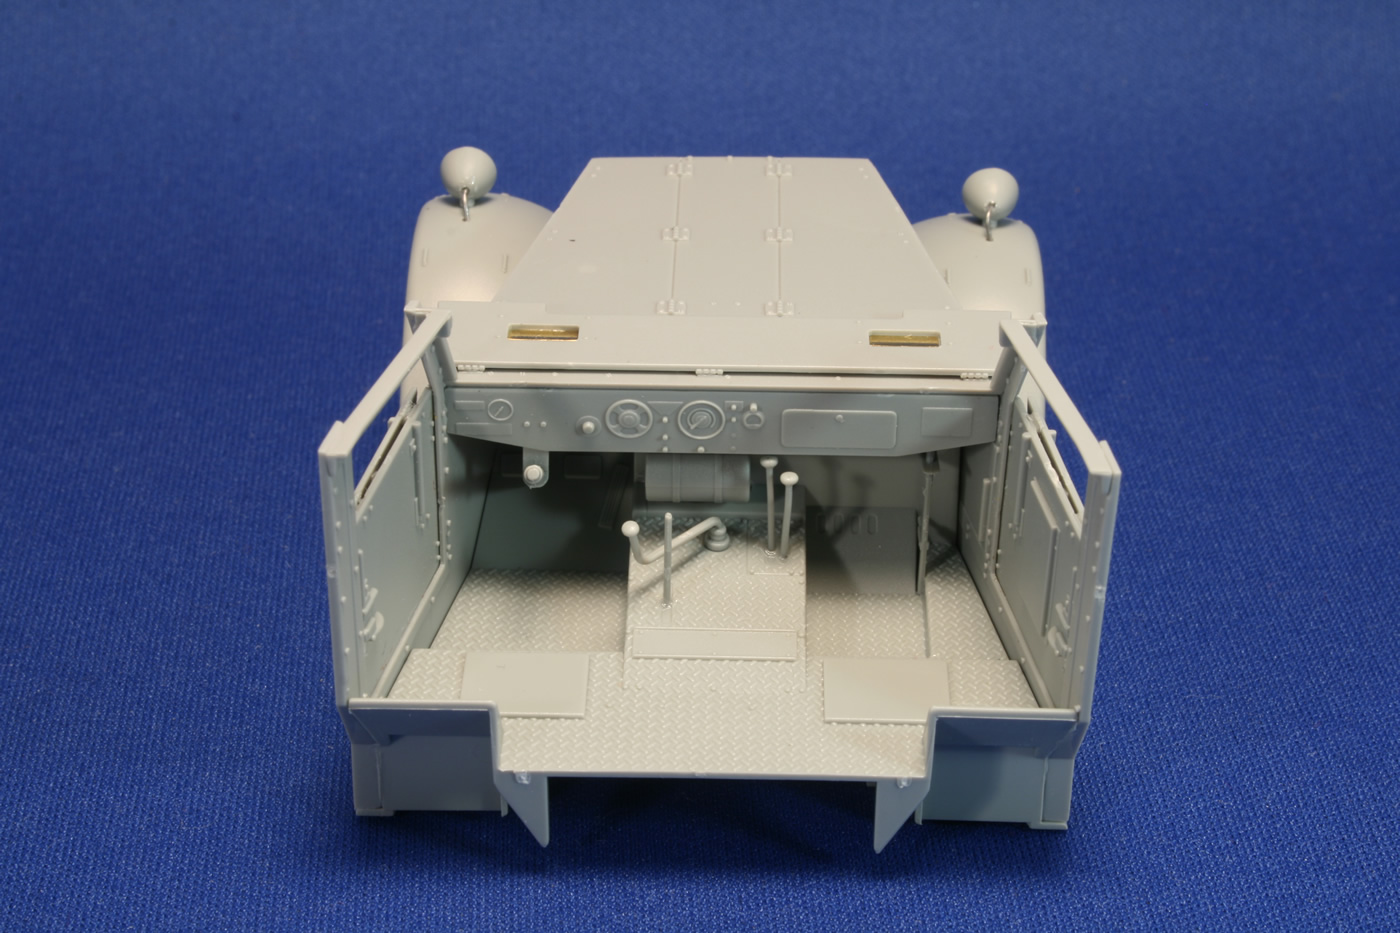
The interior of the cab is well appointed, as they say. It was nice to see inclusion of the handle (B18) for opening and closing the louvers for the radiator. However, the cloth folds on the covers of the seats (both here and back boards in the fighting compartment) are identical; this is one of those dumb shortcuts that severely undercuts all of the other painstaking research of the DML production team (of course, they're not the only ones; and this is the same complaint I've had about musette bags and other soft gear from numerous manufacturers). How much more effort would it take to sculpt a unique second seat? I worked the hobby knife and some putty over the duplicate parts to alter their appearance.
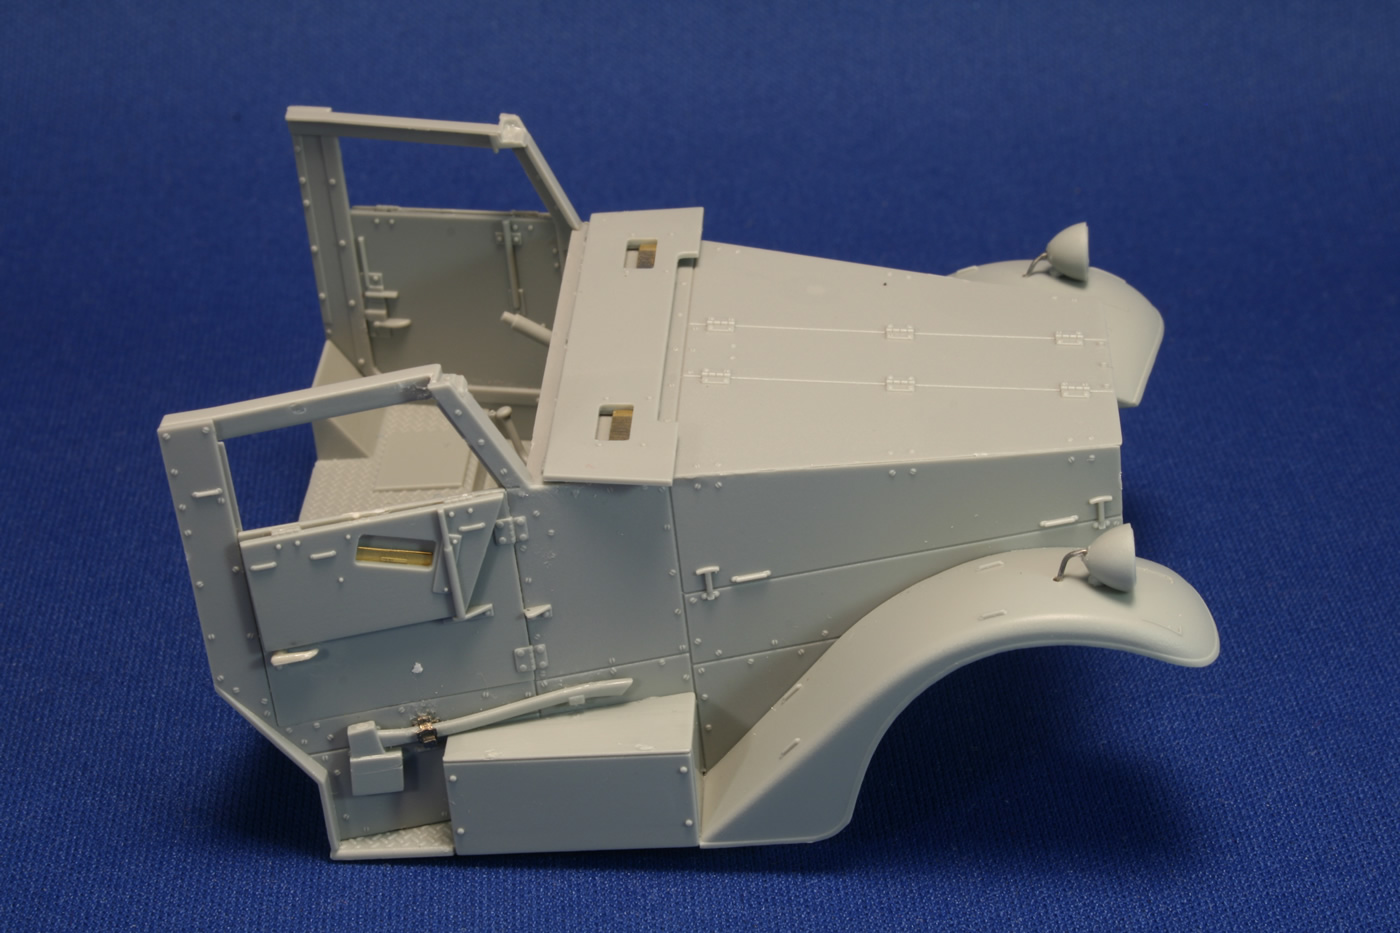
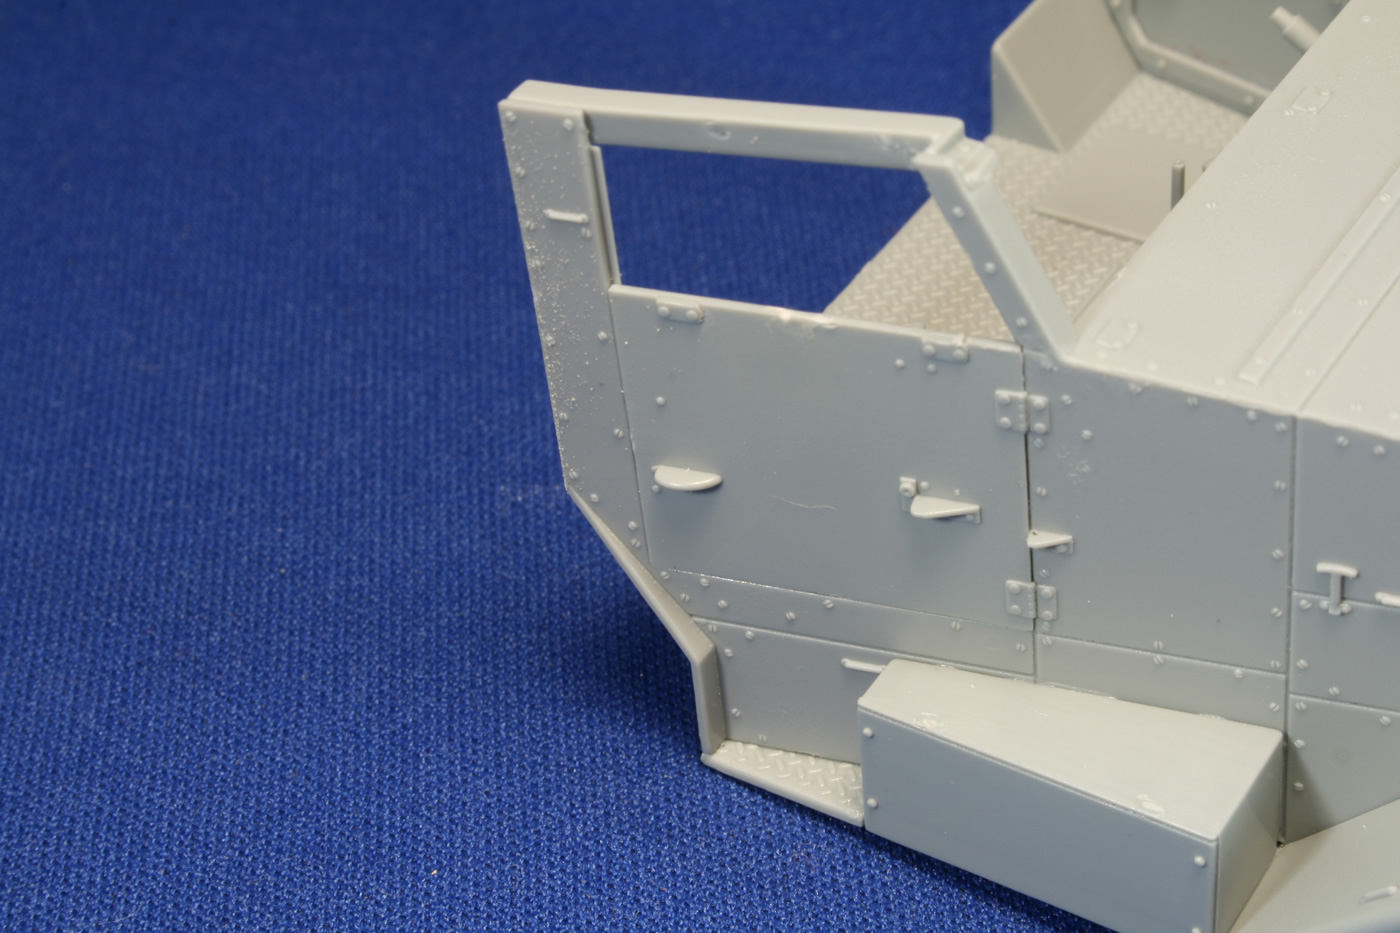
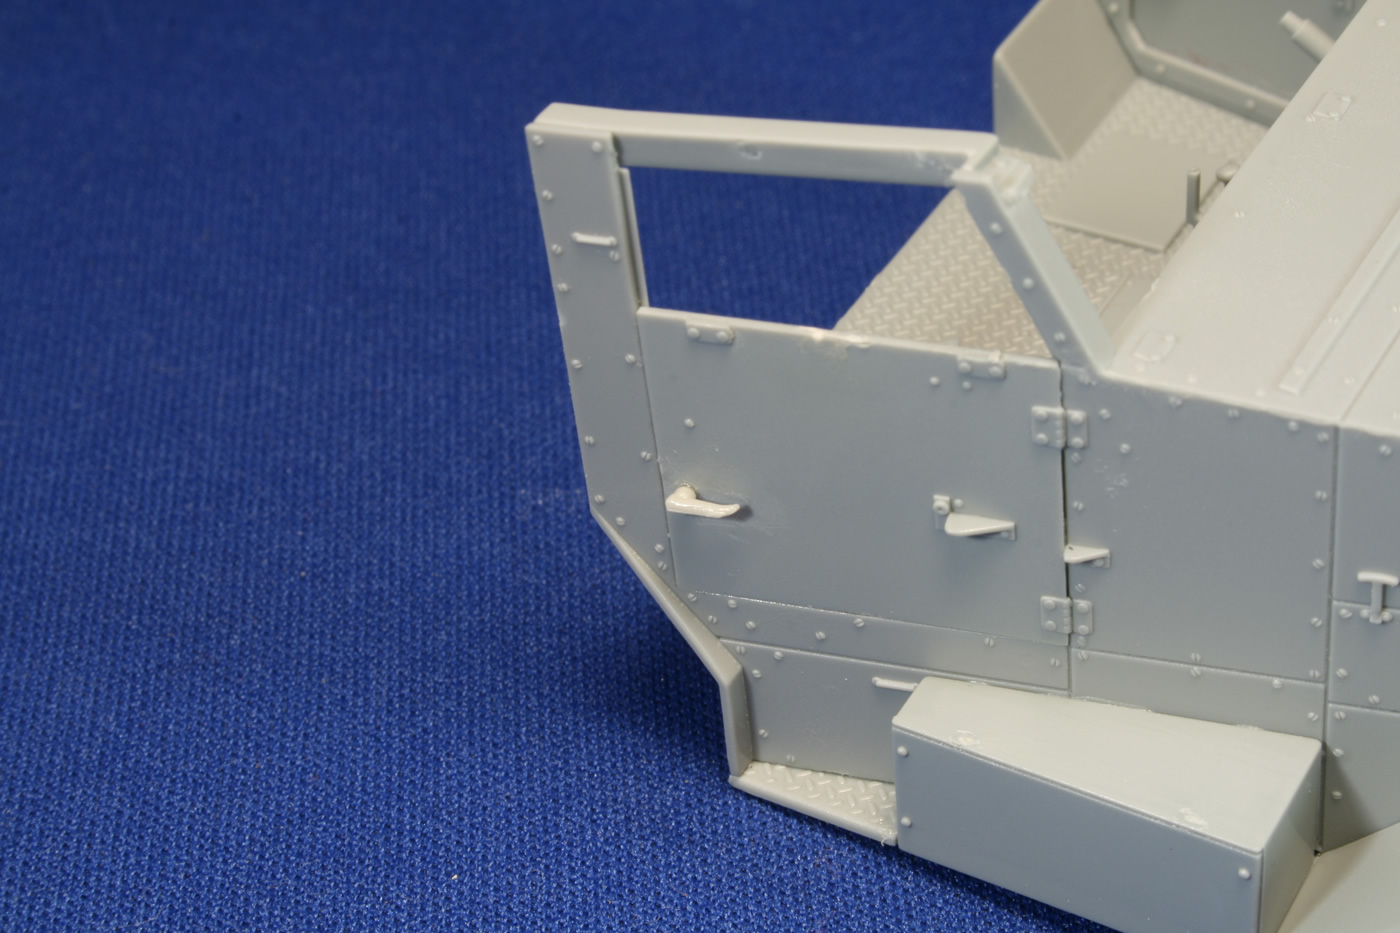
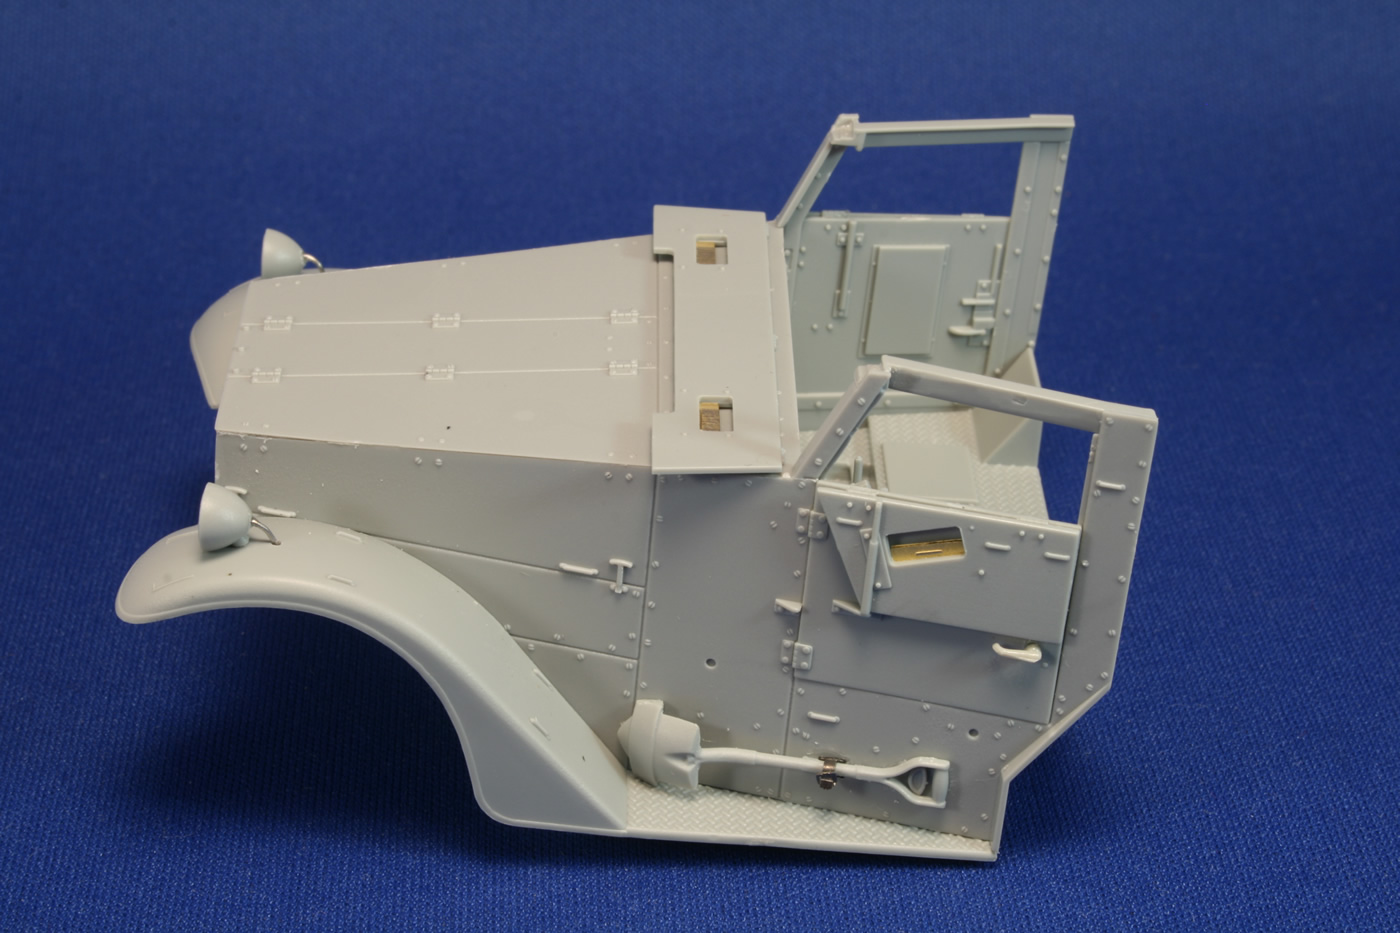
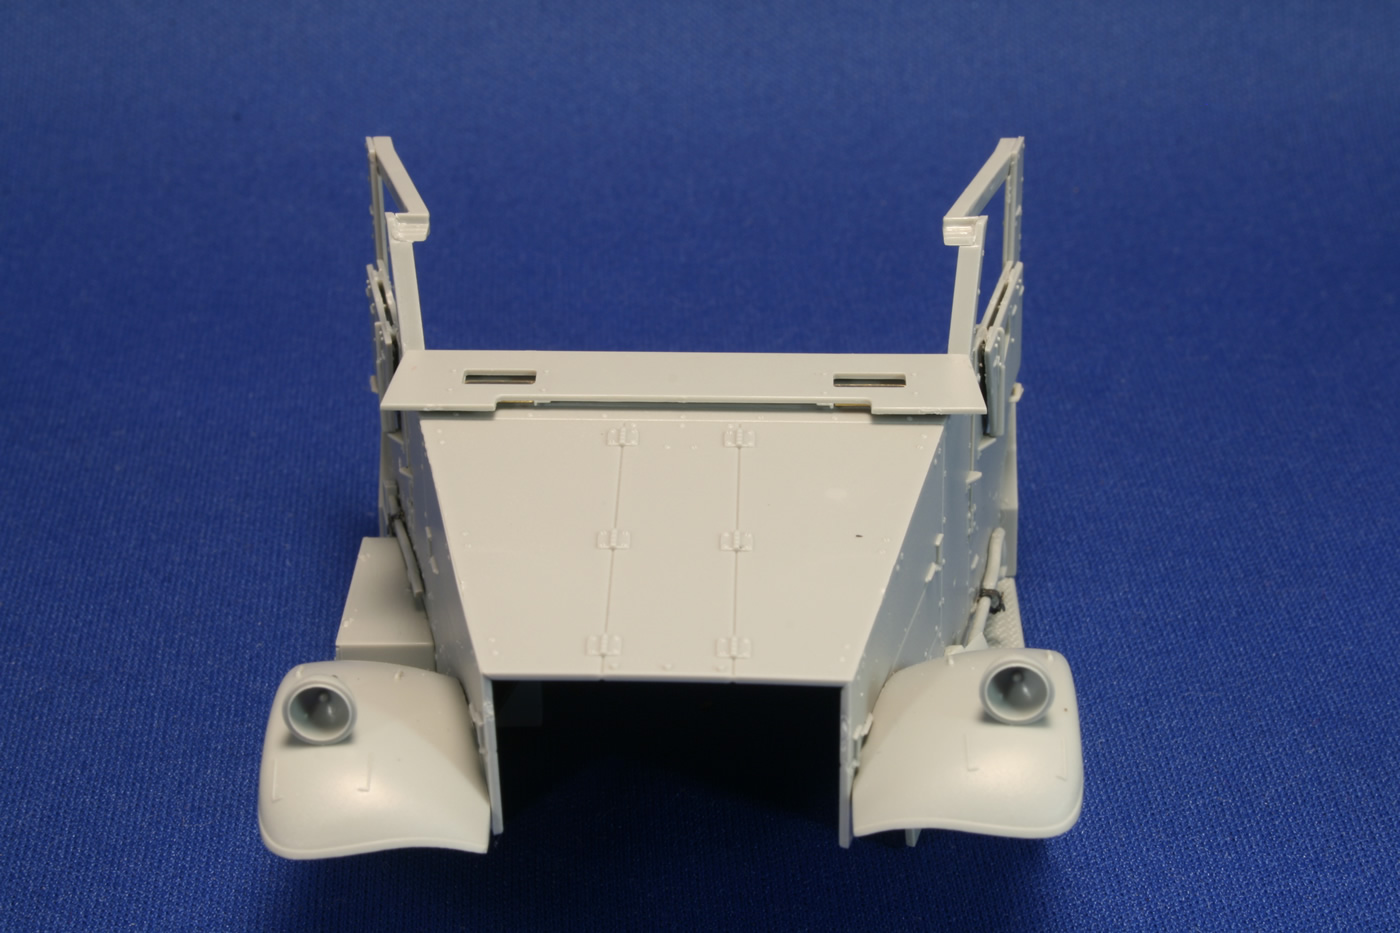
I was disappointed to see door handle "blobs" molded in place. I carved them off the outer doors and replaced them with modified sponson handles from Tiger Model Designs for a more realistic appearance. It's certainly within the realm of possibility to create these handles in plastic (a handle is provided for the back door). Again, a dubious shortcut. The inclusion of photoetch parts for the armored shutters on the windshield and doors enables you to have the ports opened or closed. Be careful when you assemble the top frame pieces over the doors (parts G4 and G5) so they sit correctly on the windshield frame. The instructions are rather vague, but the images below should help you place these parts correctly.
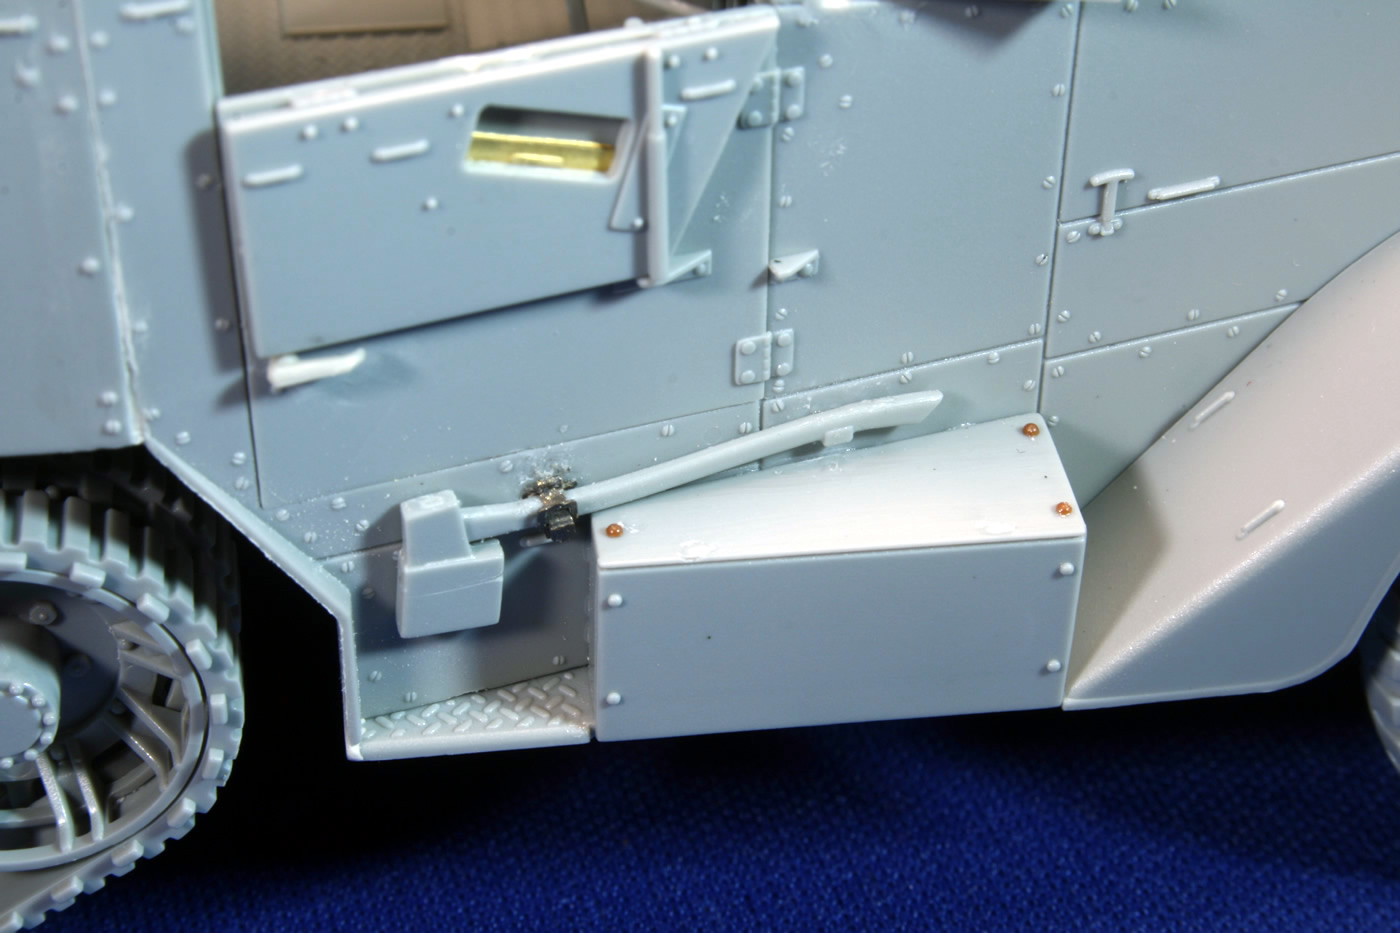
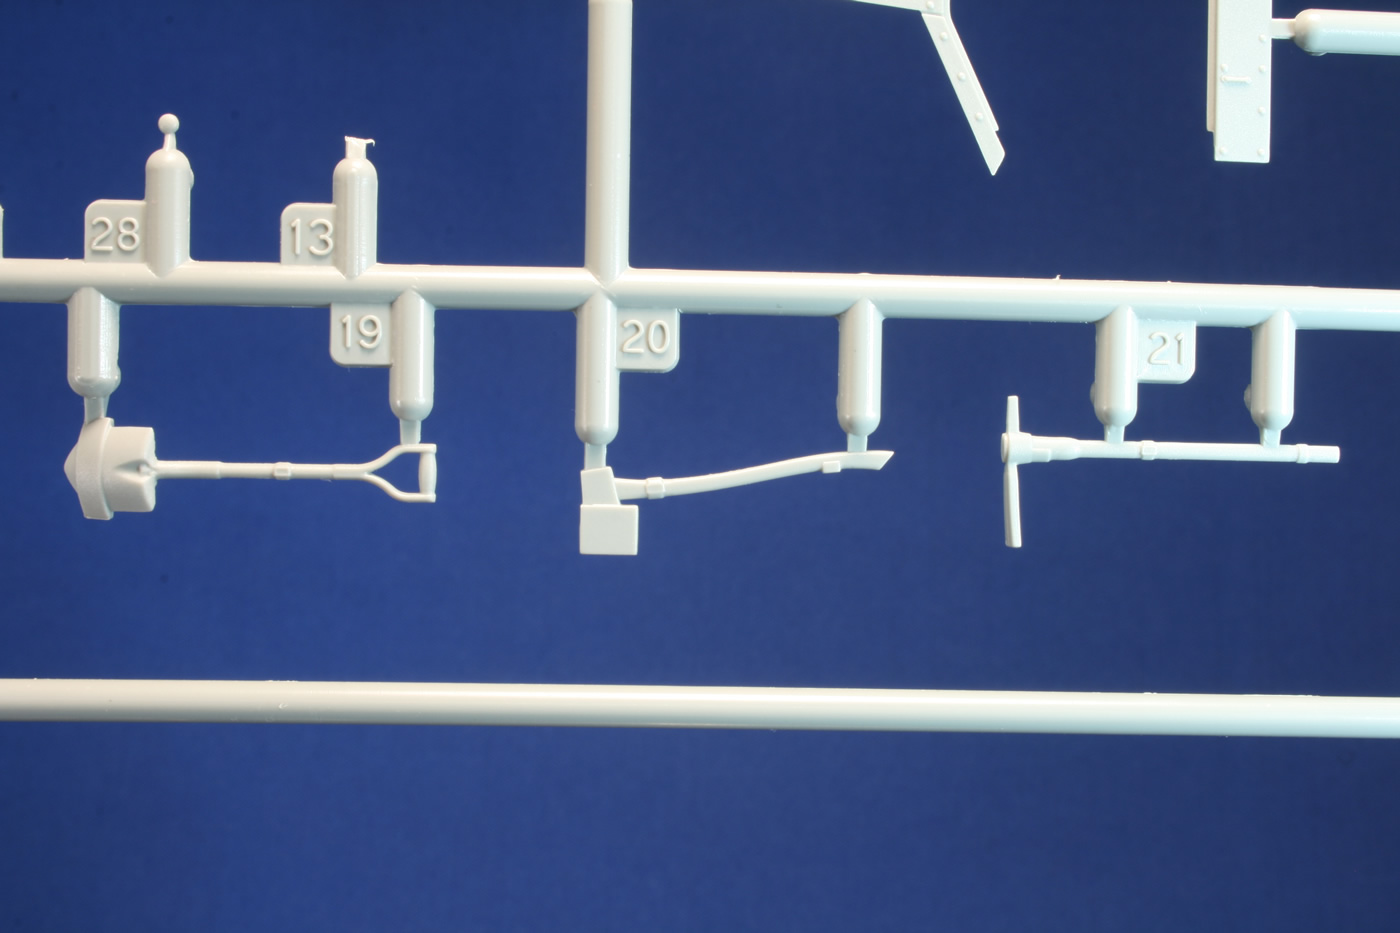
I opted to have both the windshield armor and top halves of the doors in the "down" position, which often appeared to be the status when the gun was in use. In order to get the upper sections to sit against the door properly where the hinges are and on the bottom, it was necessary to scrape off some of the unseen detailing that forces the top half to stand off from the lower door. The instructions point to B21 as the mattock tool to mount to the driver's side exterior wall, but the amputated pick end was not as noticeable when concealed by jerry cans on other versions of DML's half-tracks. Here, this weird "shortcut" is egregiously exposed. You either can flip the tool over so the pick end disappears behind the shovel, or swap it with the "anatomically correct" mattock among the spare parts on sprue J, but you'll need to add a retaining strap and bracket. I carved the weakly represented straps from all of the tools and replaced them with spare parts from Eduard. (Including these on the DML photoetch fret would not break the bank.)
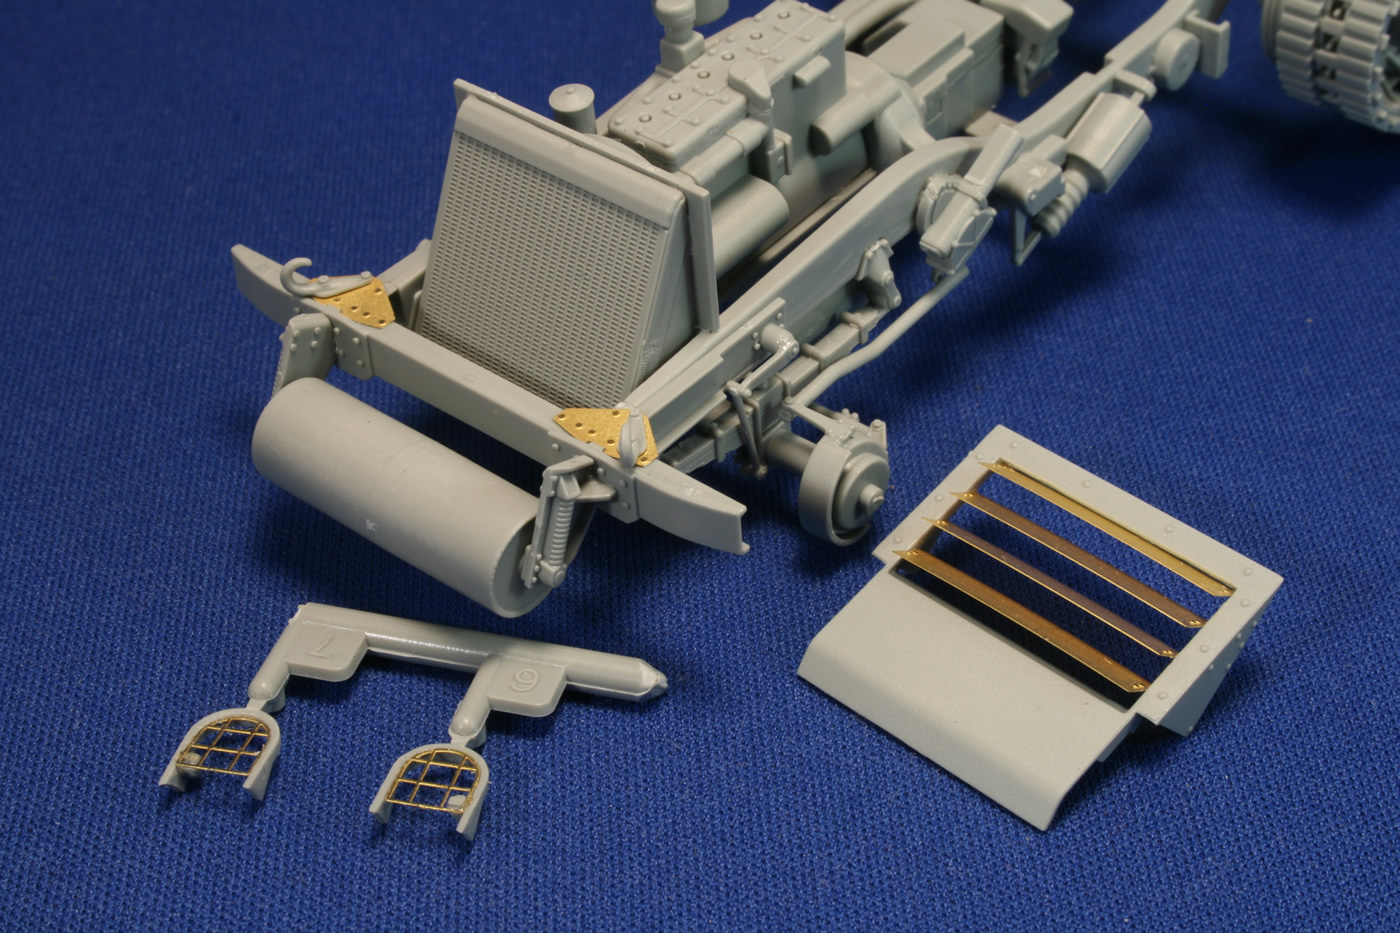
One of the main clean-up hassles with this and other recent DML kits is the preponderance of small molding pips attached to parts in numerous places. These serve as reservoirs that help ensure the injected plastic circulates through the narrow parts of the mold. I bring this up because one place where a couple of these pips would be welcome is on the brush guards for the headlights, to which should be attached the small, pip-like blackout lamps. About a third of the length of a grain of rice, it needs to sit just so on the inside of the guard. Ha. I got the first one into place after a couple of bobbles and recoveries. The second one leapt out of my fingers right off the bat and was lost among all the …. pips that littered the floor. Fortunately, I still had a leftover from the MiniArt Bantam jeep (where its mate also had gone AWOL). This is the type of small part that should be-and could be, given DML's experience in pip production-incorporated into a larger part. The fragile photoetch grills for the brush guards do not sit on top of the guards but fit within them. I opted to glue them while the plastic parts were still on the sprue. It's essential to get the blackout lamps set correctly on the guards or they will interfere with placement of the grills.
After drilling holes in the rear of the headlights and tops of the fenders, I glued thin solder wire to the light housings and allowed them to dry. I slipped the loose ends of the wire through the fenders and glued the lights in place. The brush guards would be added later after painting and installing the clear lenses on the lamps. You get the option of having the engine louvers opened or closed. I opted with open since I wanted to put this in an arid setting and experience the DML photoetch approach. I needed to slightly shave the inner sides of part H2 so the thin brass slats wouldn't bow. The brass secured nicely into notches in the plastic. Just watch your alignment and don't open them wider than horizontal. Then set the cover aside for installation with the half-track body. Introduction Building the Chassis Building the Tracks Building the Cab Building the 105mm Howitzer Building the Fighting Compartment Ready for Paint Painting and Weathering References -tss- |

 |
 |
 |
 |
 |
 |
 |
 |
 |
 |
 |
 |
|