|
Building
the Academy M7 Priest |
 |
Fighting
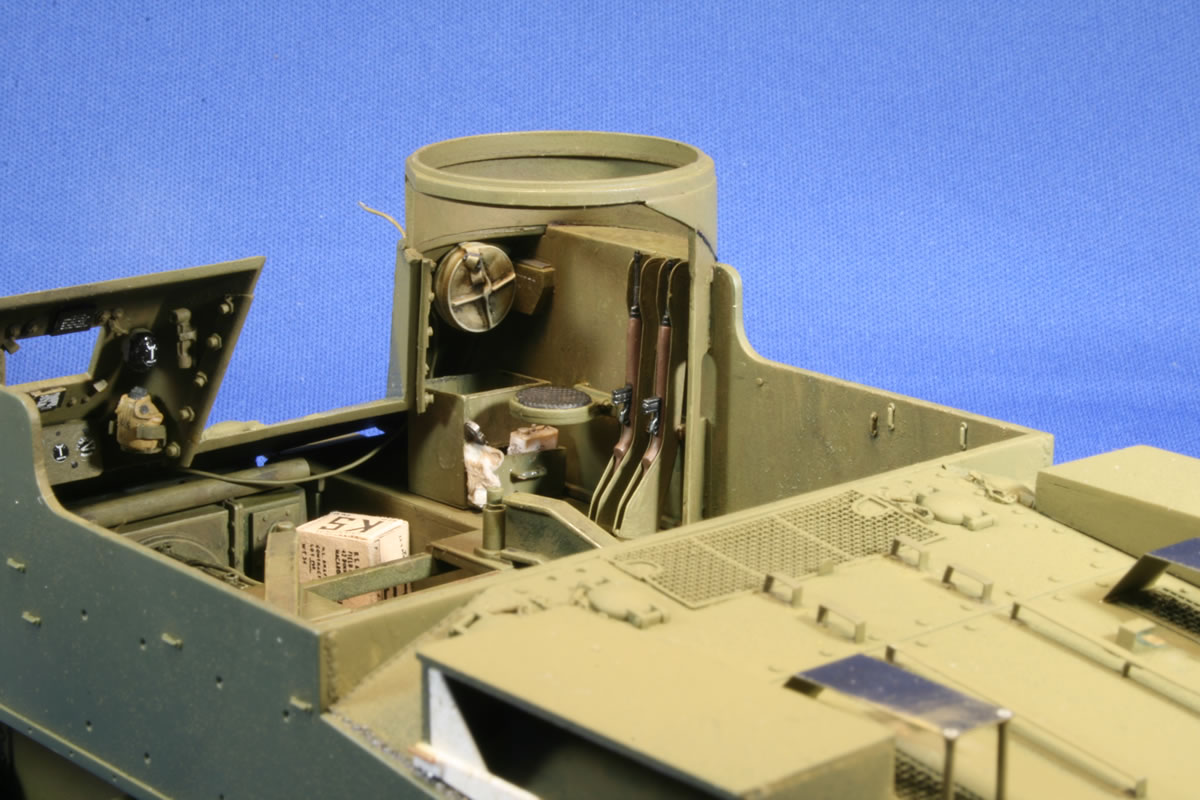
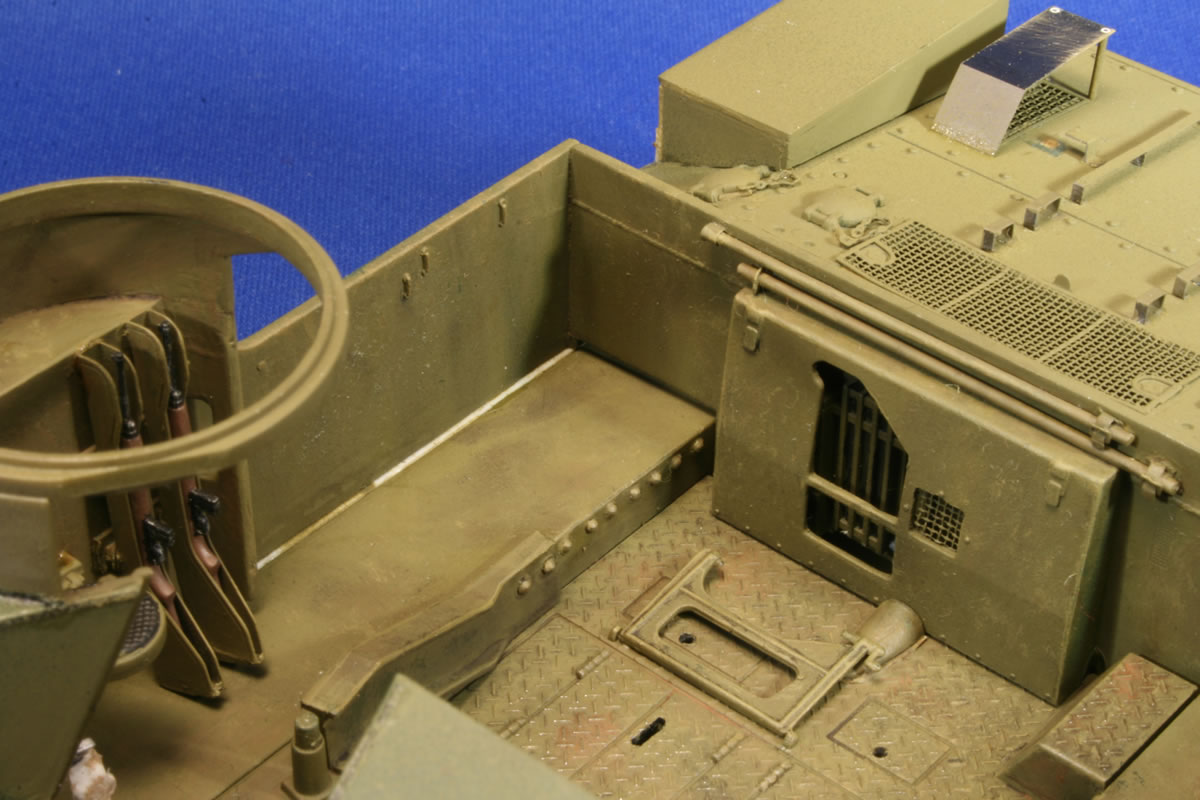
CompartmentThe kit provides the four-hole storage shelf for .50 ammo boxes, with the boxes molded into place. The early Priest had a bin for two ammo boxes, with a drawer below. For my Sicily howitzer, I built the early bin, including a workable drawer that I positioned open with a can of oil, a wrench, and a rag visible. The kit does not include the ammo box for the left front wall of the pulpit; I added one from plastic stock. The TM calls for a canvas bucket "in bracket on machine gun turret," so I attached a Verlinden bucket in what seemed to be a likely spot above the .50 ammo bin.
The gun ring also needs to be flattened in the proximity of 9:00 to 11:00 on a watch dial. The knife and sanding stick took care of this easily.
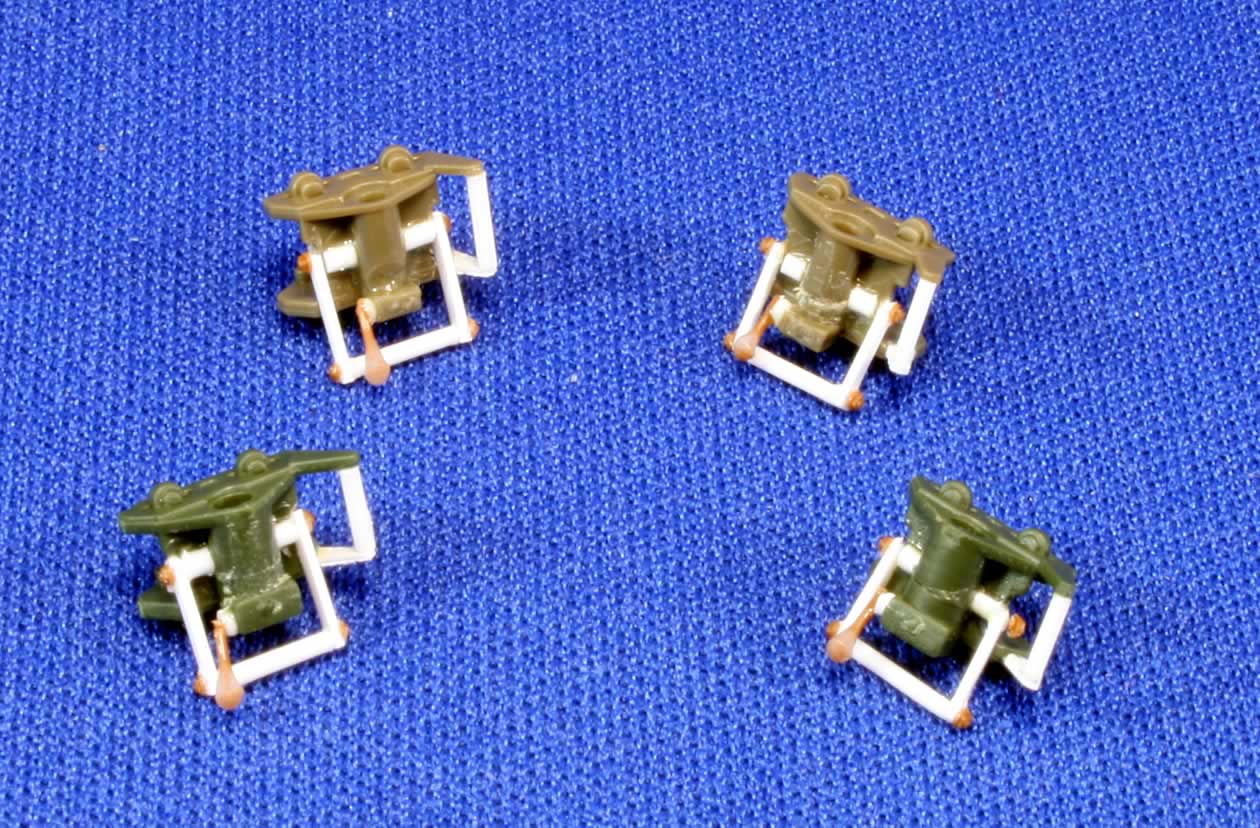
The seats on the two interior side walls were hinged to fold down when not needed.You can adapt the kit parts or use the photo etch to get the stowed position. The kit's seat covers are overly textured and could be toned down with some sandpaper or putty. I pulled a spare seat for left wall since it was in the down positio. The kit part was used in the pulpit where it would be hidden by the crew member. Beware of the bogus seat (B44) that Academy has provided for the sponson behind the driver. This shows up in an Internet photo and appears to be the driver's seat that has been detached and just placed there. This seat does not appear in any other photos or TM illustrations that I've seen. Put the part in your spares box.
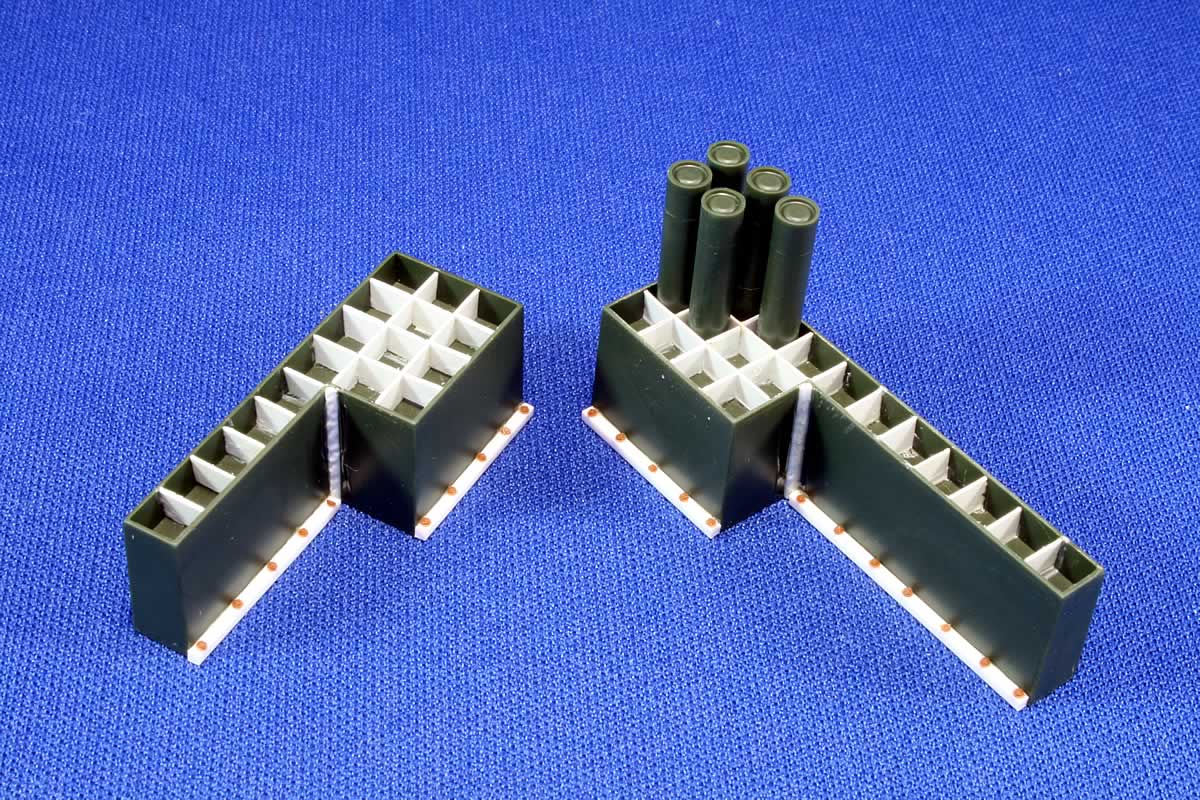
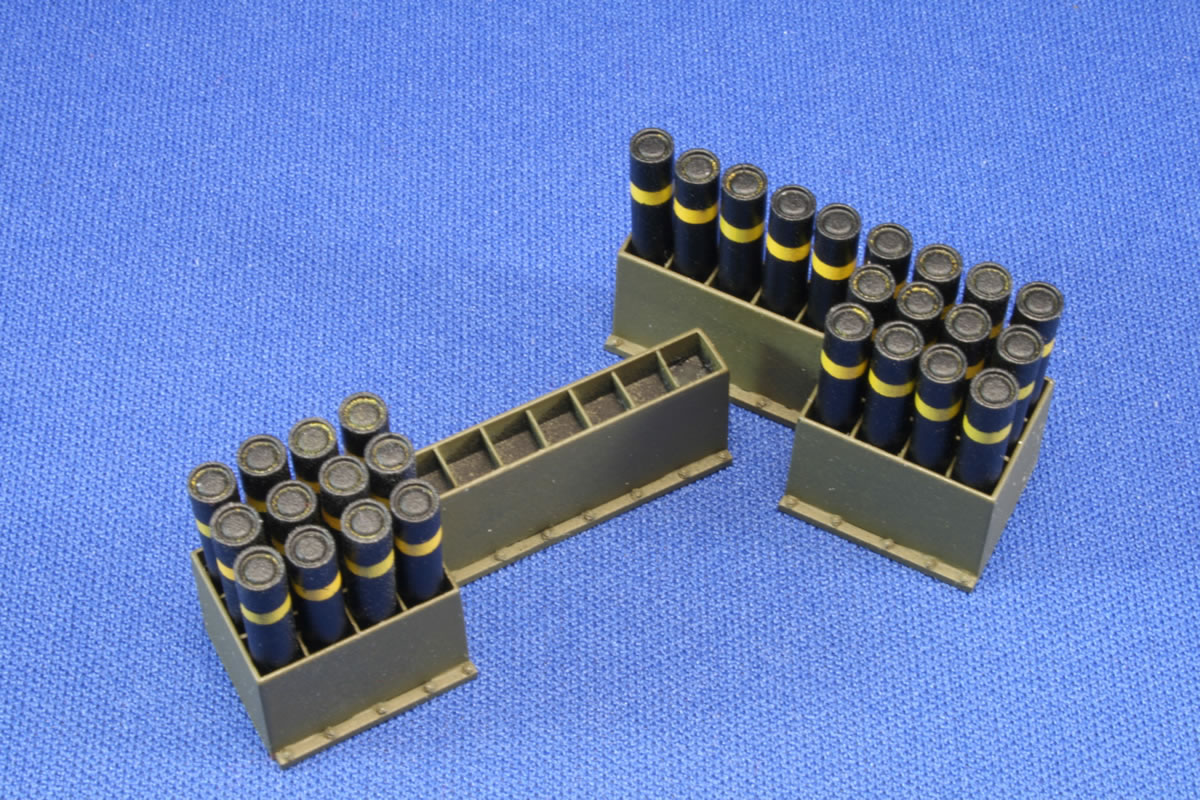
A couple photos show either the bore cleaner staff or aiming stakes stowed to the bulkhead wall above the oil cooler cover. There are latches on the cover itself, and I've seen a couple photos of long canvas sacks secured here. This is the proper storage point for the aiming stakes, which consisted of two two-section poles, each section measuring about 4'. If your Priest is in firing mode, as this one is, the stakes likely will be deployed in the distance, so you don't need to deal with them if you don't want to. Academy provides two bore cleaner staff sections, but they are rather skinny. I used some plastic rod with Eduard parts that secure the staff to the wall. The ammo bins are a disappointment, with their shallow bottoms and lack of dividers, but they're a fairly easy fix with some very thin card stock and patience. It didn't take too long to section the bins, and add attachment strips (1mm thick Plastruct square rod) and bolt heads (Tichy Train Group #8016 1 3/4" nut) to the bottom faces and weld beads in the crotch where the two-part sections were joined together.
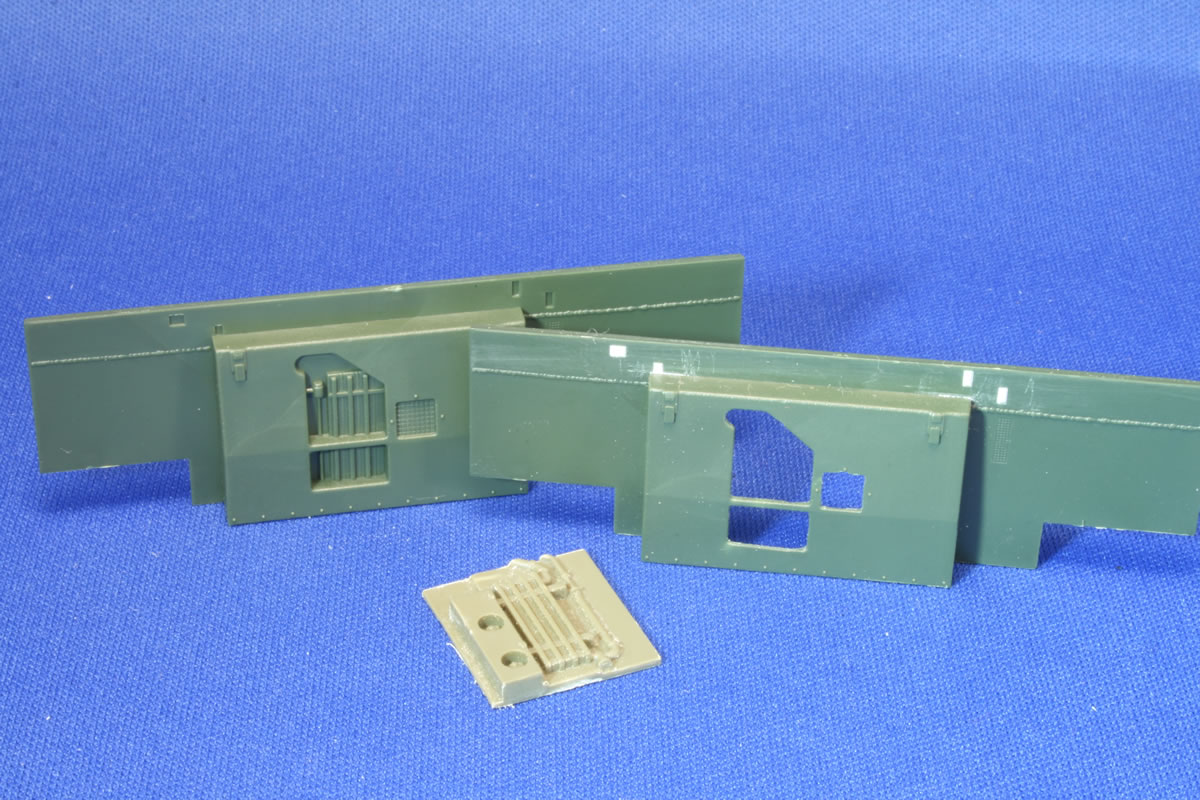
Previously, I had stated here that I had not yet seen any historical photos where the bins were loaded with ready rounds without their tubes (as intended in the Italeri kit). However, I have subsequently seen two photos where the rounds were in the bins. So this option appears to be accurate, if not necessarily the norm. Naked rounds are seen on the rear deck over the air intake grill during live firing. Being that such rounds are not included in the Academy kit, this is all a moot point unless you opt for the Verlinden or Resicast ammo sets. The kit provides a nice pair of fire extinguishers. Unfortunately, they lack decals so I relied on some from Fingerprint Designs. A row of rivets runs horizontally just below joint of the sponson shelf and the vertical hull wall in the fighting compartment. There also are bolts securing the abbreviated trails to the vertical walls. I used .040" rivets from Tichy Train Group. I drilled out the hand holes that enabled access to ammo and tool bins below the flooring. I also added the cover over the drive shaft as it rises up through the floor and enters the engine compartment behind the bulkhead. This required slicing diagonally through a 5/32" tube and sanding it down until it was about a ½" long and 1/8" high at the bulkhead end. I glued this piece onto a very thin piece of plastic that was a hair larger than the outline of the cover, and then glued this to floor. The swiveling gunner's seat (parts D27 and D28) was an addition to some, but not all, late M7s. It's possible it could have been added to refurbished earlier Priests. You may wish to omit it as I did. I painted and did basic weathering of the interior before gluing the upper walls onto the hull. In the first photo below, you can see the strip of white plastic that was glued to the edge of the sponson and how it meets the wall. I had previously carved off he ridge at the bottom of the walls where the bins would be located, so the bins could butt up right against the wall. There is a gap evident at the bottom of the bulkhead on either side of the oil cooler cover that, fortunately, is covered by the ammo bins.
Introduction |

 |
 |
 |
 |
 |
 |
 |
 |
 |
 |
 |
 |
|