| U.S.
WWII K38 A Trailer Cable Splicer for Jeep |
 |
Modifications to the Trailer
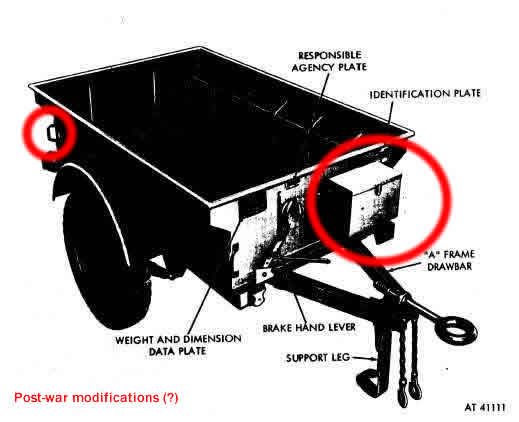
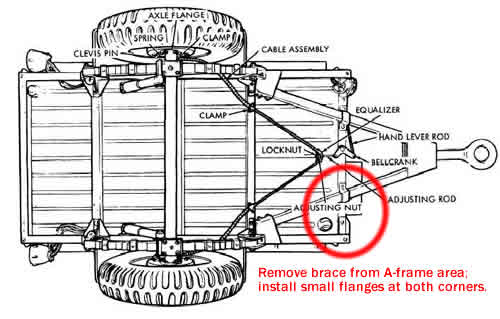
Poor casting and incomplete instructions complicate adding the C.G.M. pieces to the Italeri trailer. You need to remove the A-frame portion from the front of the trailer and replace it with a resin piece. The directions do not instruct you to remove this portion before you mate the frame to the tub. It's also not clear how to do this, and what section of the frame remains. These illustrations from the M367 manual should help (assuming, of course, that this was not different from WWII vintage trailers):
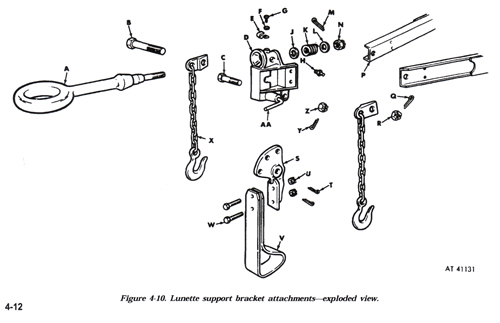
There is a hand brake to add to the front wall, and photo etch pieces such as tarpaulin stays and taillight brackets are added to the tub. Again, the photo etch is generally well conceived but the result sometimes suffers. The angled support piece that nestles into the corner where the trailer frame and tub meet in the front has a grooved line for folding, but it's not deep enough and the piece is virtually impossible to fold unless you have one of those fancy tools. I used a piece of angle Plastruct stock instead. There are no pattern or measurements provided to bend the piece of brass for the front support. Pay close attention to the scraps of resin in your bag or you might miss the upper attachment piece that connects the support to the underside of the trailer frame: it's a little angled piece, attached to a long runner, that looks like one of the bracket shelves on which the RL-31 rests. It took me forever to figure out what it was used for.
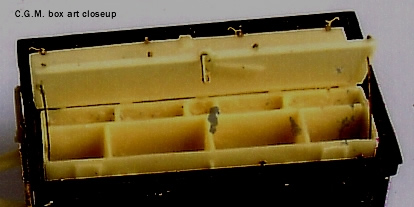
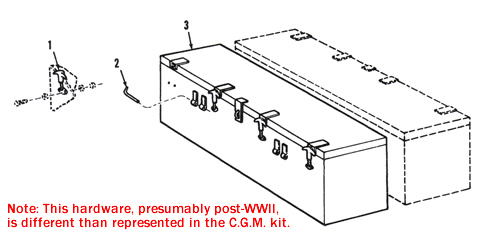
I was quite disappointed with the quality of the castings of the two tool chests. The side walls were marred by mold misalignment and required several applications of Testors Contour Putty. The larger cavities inside the chest were cleanly cast, but the shallower ones along the back were very rough. There were bubbles along the backside of one lid, and both lids were warped. The instructions are very vague on placement of supports for the opened lids and eight locking mechanisms that are spaced along the outer edge of the chests. A magnifying glass is essential here.
Various protuberances representing hinges and latch hardware on the tool chests do not allow them to sit properly in the Italeri tub. It's necessary to raise them up a tad with some bits of plastic card stock so the latch hardware clears the side walls. Conclusion It's too bad that the overall quality of this kit can't match C.G.M.'s laudable ambitions. I hope the additional information here will be helpful to the more adventurous and experienced modelers who want to give this kit a shot. It's definately not for newcomers to resin.Additional References Chad Phillips has a very interesting reenactor website for the 33rd Signal Construction Battalion, with contemporary and historical photos showing how linesmen did their jobs. The U.S. Army Signal Corps Museum website has only spotty information. It's a shame that they don't make better use of the technology to help educate the public on the corps' historical importance. The Circuits of Victory site is worth a quick look; run your cursor over the RL-31 stand in the photo to take you to another page of information. As mentioned, Plus Model has a very nice set (#085) of 6 different photo etched reels (five Allied, one German) that include two simple stands (not really representative of the RL-31) and resin castings of wire rolls. Government Issue Collector's Guide by Henri-Paul Enjames has a very good section on the equipment of the Signal Corps, from tools to radios to switchboards. This book is a must-have for the serious U.S. Army modeler. -tss- Introduction |
 |
 |
 |
 |
 |
 |
 |
 |
 |
 |
 |
 |
|