 Base
and Presentation Base
and Presentation
I wanted
to do something different in the presentation of this particular
vignette, instead of just placing it on a wooden base that was covered
with a sidewalk and cobblestone street. As I worked out the ground
plan, rearranging the two building elements and figure to get proper
distances from one another, I saw that I was getting some interesting
angles set in a diagonal progression, and I could do a staggered
sidewalk, which I made from a sheet of balsa foam. This is a nice
product to work with, as it cuts and carves easily and holds paint
well. Unfortunately, it is almost completely covered with debris,
but I sectioned and painted it all just to cover my bases (so to
speak).
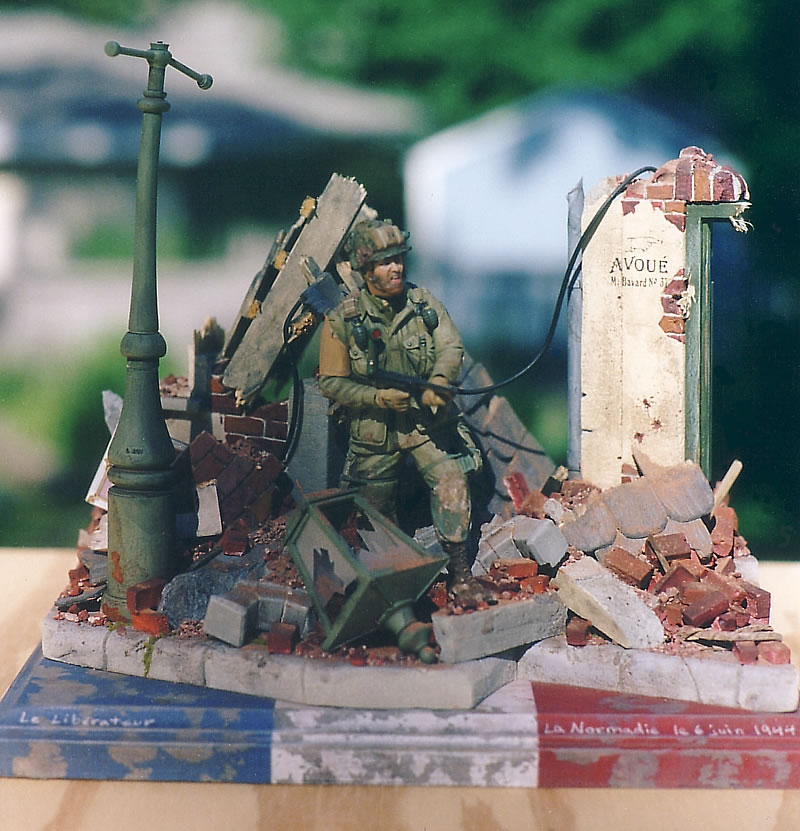
Rather
than putting cobblestones down, I decided to paint the wood base
(purchased at a crafts store) the colors of the French flag, but
aged and worn. First, the base was stained grey and sealed with
flat lacquer. Then I masked off the sections one by one. I dappled
the grey surface with a plastic pan scrubber dipped in EZ Mask.
When the EZ Mask was dried, I painted the flat color, and after
that had dried, I rubbed the EZ Mask off the surface. Either the
wood was still too porous, or the EZ Mask isn't really suited for
wood, because it took some effort to remove it and expose the wood
beneath the paint. When the three sections were completed, I gave
the base a wash of turpenoid and black/sienna mix. The sidewalk
was glued to the dry surface, and the buildings and debris were
added.
 The
building elements and street lamp come from Verlinden. The building
sections were constructed and painted as usual, with the addition
of wood trim for the window and door frames and flooring. The
building elements and street lamp come from Verlinden. The building
sections were constructed and painted as usual, with the addition
of wood trim for the window and door frames and flooring.
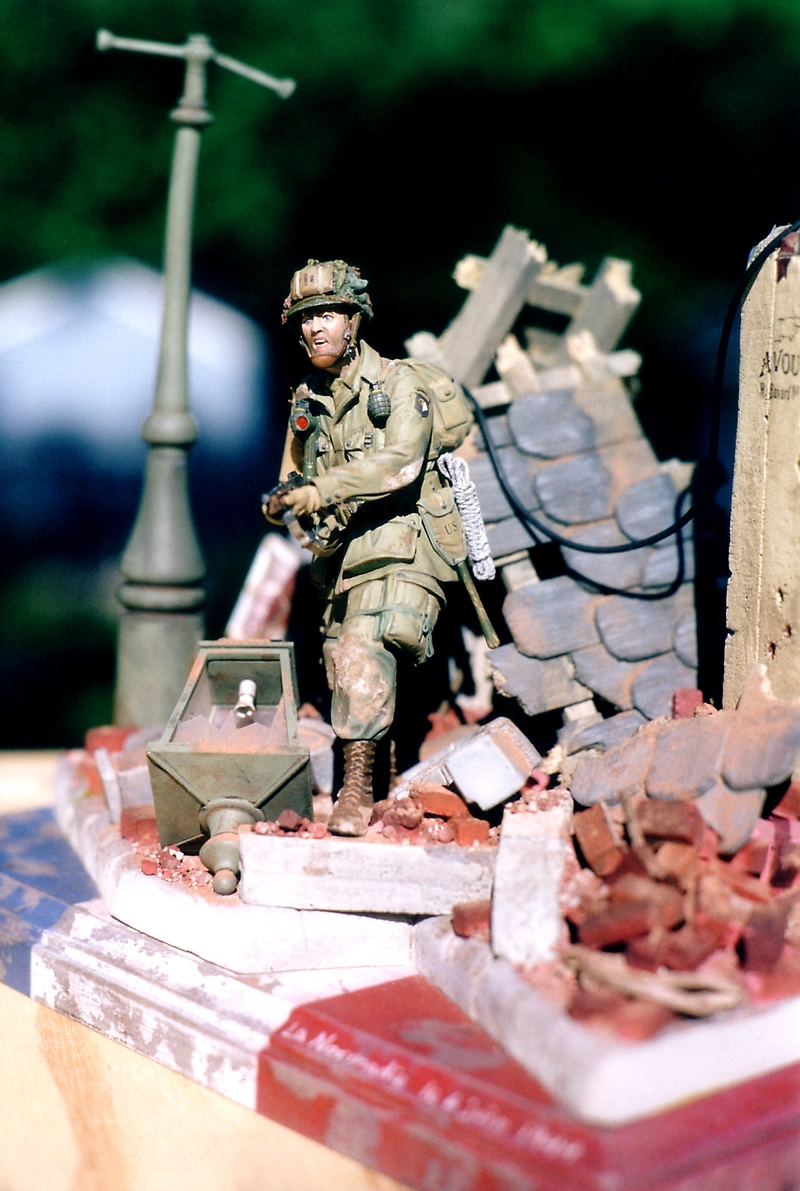
The
street lamp is tall compared to the other parts of the vignette,
and I didn't want it to overpower the rest of the scene. I decided
that "damaging" it by having the lamp box broken on the
ground would keep the height in check and reinforce the sense of
devastation. First, I inserted the top port of the pole into boiling
water and bent it slightly, away from the buildings, and glued one
of the horizontal arms askew, to suggest how the lamp was struck
by building debris. I drilled out the end of the post and bottom
of the box, and added conduit pipe to the end of the post and broken
electrical wires running from the box. The light bulb was cut in
half and hollowed out. I cut the clear plastic sheet that comes
with the lamp to represent broken glass.
The
frame for wedding picture is from one of VP's 1/35 scale sets; the
photo was resized from an actual period wedding portrait I found
in an antique store. Cut up bits of clear plastic represent the
broken glass.
The
rubble is a mix of cat litter, sand, sawdust, and wood scraps, mixed
into a paste of artist's terra-cotta tempera paint and glue. This
was spread over pieces of foam that helped build up the debris piles.
Layered into this were 1/16 scale bricks from Custom Dioramics,
which had to be painted to match. More rubble was added using white
glue, and the entire area, including the figure, was dusted with
MPP powders and sealed with a flat spray.
I'm
quite pleased with this project. It was relatively quick for me
(just a month) and was a good change of pace.
Introduction
Construction and Detailing
Paint
and Decals
Base and Presentation
|