| Building
an M36B1 from Tank WorkShop |
 |
The Hull ExteriorSuspension and Tracks
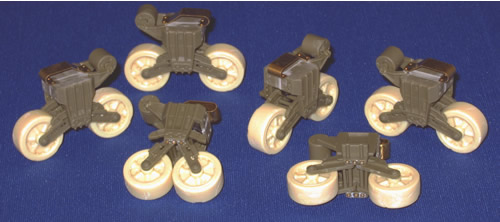
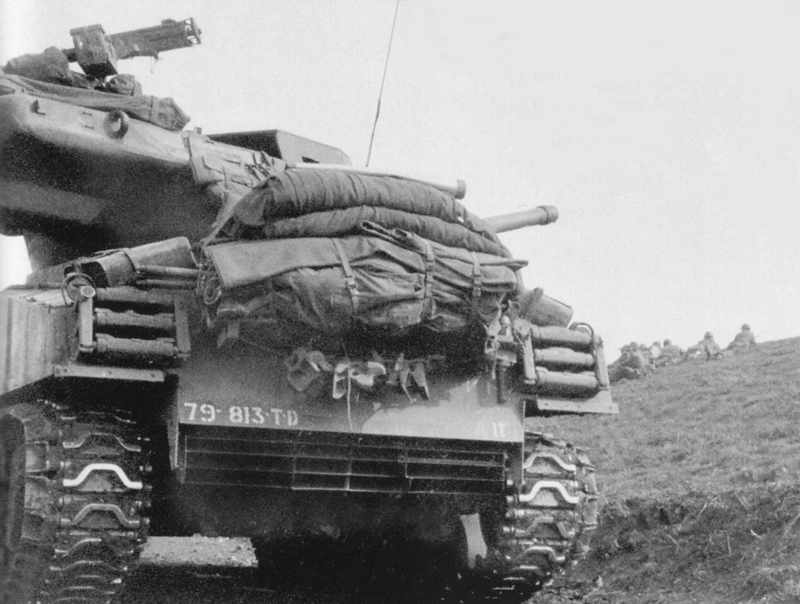
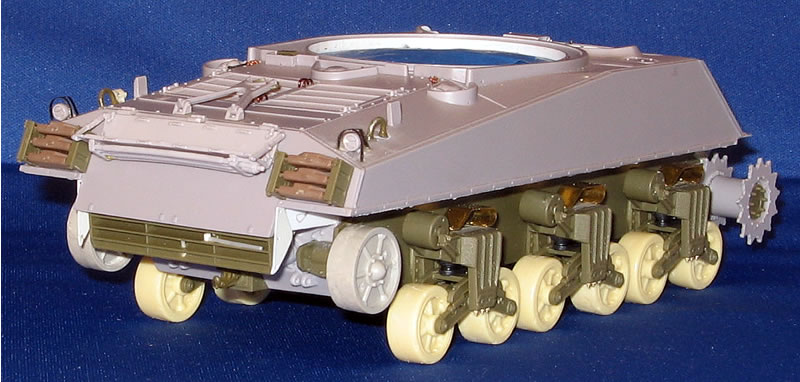
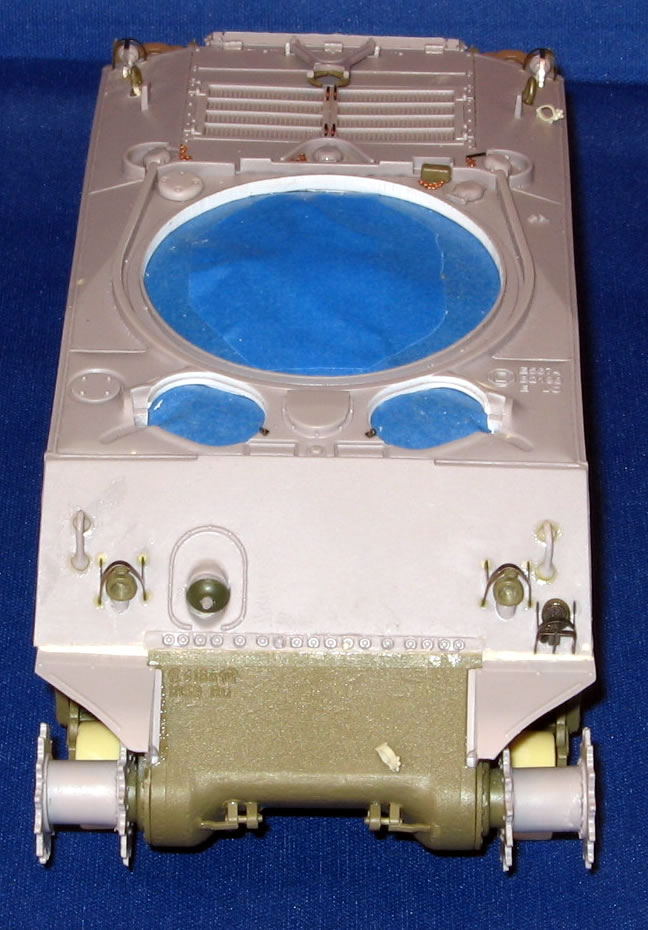
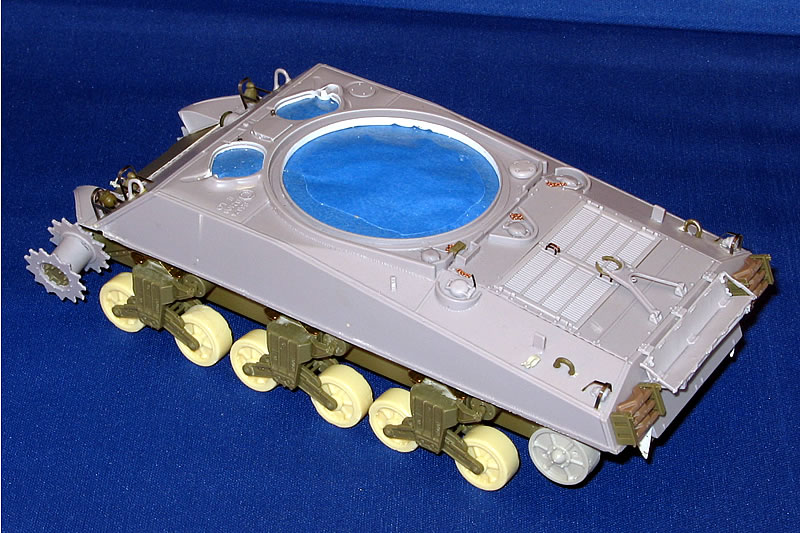
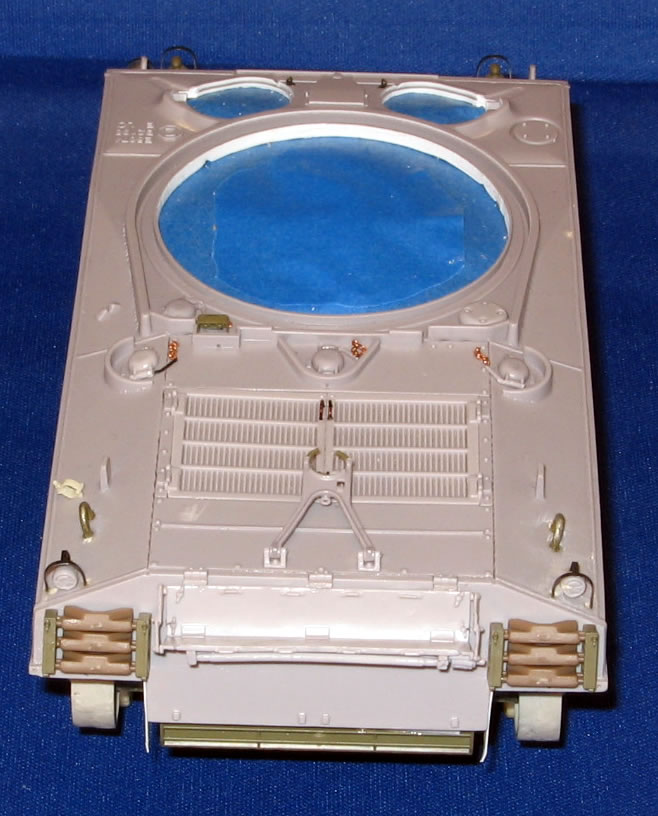
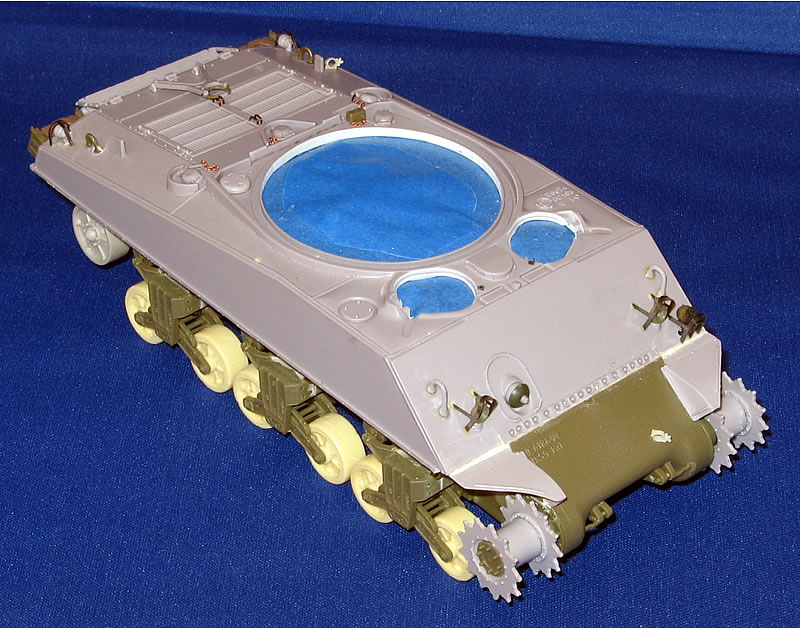
This was my biggest disappointment with the AFV Club kit. It's a complete mystery why AFV Club should produce road wheels without finished backsides. I pulled out Fort Duquesne's VVSS Update Set, a popular replacement for Tamiya's wheels at the turn of the last century. Bob Collignon made the pattern, complete with grease nipples, and they fit nicely in the AFV Club bogies, which are moveable, as you can see above. I chipped the wheels a bit before securing them in place, to give them that battle-worn look. You need to be careful during assembly since the levers and arms on the AFV Club suspension lack detail on one side, which should be faced against the hull and not outward. I finished off the suspensions with LionMarc's 1/35 Sherman Brass Skids with Nuts & Bolts, carving off the somewhat thick plastic skids and supplying the three missing bolts on the bottom of each of the pin mounts (inner side too). Finally, I drilled the four bolt holes on the open side of the spring guard. The Fort Duquesne set comes with excellent rear idlers, front sprockets, and final drive housings. Somehow, I temporarily misplaced the idlers during a lull in the action, so a pair was pulled from the spares box. The inside of the sprocket housing is not equipped to handle the large axles (the set is designed for Tamiya, Italeri, and Nichimo tanks), so I was forced to use the TWS sprockets, which are not as well formed as their plastic counterparts, resulting in significant gaps around the retaining hub. (Must find that mud recipe....) As mentioned earlier, it was not until I was painting the hull that I wondered...Hmm, is AFV Club's straight roller armed really correct for an M36 built on a Sherman body? Or should it be the raised arm style? A moot point that far into the process! But I'm doing some research and will update this article if I find the answer. But until then, this is something that you might want to consider before you build and paint the kit.. Pictures tend to show the M36B1 with chevron tracks, either the T54 steel chevrons as seen below, or the all-rubber T48 version. And they were commonly equipped with extended end connectors (EECs). I had a spare set of T54s from a Tamiya M4A3, so that option was a no-brainer for me. Once I had the bogies glued to the lower hull, I pulled out the Tamiya rubber band tracks and guess what—they were short enough so that the track bowed between the two sprocket plates. Comparing the AFV Club hull to a finished Tamiya M4A3, it appears the AFV Club's suspension spacing is a little farther apart that Tamiya's and there might be a difference in hull length. It's also possible the Fort Duquesne wheels are differently sized from Tamiya's. In any event, the rubber band track was not going to do what I wanted it to do. So much for the easy way out. I'm not wild about individual links but it seemed I was going to have to go that route—and add the EECs as well. The donor kit comes with a sprue with couple dozen or so T48 links, only six of which need to be used in the spare racks. They required some cleaning of the ejector pin marks, as I feared. I set aside the half dozen spares, and made up two short runs with the remainder to see how they ran around the TWS sprockets (this was a problem I ran into my Tamiya Lee project when AFV Club tracks didn't align with the Tamiya sprockets. Fortunately, things came together correctly this time, leading to a several-month quest to find AFV Club T48 links, which appear to be out of production. You will also note in the photo of the front end of the vehicle near the bottom of the page, the sprockets, when placed on the axles, are out of alignment with the wheels behind them. The axles had to be ground down to properly seat the sprockets. Turret Ring The upper hull has a thick pour gate in the turret ring and thick flash there and in engine deck opening to remove. The turret ring opening is not wide enough to accept the AFV Club turret, so you must carefully carve it wider and wider until you get the proper fit all around, roughly one millimeter in thickness. You may need to scrape this out a bit later after it gets a coating or two of paint. Likewise, the hatch openings need some clean-up. I supported the thinner areas in the deck around the hatch openings with some Testors contour putty. Deflector The deflector presented another speedbump in the project. The TWS instructions note the exterior components it provides to add to its M4A3 hull. But it doesn't fully note other AFV Club parts used or the crrect trailer hitch and antenna base absent from both kits. I thought perhaps a page was missing from my instructions, but that was not the case.
As seen on the rear ofthere are sand shield plates on either side of the deflector. I don't know if those were necessary, but they are not included in the AFV Club kit. So it took some additional research to determine if and how the shield plates (from which the deflector spins up or down) could be installed. I happened to have Formation's deflector set, designed by Mike Canaday, (who offers us a good deflector how-to article). I blanked off the open portion under the overhang, fixed the AFV Club deflector in place (after adding the adjustment vane) and created the side plates using the Formation parts as templates. The end result looks good, but the TWS kit should supply these parts and address this area of construction in its instructions since this is an important part of the conversion. Another "hitch" is that the towing hitch from the AFV Club M36 is different than the kind used with the Tamiya M4A3. This is another item that TWS should provide. I had to liberate one from an old Tamiya kit. The Rest of the Fittings After getting the major work done on the hull halves and masking off the openings, I glued them together, using super glue and a lot of pressure to get the front and back ends to get the parts to mate correctly. The front fenders needed some adjustment once the upper hull was glued on the lower hull. While I was able to get the TWS front bolt strip to align with the top of the AFV Club housing, the fenders were off-kilter. I had to shave down the left fender's outer edge, but the right fender somes up short as seen in the photo. And some unevenness in the TWS upper hull where the fenders are joined to the glacis became apparent. I tried smoothing it out with an emery board but it was tough with the front bogies now in the way. I used some putty to conceal the gap. More mud please.... I lost one of the TWS rear lift rings when it snapped off. Even after washing, the resin parts do not bond together as well as other resins I've worked with, and this was a problem several times during the project. I pulled spare lift rings off an old Tamiya kit. I also needed to replace the TWS bow gun armor shield which I severely maimed while removing it from the carrier. I pulled out a spare from an Academy M36, which has the bow gun for the Korea War version. ("See honey, these kits come in handy even when I haven't built them yet.") Both of the TWS rear lights had air bubbles requiring putty. The gas caps are separate items, and I lost locking pin to one somewhere along the way that I had to replace. I added chains to the pins, Eduard brush guards to the rear lights, and wire grab handles for the engine deck doors (they will probably be removed because of stowage). The travel lock for the barrel was not glued into place until I decided on how I was going to load the deck with stowage. I've seen the lock both up and covered in photos. TWS does not provide the outer jaws of the ring, and the instructions do not note that you can pull them from parts (A13) provided in the donor kit. I had pulled the Kirin sandbag set off my shelf, thinking it would come in handy if I needed to conceal the hull problems. I've seen one photo of an M36B1 with some minimal sandbagging on the classics, but none with the full side racks. But it's certainly conceivable that some of these tank destroyers did opt for the extra (perceived) protection. The Kirin parts fit well up against the hull. After some debate, I moved forward with installing the glacis fittings, figuring that if I ended up using the sandbag armor these areas would be covered so any damage to the finish would not be seen. I did hold off on the antenna mount, which was fixed on top of an upsidedown "L" shaped bracket welded to the glacis until I was sure what direction I wanted to go in with the sandbagging. I hollowed out the plastic headlights to accept MV lenses after the hull was painted. I drilled a hole for the siren wire, and used the Eduard brush guards instead of the parts from TWS, which had broken. When I compared the TWS hull hatches to some I had on hand from Tiger Model Design, I had to go with the latter: Better detailing and "glueability," and the receiving sleeves for the periscopes were more squared. I wanted to have the periscopes stowed while the crew was rearming the TD. I added wire grab handles and Eduard latches to hatches. Because they are opened, the TMD hatches work fine with the DML hull even though they are designed for the Tamiya Sherman.
Introduction |
 |
 |
 |
 |
 |
 |
 |
 |
 |
 |
 |
 |
|