|
WWII
U.S. Army M7 "Priest" |
 |
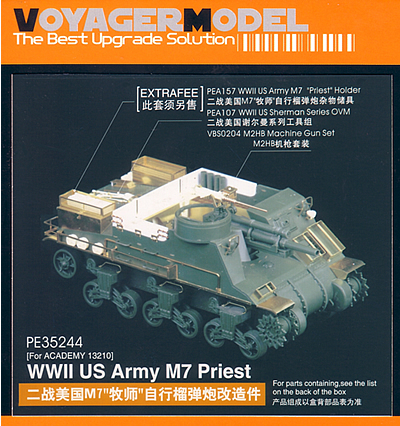
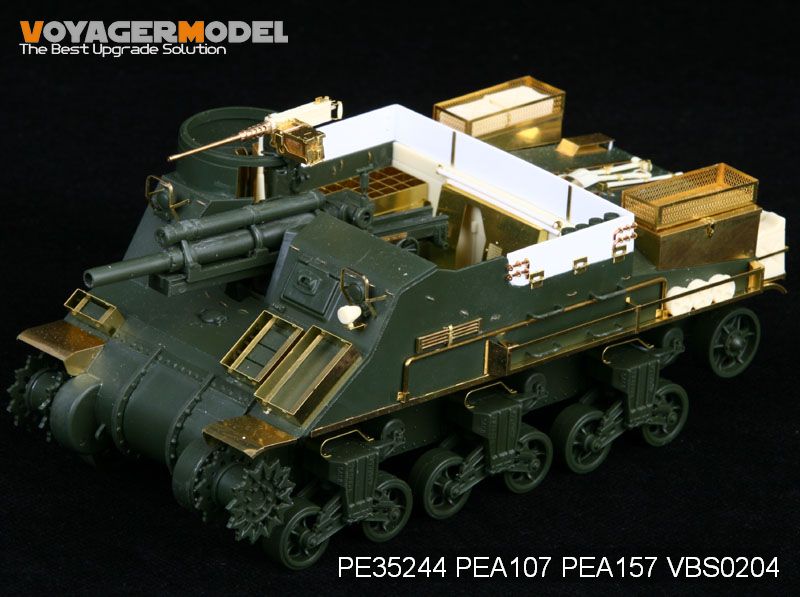
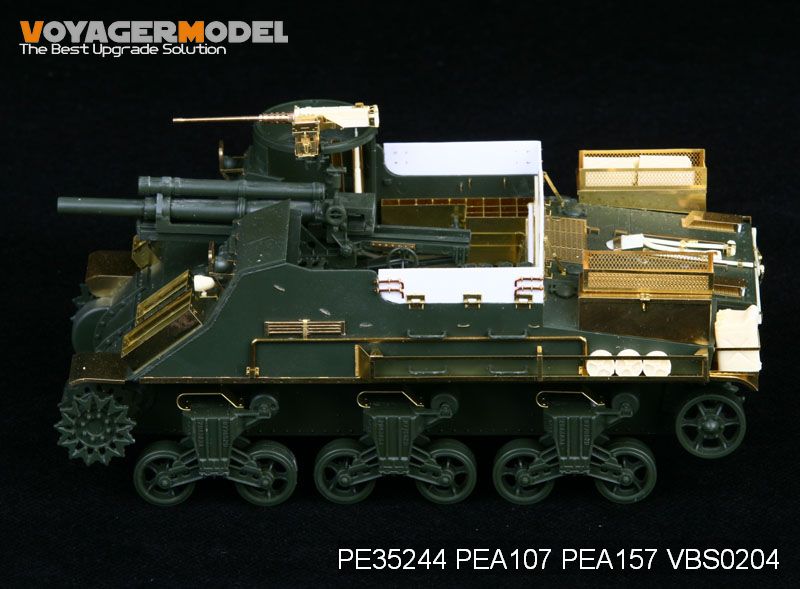
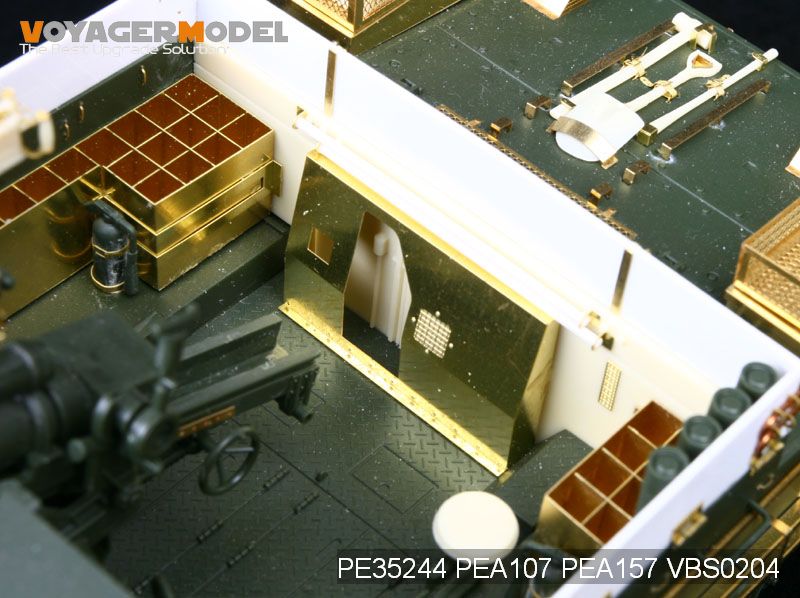
Voyager Model This is an extensive set for detailing the Academy mid to late M7 Priest, but does not go to the extravagent lengths of Eduard's six-set update. The main highlights here are inclusion of ammo bins for the 105mm rounds and .50 M2 machine gun boxes, rear exhaust screen, and plastic sheet and templates for the additional raiser armor around the fighting compartment. The set is rounded out with the usual attachment fittings for tools, light and siren guards, and engine deck stowage bins. It also provides some resin replacement parts and the necessary thicknesses of plastic rod and brass wire to get into the more picayune detailing. However, let it be stated early: this is not a set for beginners, who might find picking and choosing among the various Eduard sets less daunting (even the much simpler Edurard set for the Italeri kit has some useful replacement parts for the Academy kit). Also, it's not quite everything it purports to be. The box cover shows a Priest dressed with Voyager parts, including brass for the distinctive hull side racks typically used on M3A1 halftracks. There are a few pictured items called out as not being included in this set (an "extrafee" is required for the baskets, resin machine gun and brass barrel parts, and resin tools), but nothing points to the racks as being MIA. I was disappointed as I wanted to use them on my build of Academy's "Baboon" of the 2nd Armored Division, where these racks were prominently used. (Fortunately, I'm covered by some spare Tamiya parts set aside long ago. Lesson: Don't throw away spare parts.) Also, the armor covers over the engine deck gas fume vents are shown in the cover, but are not included inside.
The Voyager set has some good things going for it. It's barely perceptible, but the brass comes on sheets of different thicknesses that would seem to be more scaled to their relative size. They're not too thin, nor are they too thick like some of the older Verlinden pieces. These seem to be just right. Bend lines are clearly etched and I was able to fold even the longest pieces easily with a hobby blade against a metal ruler. You also get some small frets with bolts and straps. The resin parts are well cast and free of air bubbles. But the quality of the parts is only part of the value. The others are accuracy and ease of use. This is where the set falters some.
The resin bits include a new bulkhead wall with the radiator and oil line molded in situ; it would be more accurate to stand the oil pipe away from the wall. The sheet metal cover is fashioned in brass, but oddly: there are etched recesses that run across the top and bottom of the center section which I thought either served to represent how the cover was attached to the bulkhead, or acted as locator marks for affixing the small bolts. But they don't appear in the instructions, and the way the shield is folded (ominously, the instructions don't show how to fold the piece as they do other pieces), the etched recesses end up on the back side, obscured from view, as you can see in the photos where the Voyager brass is accompanied by the Academy plastic part. Voyager provides a pair of nicely-cast M1 Garands to insert in the long scabbards mounted in the pulpit. Unfortunately, the Priest was initially equipped with M1 carbines, and later with Thompson submachine guns. Ditch the Garands and scrounge up some carbines or Tommy guns (which appear in the August 1944 tech manual equipment list). Though it's easy to thin down the kit's bogey skids, Voyager supplies replacement skids in the mid and late styles for the VVSS suspension, if you use that option from the Academy kit. Voyager thoughtfully provides the oft-missed bolts for the skids, and they are called out in the instructions.
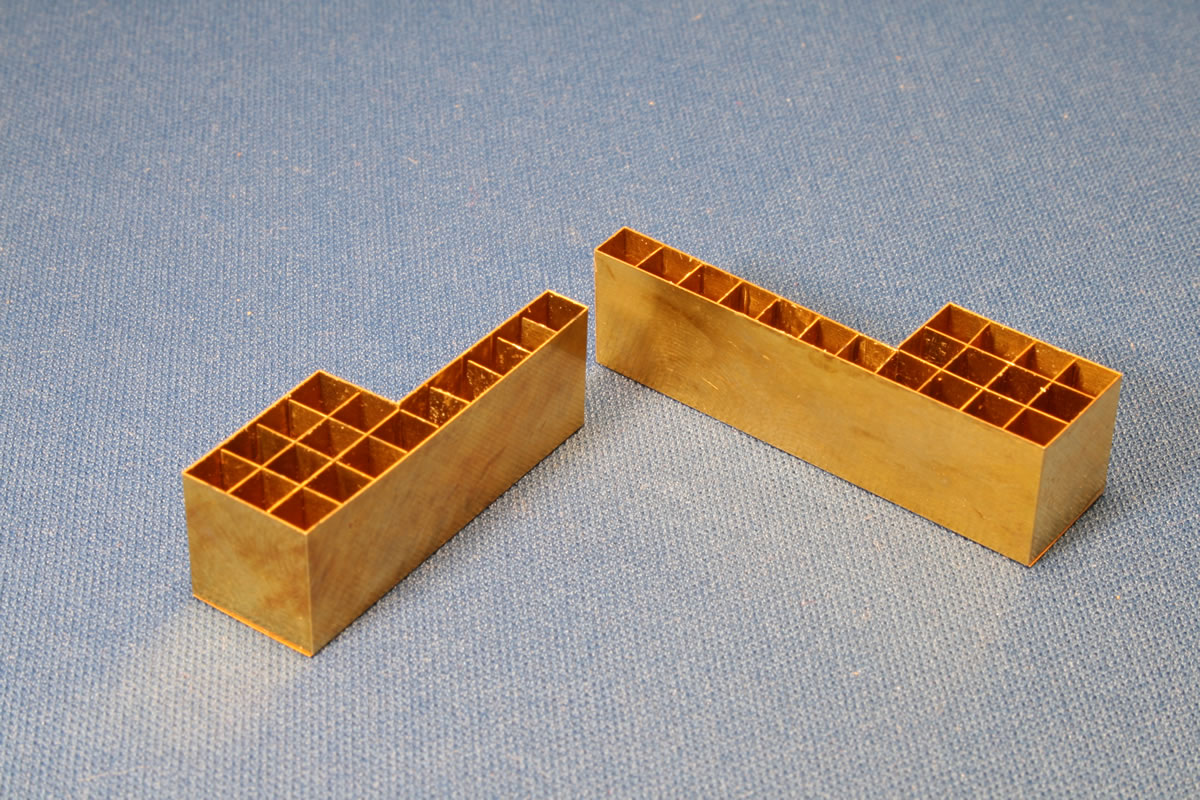
I was apprehensive as I approached building the ammo bins, but the process went much more smoothly and quickly than I anticipated. The parts are logically deconstructed into pieces, so the outer walls come together easily. The full-length interior dividers—which the Academy parts lack—are either short single walls or sheets of multiple compartment walls that are interlaced together like dividers commonly seen in cardboard boxes. Best of all, they are large enough to accept the Resicast fiberboard ammo tubes. That enables the modeler to depict bins that may be half full (I wish I had used these in my Italeri Priest for that reason!). I will set these aside for yet another Priest I have in mind that can use this versatility. You can see how my bins turned out below.
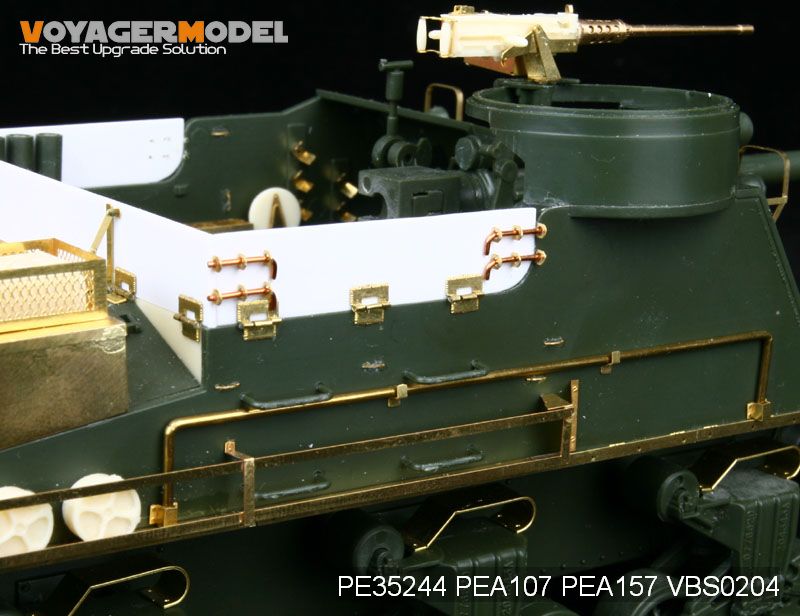
The large rear stowage bins can be positioned with their lids opened; with thinner walls than the plastic counterparts, the brass will present a more realistic character with an open lid. The supplemental armor plate around the top of the fighting compartment is easily scratchbuilt with the plastic and template provided in the instructions. However, the rear wall is constructed out of three pieces, which is fine if you want to have one or all of these sections raised or lowered. But if not, it's easer to cut one long length and then add the brass parts over the joints. This brings us to the more complicated aspects of this set. The hinged upper armor plates were secured with small bars that slid through three rings welded to the wall. To accomplish this with the parts, you need to measure the locations and drill shallow holes into which the male prongs coming off the rings are glued. You need to do this with the supplied tie downs, as well, should you chose to use them (personally, I think Accurate Armour's tie downs are easier to use and represent the original tie downs well). The hinges that secure the additional plates to the wall need to be formed over short lengths of wire. The effect is to more accurately reflect the real world objects, or perhaps to make these parts movable. There are additional hinges and machine gun cradle parts that also are designed to be assembled for possible mobility. So that's why I pose the "not for beginners" qualifier in the opening paragraph. If you don't have more than a few Eduard sets under your belt, you might get put off by the more intricate nature of this set. On the other hand, I'm sure there are some brass masters who will find this to be an enjoyable challenge. Another maddening aspect of this set is the instructions, which comes in two double-sided 30" x 4" strips. Not very workbench friendly! Though deficient in numerous areas, this is an impressive set overall that will shine in the hands of highly experienced modelers. But buyer beware! Thanks to Saul Garcia and Voyager Model for the review sample. -tss |


 |
 |
 |
 |
 |
 |
 |
 |
 |
 |
 |
 |
|