|
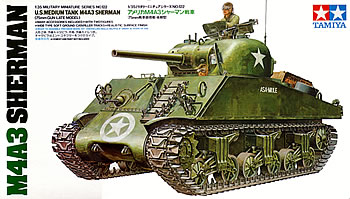 Tamiya Tamiya
35122
This
classic kit represents an M4A3(75)W VVSS — or an M4A3 Sherman
with a 75mm gun and "wet" ammunition stowage, with vertical
volute spring suspension. Unfortunately, Tamiya misidentified a
late M4A2 with appliqué armor as an M4A3. The appliqué
armor was welded to the hull sides of the M4A2 to provide added
protection to the ammo stored within. But the hull in this kit is
the intermediate style with wet stowage (i.e., the ammo was stowed
in a bath ethylene glycol, or antifreeze). So don't use the appliqué
pieces as the kit instructs.
Beyond
that, there are only a few other significant things to be mindful
of when building this kit, which also serves as the platform for
Tamiya's M4, the M4A3 "Winter Breakthrough" Sherman, and
the 105mm Sherman howitzer. Of course, there are many other smaller
details that you can add, depending on your level of interest, skill,
patience, and bank account.
The
old figures can be given some life with careful painting, and new
heads from Warriors or Hornet would help a lot. But there are many
other tankers out there who would look good crewing this kit.
I built
a couple of these Shermies when I got back into the hobby, but that
was before I had the benefit of these tips and tweaks, collected
from various modelers on the Internet.
| Deficiencies |
Solutions |
|
|
| As
with all Tamiya Shermans, the sponsons over the top run of track
are missing, enabling one to see through the tank if a hatch
is left open. |
Get
some plastic card stock and check out this diagram at Archer
Fine Transfers to build your own sponsons. |
|
|
| Wheels
and idlers are hollow on the back sides. |
The
best alternative is the "VVSS Update Set" from Fort
Duquesne Military Miniatures; The Tank Workshop also makes a
set. Otherwise, you can make a casting of the one spoked side,
then fill the backside with putty and press the casting on top
of it to create the proper relief effect. A third alternative
is to get another kit, saw the wheels in half, and mate the
two detailed sides. Another alternative is to buy Academy's
M12 or M10 kits for the extra wheels. |
|
|
| Bogie
units need additional bolts and bolt holes. |
The
bogie units were universal; the return roller arm and skids
could be placed on either side of the bogie housing. Drill
four holes on the open side of the housing. Add Grandt Line
bolts to the top of the skids where they attach to the housing.
If you're really anal, you could add four bolts to the inside
of each of the return arms.
Painting
note: the return rollers were metal, not rubber.
|
|
|
| The
welds on the top of the hull are recessed, but should be at
least flush with the hull top. |
Use
stretched sprue or a very thin band of putty to fill the recess,
and texture with a hobby knife or toothpick. Also, add weld
bead texture to front and back corners of hull sides |
|
|
| Headlight
and tail light guards are thick. |
Thin
down kit parts, or replace with photoetch. Add chained stoppers
and receptacle to headlight guard (used to plug socket when
headlights were removed). Add electrical cable to back of
rear lights and run straight down into hull.
Painting
note: Upper portion of tail light is red, lower slot is bluish-silver.
|
|
|
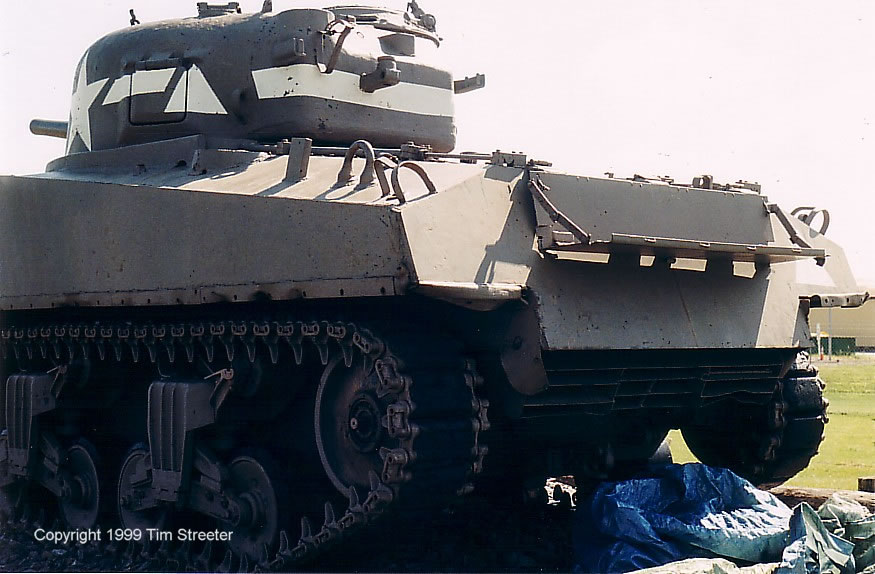
| Engine
access door rests are missing. |
This
was a feature on all wet stowage M4A3 hulls: a piece of steel
welded to the sloping faces of the top hull on either side of
the engine access grills, designed to relieve pressure on the
access door hinges (photo).
Cut two pieces of plastic card approximately 3mm wide by 4mm
tall and 1mm thick. Glue them centered with the grill doors,
and centered onto the sloping face or in line with the rear
lifting ring. |
|
|
| Appliqué
armor was not used on this tank. |
This
was a wet stowage, so don't use it. |
|
|
| Grab
handles on engine deck are molded solid. |
Carefully
carve them away and use thin wire to replace them. Or cover
them with stowed gear or riding soldiers, but don't completely
block the deck grates — the engine's gotta breathe! |
|
|
| Splash
rings around fuel caps lack drainage holes. |
With
the tip of a new X-acto blade, drill a small hole at the bottom
center of the three guards. It might be easier to drill the
center guard after removing the solid engine grate handles.
The L-shaped pins that secured the fuel caps in place usually
had small chains attached to the outer end of the pin and then
to the hull. |
|
|
| The
slats on the exhaust deflector (part B42) are too thick. |
Thin
them down with hobby knife; add detail as suggested in this
article.
|
|
|
| Casting
numbers from transmission and turret are missing. |
Carefully
carve off part numbers from sprue and glue to surface. |
|
|
| Hull
missing sand shield attachment strips. |
These
pieces, three to a side, usually come with photoetch sets. But
you can drill small holes into thin plastic strip and attach
them to the lower edge of the hull. Position the strips so the
holes are below the hull edge. Add 1/8" long slivers of
plastic in intervals to the upper edge of the strips to denote
welds. |
|
|
| Turret,
upper hull section around driver hatches, and transmission cover
lack texture. |
Use
Gunze Sangyo "Mr. Surfacer 500," or Bondo thinned
with Testors liquid cement, to add texture; be care not to overdo
it, because Sherman texture is more flat and with shallow pits
rather than raised and bumpy. Do not apply to rolled steel hull
and lower hull. |
|
|
| As
with all Tamiya turrets, the slight bulge on the right cheek
is missing. |
Build
this area out with some epoxy putty according to this
diagram. |
|
|
| Commander's
early split hatch missing leather pad. |
Create
pad from piece of plastic and attach to hatch without periscope.
Add handle and other fittings. |
|
|
| Hatches
missing periscope guards. |
Easiest
remedy is found in the larger photoetch sets. |
|
|
| Turret
missing commander sighting vane, rear machine gun holder. |
These
items are found in the larger photoetch sets. |
|
|
| Machine
gun pintle mount missing locking handle. |
To
really do this up right, you need to wrap a small rectangular
block of plastic perpendicularly around the back of the pintle
on part B21 or C11, and then attach a small bit of stretched
sprue to the right edge of the rectangle, facing forward.
The
storage mount for the MG (part C1) also needs a small handle
on the left side, fashioned as above.
The
.50 MG can also use some chains and and a locking lever on
the cradle.
|
|
|
| "Classy
Peg" wolf head should face forward on both sides of hull. |
Decals
face same direction. Hard to fix this error aside from not using
the decals. |
|
|
| The
kit's purported rations boxes aren't legit. |
Use
them for generic storage boxes and get some good rations boxes
from Hudson & Allen. |
|
|
| For
Variety... |
|
|
|
| To
open the loader's hatch... |
Carefully
carve the sealed hatch with a hobby knife, then use the insert
and hatch provided in Verlinden's "Sherman Update Set."
Or, swap the turret with one in the "Winter Breakthrough"
set. |
|
|
| The
steel chevron track includes the duckbill end connectors, which
gave the tank greater "floatation" over snow and soft
terrain, but... |
These
things broke off the track fairly easily, so you can clip off
a few of them for a more "used" look. You could also
swap the rubber chevron tracks from Tamiya's M4, particularly
for a post-Normandy setting. |
|
|
| To
build an M4A3 wet stowage with a T-23 turret and 76mm gun... |
Swap
turrets with Italeri's M4A1 Sherman, fix or replace the Italeri
barrel. Use kit tracks or plain block, rubber chevron, or
steel cleat.
Then
you can use the Tamiya turret on the Italeri hull, creating
a large-hatched M4A1 with a 75mm gun (this combination was
standard for duplex-drive tanks that took part in D-Day, but
photos exist of non-DD tanks in this configuration).
Or,
use T-23 turrets from The Tank Workshop of Chesapeake Model
Design.
|
|
|
Here
are some update sets that you could use with this kit if you really
want to dress it up:
Aber
- Sherman
M4, M4A1, M4A3 (35032) - Extensive photoetch set for those
who want to go whole hog.
Chesapeake
Model Designs
- 75mm
Sherman Gun Barrel (CMD 16A) - Metal gun tube.
Custom
Dioramics
- Sherman
Detail Set (CD2001) - Photoetch details.
- Sherman
Periscopes (CD2002) - Resin and photoetch periscopes and guards.
Eduard
- M4A3
Sherman (35369) - Updated photoetch set, replaces #35061.
Fine
Molds
- WWII
U.S. AFV Periscope Set 1 (MG24) - Set of clear plastic periscopes;
you carefully paint the metal areas, leaving the periscope lens
clear.
Fort
Duquesne Military Miniatures
- VVSS
Update Set (FDA101) - Exquisite resin set of fully detailed
solid spoke road and idler wheels. Both wheel types have grease
plugs, and the road wheels even have the rivets on the inside
lip of the wheel rim. Also included are a pair of transmission
covers and single piece drive sprockets fully detailed on the
inner side, which provides additional detailing if your Sherman
is have its track replaced. I've got two sets of these and will
undoubtedly need more!
Jordi
Rubio
- U.S.
75mm M3 (TG-17)
- Metal barrel.
Ordnance
Models
- M4
Sherman (TTWD 105B) - Small, inexpensive fret of photoetch
with such essentials as the periscope and headlight guards.
RHPS
Models
- T54E1
U.S. Metal Chevron Individual Link Track Set (RH04) - Link-to-link
late war track with metal chevron. Similar to kit's rubber band
track, but without duckbills.
Royal
Models
- Sherman
M4A3 (052) - Another extensive photoetch set.
The
Show Modelling
- M4
Sherman Detail Set (SH-078)
- Photoetch set, includes numbers for casting marks.
Verlinden
Productions
- Sherman
Update Kit (0204) - Offers periscopes, two antenna mount styles,
dished road wheels, oval loader's hatch, and more.
- Sherman
Super Detail Set (0263) - Photoetch periscope and headlight
guards, machine gun cradle, tool straps, and more.
- U.S.
Tank Periscopes WWII/Early '50s (0341) - Various periscopes
for detailing hatches.
|


