|
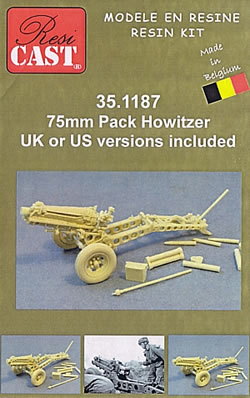
75mm
M8 Pack Howitzer |
 |
|
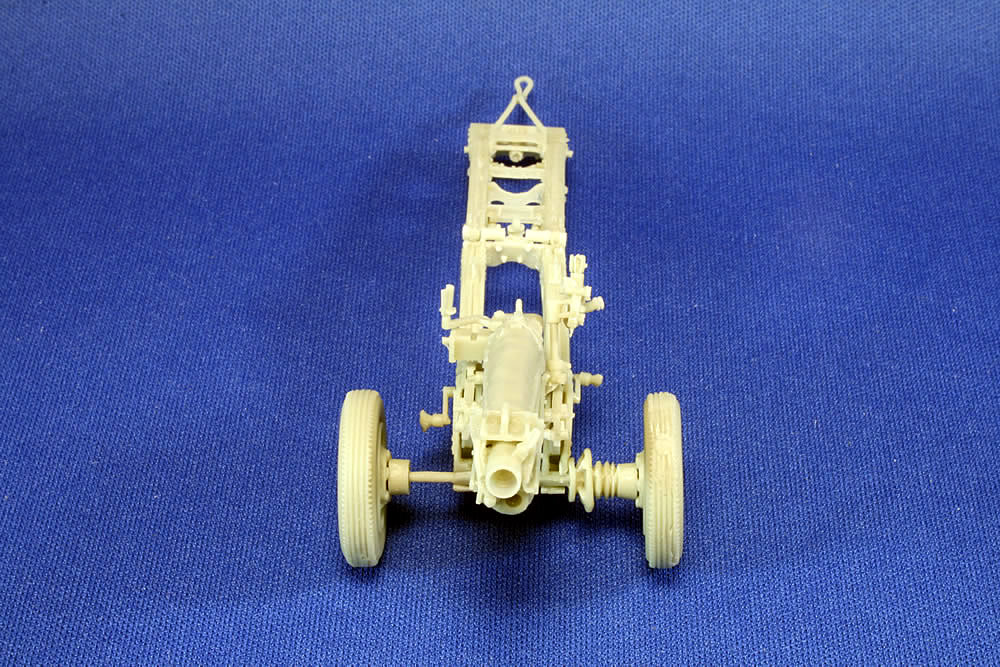
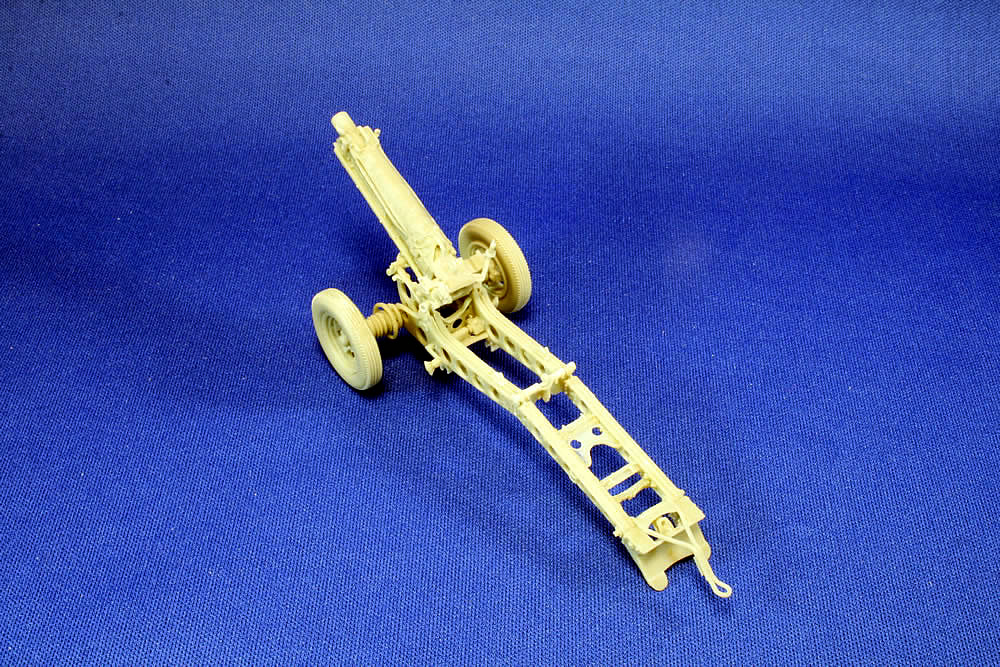
The 75mm Pack Howitzer M8 (Airborne) has a U.S. Army lineage that stretches back to the 1830s. These light cannons were designed to be disassembled and packed on the backs of mules-and indeed, many of them were lugged through the rugged mountains of Italy and other unfriendly terrains during WWII. But this war also saw the pack howitzer delivered to the front in seven crates by parachutes from airplanes or stowed in gliders. They were typically towed by the modern equivalent of the mule—jeeps. The pre-war version rode on wooden wheels, but the 1940s version bounced along on pneumatic tires. The British also used this little cannon, most notably by the ill-fated paratroopers assigned to take the Arnhem bridge. A lesser-known version, the M3, had split trails, a different equilibrator arrangement, and a seldom-used gun shield and. That carriage also served as a mount for a 105mm pack howitzer. The Kit
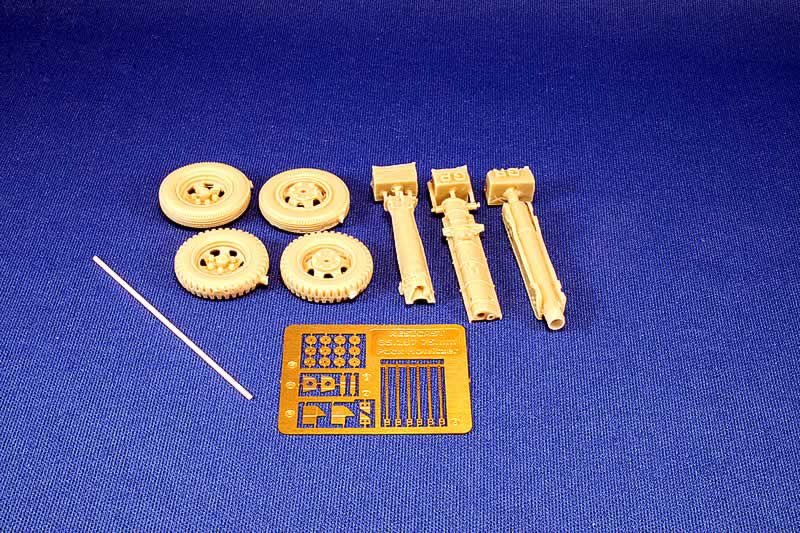
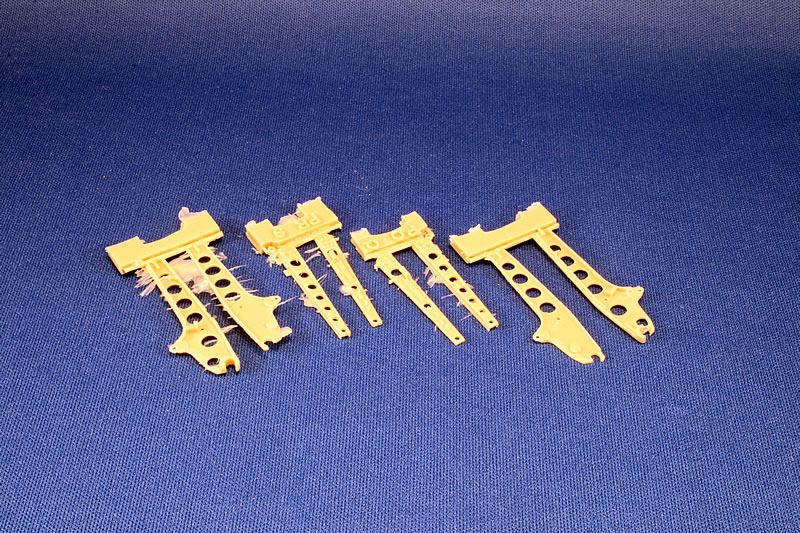
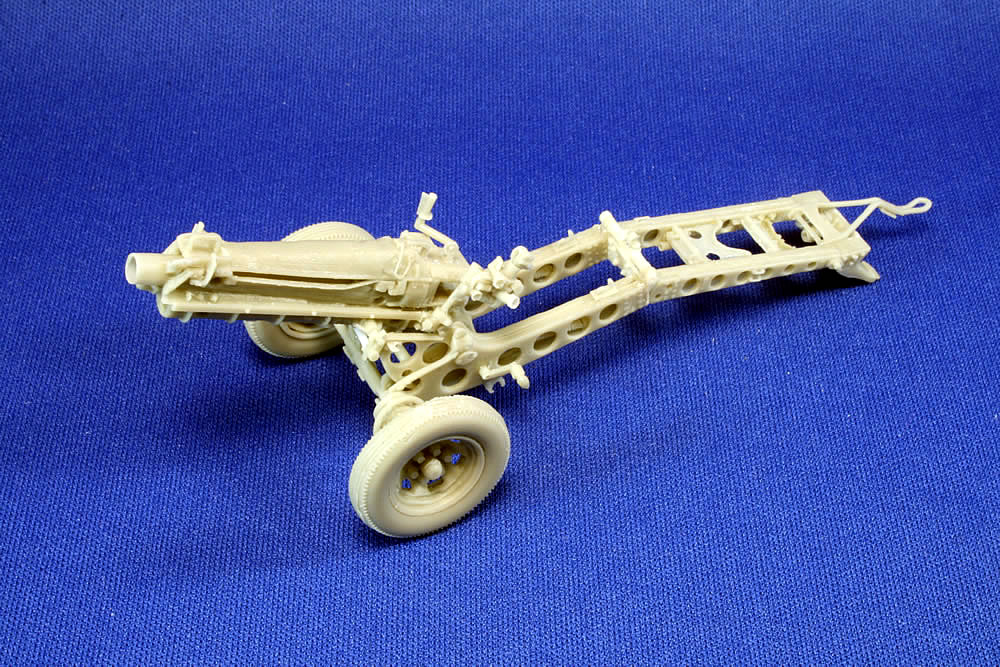
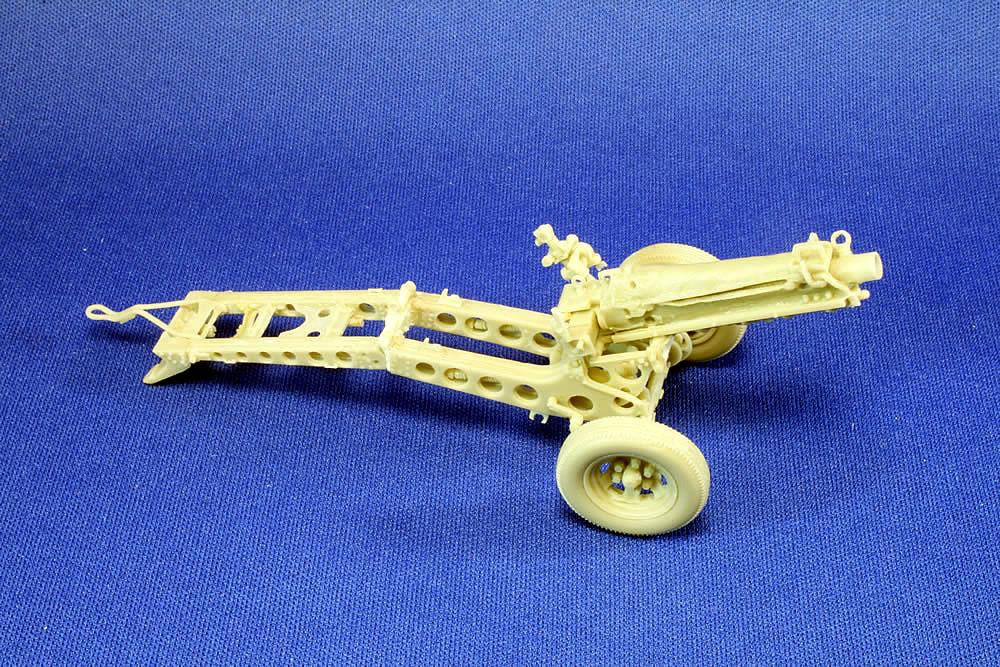
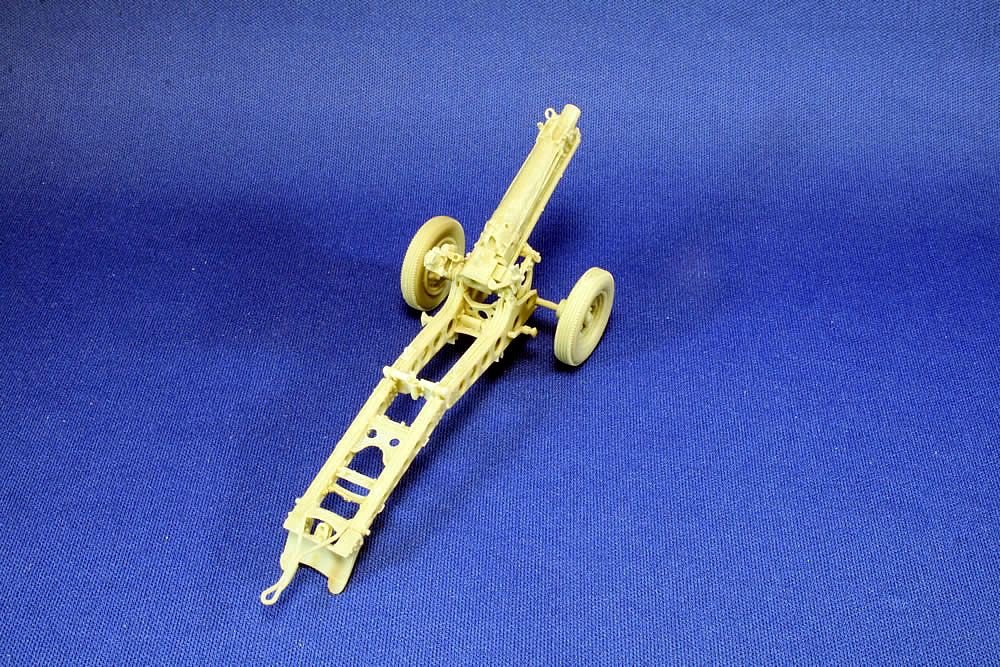
This Resicast kit can be built in either the U.S. or U.K. styles. The parts were mastered by Leon Hassing, and he's done an excellent job catching the details of this modest weapon. Some of the small parts are simply amazing. There is some flash present, and sometimes it's difficult to tell what is flash and what is actually very thin portion of a part. Look carefully before you trim, particularly the little "fins" at the ends of parts PA, PB, BC, and PD. Also note that the trail lengths had long seams running down the center on both top and bottom sides; do not scrape these off the kit parts! The Carriage The build went well through the two sections of the trails, which took about three hours. I'm always extra cautious with resin, and even more so with such small, fragile parts as are included here. The next day I came back to the bench and thought I'd dry fit the two sections of the trail. I discovered that I had installed the end plate (part PM) upside downI I slapped myself for such a boneheaded move, but in reviewing the directions I confirmed that I had put it on as instructed-upside down. A confusing note next to two photos in the instructions says, "Pivots on top!" but I took that to mean the ring that is used with the handspike to lock/unlock the two trail sections together, not that the hinge should be positioned upward, opposite as shown in the adjacent photos. Later photos, beyond the point where I had stopped building, show the plate had been reversed so the hinge would align with its mate on the other section of trail. Unfortunately, in spite of my best attempts to carefully remove the part using some de-bonding agent on the cyanoacrylate glue, the end plate splintered beyond repair. I also broke off part of one of the axle mounts on the bottom of the trail. I sent off an email to Graham Sellar at Resicast explaining the problem with the instructions and the mishaps as I tried to correct the mistake. He promptly replied and sent me new replacements parts. (I should note that the box came with extra sprues of particularly fragile parts, a nice accommodation by Resicast, but the end plate was not on these back-ups.) Another pair of photos instructs the modeler to drill out the hinge on part PM, which I had done with the original part. But there is no apparent reason as to why they need to be drilled out; if you glue the trail sections together for a static display, there is no need to make the hinge workable. But if you want to be able to disassemble the trails or show off a working hinge, then drill it out, but you'll need to supply wire of thin rod, or perhaps use the parts PZ, that are described in the parts list as "trail pins" but do not appear in the instruction photographs. Assembly of the trail sections ends with installment of the broad spade. Before you glue it in place, be aware that there are two raised receptacles that secure the U.K. version of the lunette that should be removed for the U.S. version. The instructions do not address this, and I only discovered it as I was trying to insert the U.S. lunette in place. There were at least three versions of the lunette used in the American version of the howitzer. The one in the kit appears in the April 1944 technical manual. However, the instructions include illustrations from a TM of a different lunette, but I haven't seen evidence of this type on a "real world" howitzer. You can see a third and perhaps more common version of the lunette here. The Resicast piece is too wide for the trail (as least as I assembled it) and I needed to remove the pivot nubs and thin the sides down a bit. I couldn't see any evidence of part TB in the TM photos, so I left it off. Also left off were the photo-etched parts on the sides of the trail used to stow the handspike or sighting poles. Again, I couldn't find evidence of these on WWII era howitzers, neither in the technical manuals nor photos, in spite of the instructions' claim that these fittings were common to both U.S. and U.K. variants (they do appear in photos in the back of the instruction booklet of a restored howitzer, but nothing notes the origin of that piece). The Gun and Sleigh After these speed bumps, construction proceeds with the barrel assembly, and this went together without incident. I built mine with the breech in the open position; you also can assemble it closed. The Resicast kit comes with the panoramic telescope M1 on the M3A1 mount (known collectively as the sightunit M28A1), and they have delivered a fragile little gem here, including a tiny wing nut molded in place (again, spares are thoughtfully provided in case the original is lost, but there are no duplicates of the scope parts so be careful!). Two sets of tires are provided, regular road tread and mud/snow versions. I've not seen photos of the latter type used during the war, but the instructions say to use one or the other depending on which nationality you're representing-and fails to say which ones those would be. The instructions only show how to assemble the howitzer in firing mode, and the barrel and sleigh fit right into place. No guidance is provided for putting the howitzer in travel order, so reference photos are necessary. There are no painting indications, but you can't go wrong with olive drab; a color photo I saw on the Internet of a Marine howitzer in the Pacific shows one in use with black camo.
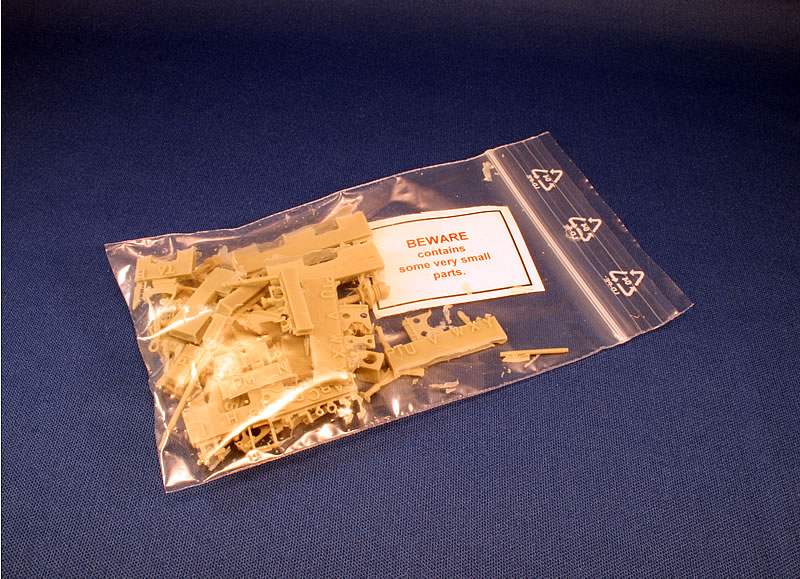
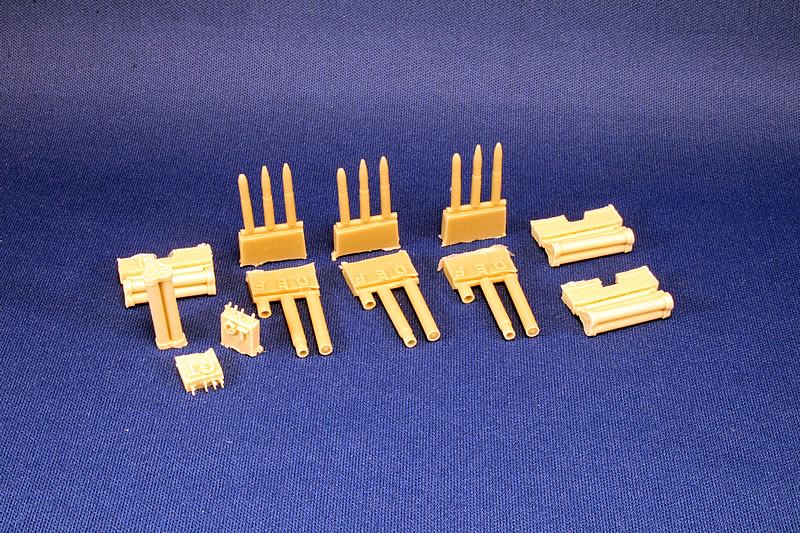
Accessories One of the impressive things about Resicast is that they go the extra mile to give the modeler enough accessories to at least create a simple yet realistic diorama. This kit includes three closed ammo tubes, three opened tubes and end caps, three runners with three different ammo rounds (high explosive anti-tank, chemical, and one of indeterminate type), AND three bundles of ammo rounds with the distinctive cloverleaf end caps, AND wing nuts used to hold the caps to the fiberboard tubes. But that's not all! There is ALSO a handspike (actually, two), the two-sectioned sponge staff, the swabbing sponge, and a chest presumably used to stow the sighting mechanism. The fret of photo etch parts includes straps for the tie-downs to hold the U.K. elevating mechanism and rims for the bottom of the ammo rounds. Does this make up for the goofs in the instructions? Well, almost. As with its 57mm anti-tank gun, Resicast needs to be much more careful in developing its instructions and making sure they are correct and complete. This little kit, with its finely crafted parts, needs to be assembled with care, and the instructions, obviously, should help—not hinder—that process. But the final result presents an excellent model of the 75mm M8 pack howitzer. Thanks to Graham Sellar at Resicast for the review sample. References
-tss- |
 Resicast
 |
 |
 |
 |
 |
 |
 |
 |
 |
 |
 |
 |
|