M4A2
Conversion for Academy M10 Kit |
 |
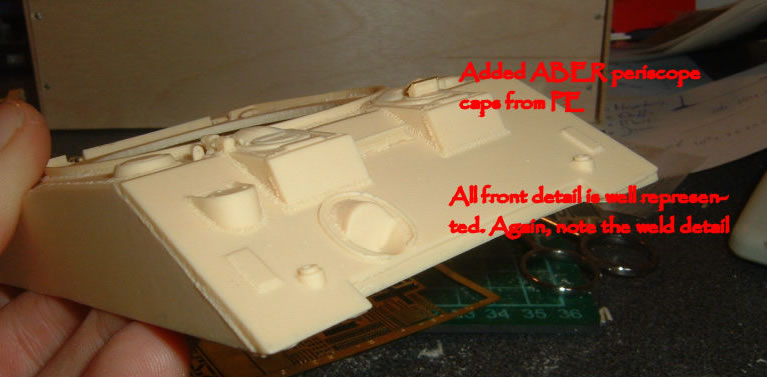
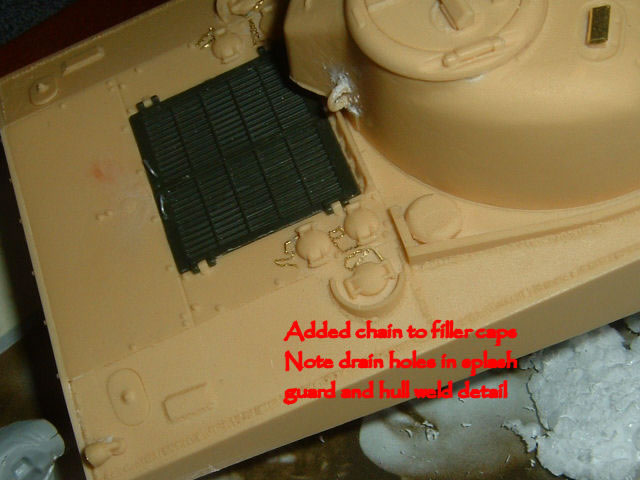
 Formations The variant kitted by Formations was a evolution of the original design. The M4 series originally used small front hatches. This created several shot traps and decreased ballistic protection. In the case of the M4A2, this was worsened as the front plate consisted of seven major pieces welded together. This was partly because the M4A2 was the first welded tank into production, so many techniques were pioneered on this version. The foundries had to cast the drivers' hoods and the MG mounting for the M4A2. They were under heavy demand as the M4A1 used a completely cast hull, and all the M4 tanks had cast turrets. This created shortages in armour castings, and so Fisher developed the 'pre-fab' welded driver's hoods, as well as other parts to replace cast part on the assembly lines. The bow MG mount, antenna socket, and turret ring guards were among the parts replaced. These parts were introduced in the fall of 1943. The blocky driver's hoods make identification of the M4A2 very easy. The French Army and British/Commonwealth Army also used this variant. The Conversion KitUntil the release of the DML 'Tarawa' Sherman, the M4A2 was the only Sherman variant never kitted out in plastic. This is a shame, as the tank was used in all theatres of the war, and had some pretty colourful schemes and markings applied. This makes it a great subject for a modeler, and surely defies the point that "Allied is boring 'cause all I can paint it in is OD." Paint matters aside, the only way to get an M4A2 was a conversion. There have been several manufacturers who provided sets, and among them were Verlinden, Tank WorkShop, and MP Models. I don't know about the quality of these kits, but the one I have at hand is very, very good. The name of Rob Ervin will not be strange to most Allied modellers, and his company, Formations Models, is one of the better resin aftermarket companies. Formations produces conversion and update kits, all for Allied models with a firm accent on Sherman bits. A lot of the variants that are not covered or poorly covered in plastic can be made by using a Formations kit. This set is intended to convert the Academy M10 kit into a mid-production M4A2 with the, welded driver's hoods. Formations also made a specific Tarawa version, with decals applicable to C Company, 1st Marine Tank Battalion. The reason the M10 kit was chosen is simple. Both vehicles used the same engine, and thus the same engine deck and rear plate. This can reduce costs as there's no need to provide a new engine plate. Second, the Academy suspension is the correct one, and a good one too. For more details, refer to the M10 review I did on this site. On to the conversion itself. Packaging is very uninspiring: a large plastic bag, with some smaller ones inside, stapled to a card header with a sticker saying "M4A2 conversion for Academy M10 kit." Several A4 sheets of paper are folded together and put in the bag. That's it. No box, no artwork, no fancy painted and weathered master model. But the contents of the bag are great. Formations supplies all the necesarry bits for the conversion:
About the only thing you could add are brush guards for the lights. The pioneer tools don't need PE, as they come with their straps moulded in place. Just shave them off the casting block and away you go. The front fenders are cast quite thin and are good for the job. Assembly
From front to back, the transmission cover is great. Castings marks are there, and there are no blemishes, other than one big air bubble on my cover which destroyed the bullet splash guard detail. That's about the only fault I could find on the entire set. The lights are hollow, with MV lenses provided. Formations also gives the light plugs, a nice touch. The hatches fit snugly after some trimming. I actually drilled some holes around the sides instead of using a saw or Dremel. This produces less dust flying around, and works very well for me.
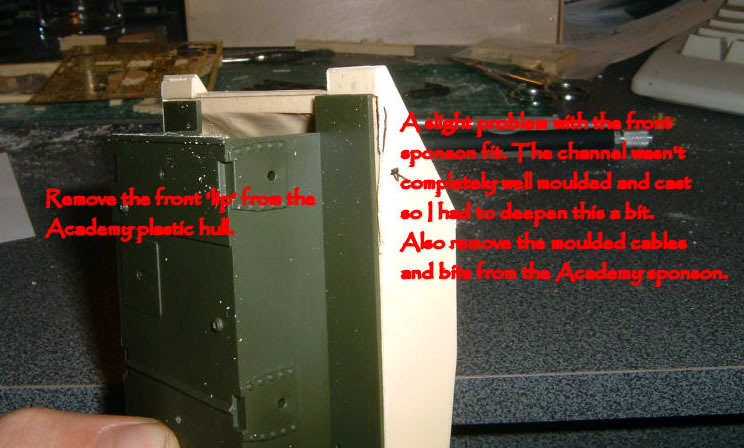
The rear plate goes together fine, just follow the Academy instructions. You then have to cut down the top to add the Formations upper hull. The fender plates need some trimming to get a good fit.
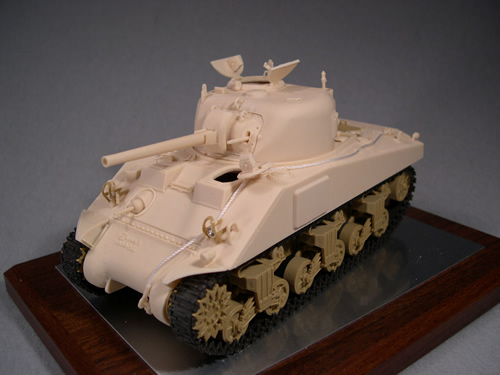
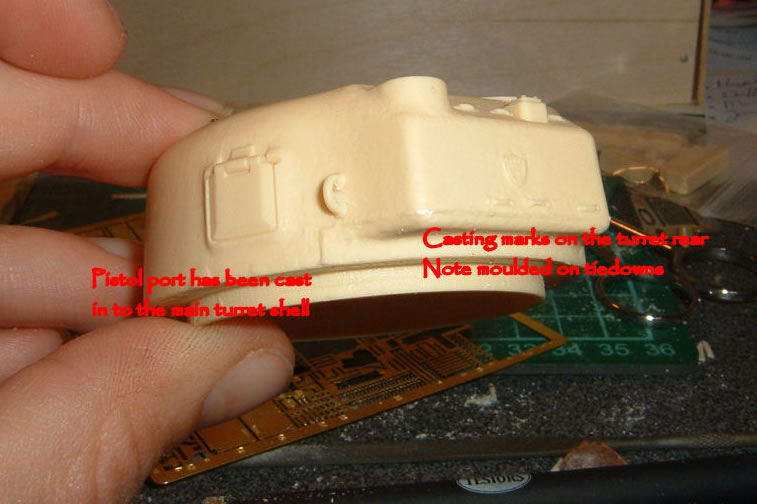
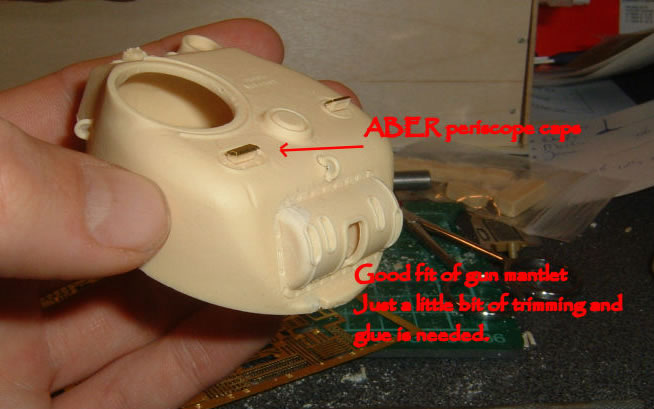
The turret is also available as a separate set. It's very easy to put together. The main turret shell is a one piece casting, with just the mantlet, gun barrel, cupola, and small detail to add. Cut off the pieces from the sprue, add them together and you're done. No need for filler and nothing could be easier.
FinishingI'm finishing my kit as a Tarawa Sherman. I actually messed up the weathering, and also the kits decal. These were made very thinly and easy to use, but folded together. An e-mail to Rob provided me with a new set of decals. He managed to collect some spares so I'm now able to finish 'Colorado' one day. Top marks for customer service! References
Photo creditsConstruction
photos: Martin Dogger -Martin Dogger |

 |
 |
 |
 |
 |
 |
 |
 |
 |
 |
 |
 |
|