|
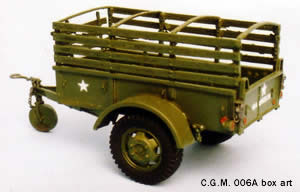
Ben
Hur Metal Body 1 Ton Trailer |
 |
|
The Ben Hur Manufacturing Company was one of nearly two-dozen firms that produced these trailers, capable of hauling a ton of supplies (or, in one grim photo from the Battle of the Bulge, frozen corpses). The trailers were either metal or wooden sided, with wood slat racks that could be fitted onto the body to contain big loads. Four hardwood bows spanned the racks to support a tarpaulin. Trailers are certainly not as sexy as a tank or even a jeep. They don't jump out at you from historical photos. Consequently, it's interesting to get the chance to build them and include them in a diorama every once in a while. C.G.M. should be given thumbs up for subject choice here (they also produce a wooden body version). But if you are looking for a kit with quality similar to Tiger Model Designs ammo trailers, or even comparable to Italeri's ¼ ton trailer, this is not it. There
are about 20 resin pieces, some with significant flash. Also included is a small
fret of 30 photo-etched parts, several with no discernable use. The one-sided
sheet of instructions includes two blurred photos and a crude drawing that does
not account for all of the parts. Spending some time on the Internet will fill
in some of the blanks; I highly recommend that you check out the GMC
CCKW site for some good photos of old and restored trailers. The hallmark of this offering is very rough casting, with bubbles, pitting, and warping, with some sizable chunks of rubber mold tossed in. Bolt heads are missing from the wheel rims and one of the tabs for the securing chains at the front of the trailer was broken off (they should have used photo-etched tabs for this). The cleanup is itself not bad, but indicative of problems to come.
It also should be noted that the leaf springs are flat, I suspect because it was easier to create masters from flat pieces of plastic stock than trying to get them to bend. As flat, the springs would represent a very heavy trailer load. So if you are a stickler for accuracy, the flat extended springs are going to require the weight that makes them that way. Other puzzling spots include locator pips at the bottom of the side rack supports, with nothing on the top rim of the trailer body to receive them. Proper placement of these side and front racks is important because you have to follow up with photo-etched pieces that represent the latch hardware that secured them to one another. The GMC CCKW website has a set of plans for the rack hardware that is light years better than what C.G.M. gives you. Also, two short racks are included, but the instructions show only one of them positioned in the front. A search on the web showed that the second rack was used on the rear gate and secured with sliding bolts from the topmost rail of the short piece to the third rail from the top on the side racks. It could hang there while the gate was opened. Good luck attempting this at home. The small steel landing wheel at the front of the trailer is too thick for the caster that wraps over it and secures it to the frame, so you will need to sand or file that down some on both sides and try to keep the surface squared to the edge of the wheel-while at the same time preserving the little bits of axle protruding from the center on both sides. Even without the sanding, the wheel is not as concave as wheels I've seen on the Internet, and sanding makes it even less so. (Remember to retract the wheel up in between the A-frame if the trailer is actually being towed.) Included among the resin pieces is the parking brake hand lever that was positioned on the right of the trailer. The piece is not called out in the instructions, but does appear in one of the fuzzy photos, placed at the rear just behind the fender. The real trailer had a gooseneck lunette, while this kit has a straight lunette. Also on the real trailer, a bar (or two bars) spanned between the hinges on the rear gate, probably as a reinforcement or stiffener. It (they) is missing from the kit. The photo-etched parts include stays on the side walls to the tarpaulin would be secured and mounts for the taillights. Decals are provided for three stars and a registration number for the rear gate. Finally, the assembled kit measures 6'3" wide and 12'3" long, whereas the actual trailer came in at 5'11" wide and 12'1½" long. Oops. Oh well. This is probably going to be an acceptable kit for an experienced modeler who can work with resin and doesn't demand perfection. Load this chariot up with equipment, festoon the rails with haversacks and musette bags, slop a little mud on, and most folks will think that's a pretty cool deuce and a half you have there, pulling that old trailer. -tss- |
 C.G.M.
 |
 |
 |
 |
 |
 |
 |
 |
 |
 |
 |
 |
|