|
Text
and photos by Scott Taylor, IPMS
London, Ontario
|
|
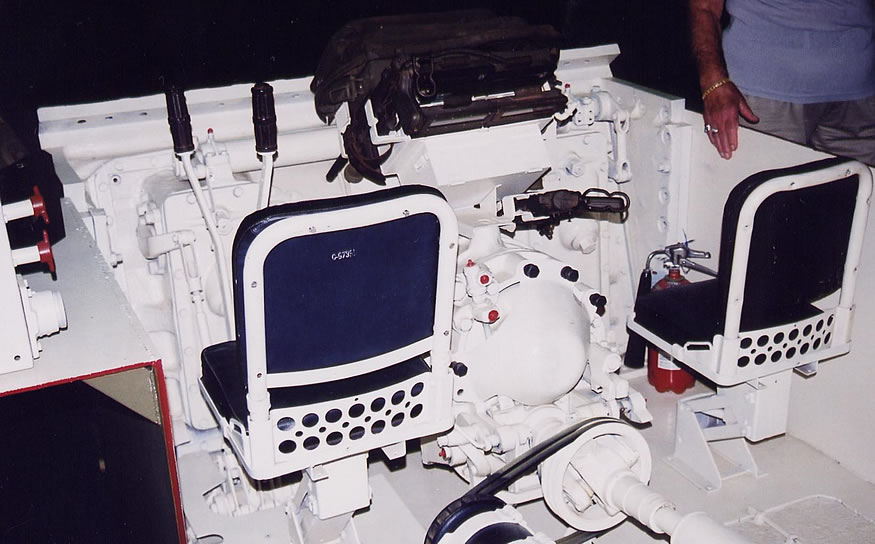
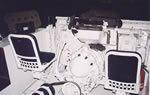
Among
the many great exhibits at the World War II Vehicle Museum and
Learning Center is this cut-down M4 Sherman hull. What is great
about this is that the removal of the upper hull and turret
allows one an extraordinary view of the driver and radio operator's
stations. The overall view at left shows the driver's (left)
and assistant driver's (right) stations, with the transmission
on the floor in the center. |
| |
|
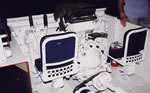 |
This
photo gives us a good view of the rear of the seats, including
the elevating mechanism that allowed the crew to stick their
heads and shoulders out of the hatches. The seat assemblies
are identical to a number of other U.S. armoured vehicles, including
the M18 Hellcat. A fire extinguisher can be seen at the front
of the assistant driver's station.
|
| |
|
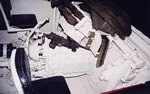 |
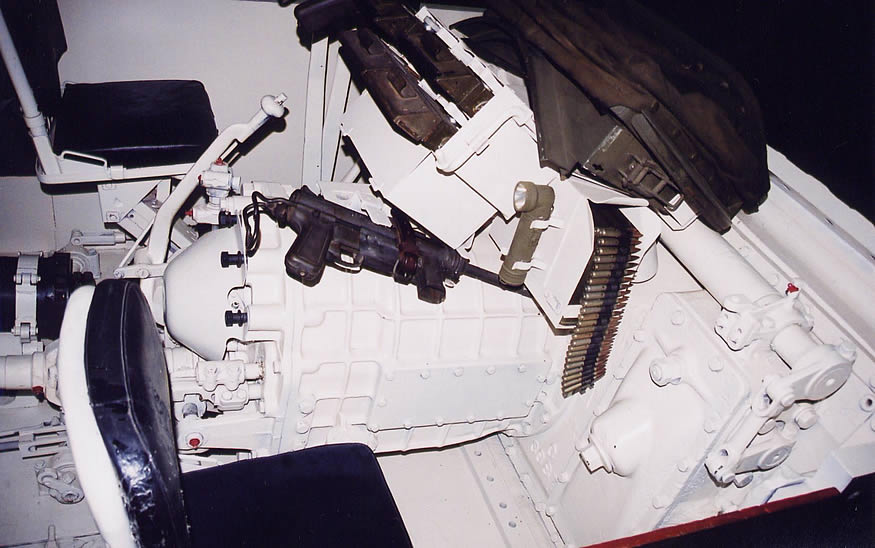
A
useful view of the assistant driver's postion is dominated by
the right side of the transmission. The assistant driver's personal
weapon, an M3A1 "Grease Gun," is clipped on top of
the transmission, with a flashlight in front of that. Note that
the assistant driver does not have any driving controls. Also
of note is the driver's bad weather hood stowed over top of
the transmission, with the ammunition box for the .30 caliber
bow machine gun below that. |
| |
|
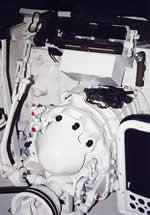 |
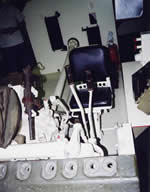
This
is the back of the transmission, looking forwards towards
the driver's position. The assistant driver's M3A1 can be
seen again, with a stowage box and rack for spare periscopes
above that. The lever to the left is the transmission gearshift
lever.
|
| |
|
 |
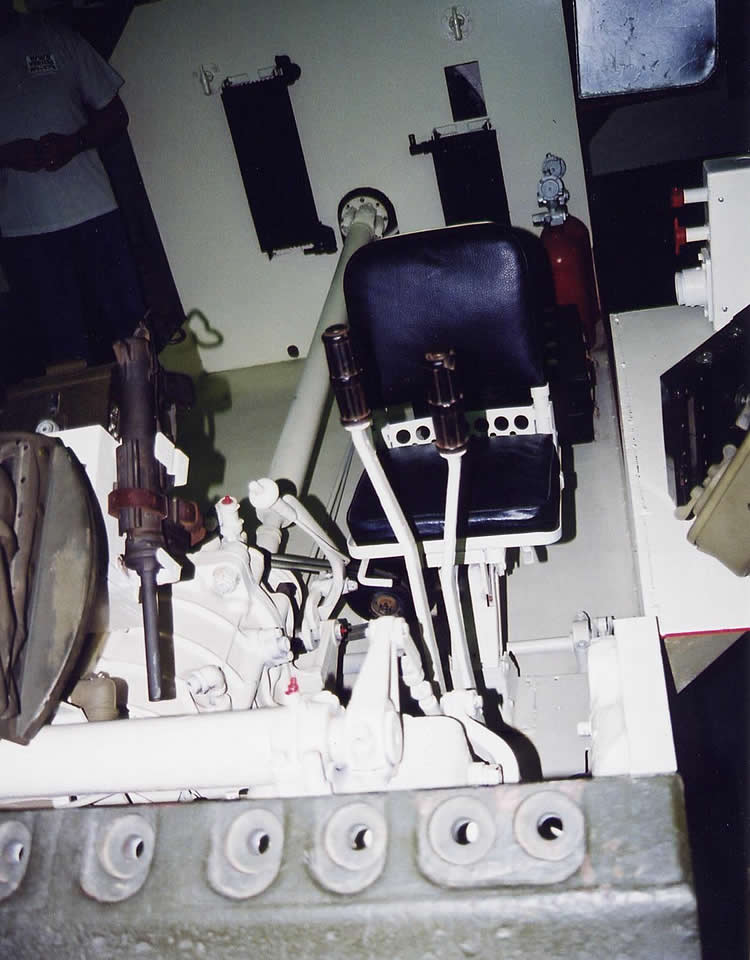
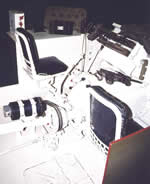
This
photograph looks backwards towards the driver's seat; the transmission
housing is visible at the bottom of the picture. The driver's
steering brake control levers are prominent in front of his
seat, and his M3A1 can be seen stowed on the side of the transmission,
just to the left of the driver's bad weather hood; the head
of the driver's flashlight can just be seen poking out from
beneath the driver's hood, to the left of the submachine gun's
muzzle. The drive shaft, which ran underneath the turret, can
be seen going back to the main bulkhead. |
| |
|
 |
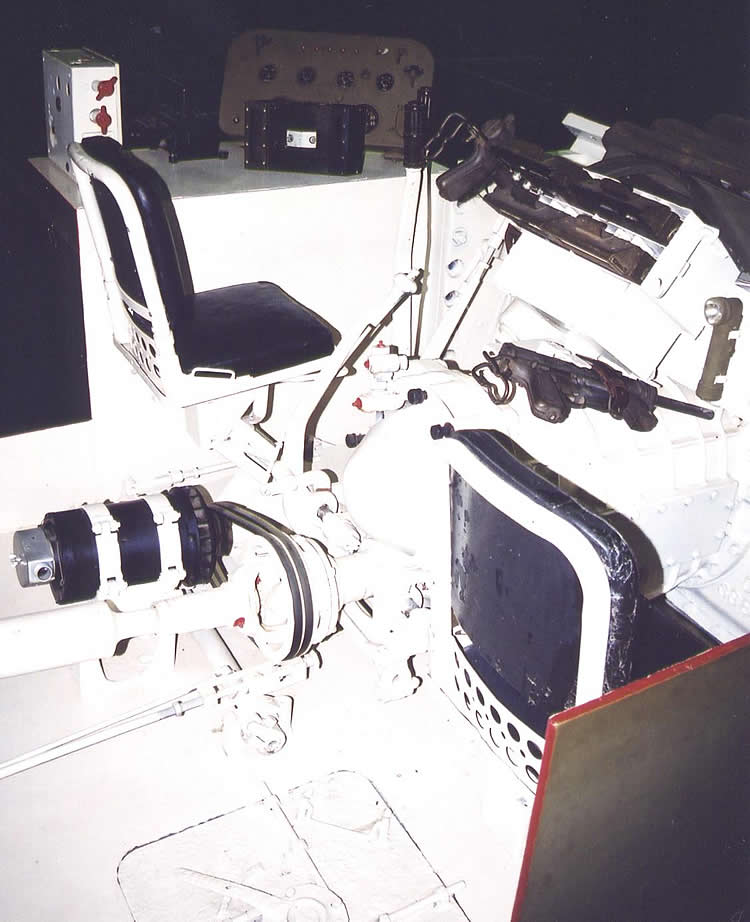
Our
final shot looks at the driver's compartment from the right
rear. In the foreground, the escape hatch can be seen in the
floor, behind the assistant driver's seat. The instrument panel
sits on the sponson to the driver's left (from the shape of
it, this is a late-model Sherman), with the two red handles
for activating the fire extinguishers just beside the driver's
left shoulder. The belts coming off of the driveshaft, just
before it enters the transmission, power the alternator, which
would usually be hooked up the a series of batteries that would
be under the turret floor. |
I hope
that these photos are of some use to anybody working on an Sherman-based
vehicle
(M4, M7, Priest, M10, M32, M36, etc.), as the driver's compartments
of all of
these vehicles are essentially similar.
|